Brown Butter Chocolate Chip Cookies Recipe
- Time: Active 20 minutes, Passive 10 minutes, Total 30 minutes
- Flavor/Texture Hook: Toasted hazelnut aroma with a velvety, toffee infused center
- Perfect for: Impressing foodies or a high efficiency weeknight treat
- The Ultimate Homemade Brown Butter Chocolate Chip Cookies
- The Molecular Magic of Toasted Fat
- Recipe Specs and Performance Checkpoints
- Component Analysis and Ingredient Deep Dive
- Essential Equipment for a Streamlined Baking Flow
- Executing the Prep and Bake Flow
- Troubleshooting Common Baking Hurdles and Fixes
- Scaling Guidelines for Larger Batches
- Debunking Cookie Baking Myths
- Storage Guidelines and Reducing Kitchen Waste
- Presentation Tips for the Perfect Cookie Spread
- Recipe FAQs
- 📝 Recipe Card
The Ultimate Homemade Brown Butter Chocolate Chip Cookies
The first time I browned butter, I stood over the pan like a scientist watching a volatile experiment. I remember the exact moment the foaming subsided and that sharp, nutty aroma hit me it was a revelation.
It’s not just "melted butter"; it’s a sensory shift where the kitchen smells like toasted hazelnuts and caramel. When that liquid gold hits the dark brown sugar, it creates a sizzle that promises a depth of flavor no standard cookie can match.
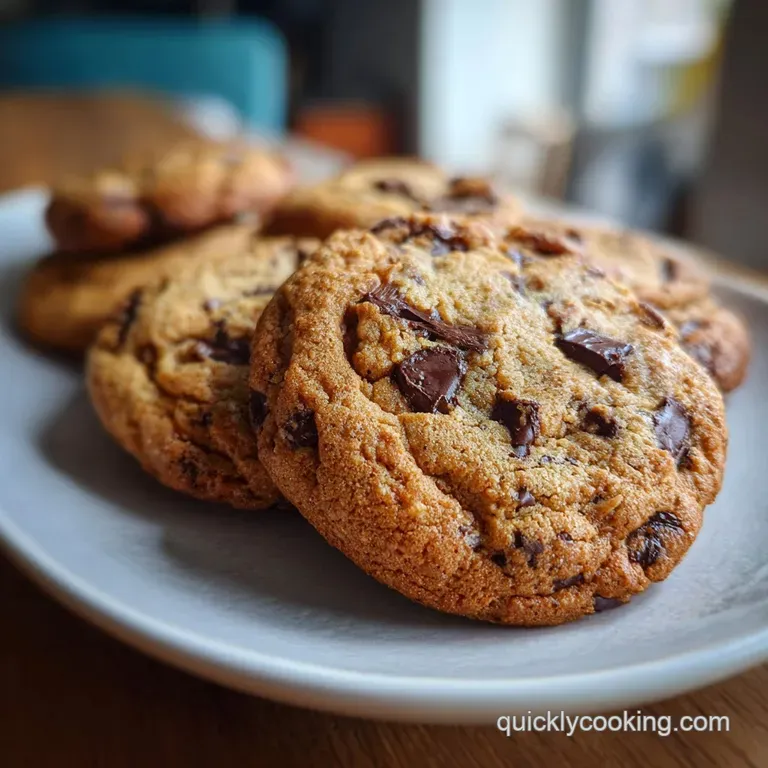
We’ve all been there making a batch of cookies that come out flat, greasy, or just "fine." But this version is different. We are chasing that specific texture where the edges shatter when you bite into them, revealing a soft, almost doughy heart packed with semi sweet chocolate chunks and crunchy toffee bits.
This is the recipe I send to my friends when they ask what actually works for a bakery style result at home without the three day wait.
The Molecular Magic of Toasted Fat
Maillard Reaction: Browning the butter triggers a chemical reaction between amino acids and reducing sugars, creating hundreds of flavor compounds that mimic toasted nuts.
Moisture Management: Adding 1 tbsp of water back into the browned butter replaces the liquid lost to evaporation, ensuring the cookies stay chewy rather than becoming greasy or brittle.
| Browning Method | Speed | Texture Result | Best For |
|---|---|---|---|
| Stovetop Pan | 5-7 mins | Intensely nutty, crispy edges | Maximum flavor development |
| Oven Roasting | 15 mins | Even browning, less "burnt" risk | Batch prepping large amounts |
| Microwave | 3 mins | Mildly toasted, very fast | Emergency cookie cravings |
To get that elite texture, we need to talk about the sugar ratio. By using 1 cup (200g) of dark brown sugar against only 1/2 cup (100g) of granulated sugar, we are loading the dough with molasses. This makes the crumb incredibly moist and dense.
If you’ve ever wondered why some cookies feel "hollow," it’s usually because there’s too much white sugar and not enough humectant (moisture attracting) ingredients.
Recipe Specs and Performance Checkpoints
Efficiency is the name of the game here. We aren't going to chill this dough for 24 hours because, frankly, when the craving hits, nobody has time for that. Instead, we use a specific whisking technique to build structure quickly.
You’ll want to look for three exact checkpoints to ensure you’re on the right track:
- Checkpoint 1: Your browned butter should weigh approximately 180-190g after browning but before adding the water.
- Checkpoint 2: The sugar and butter mixture must look like thick, pale caramel after 3 minutes of vigorous whisking.
- Checkpoint 3: The cookies are done when the edges are set and obsidian dark, but the center still looks slightly "underdone" and soft.
Chef Tip: For an unconventional flavor boost, add a pinch of espresso powder to the flour. It doesn't make the cookies taste like coffee; it simply makes the chocolate taste "more like chocolate."
Component Analysis and Ingredient Deep Dive
The ingredients you choose for these brown butter chocolate chip cookies recipe will dictate the final mouthfeel. Using grass fed butter is a massive efficiency hack because it has a lower water content and higher butterfat, meaning more toasted milk solids for your effort.
| Ingredient | Science Role | Pro Secret |
|---|---|---|
| Dark Brown Sugar | Provides acidity to react with soda | Pack it tight to ensure accurate moisture levels. |
| Baking Soda | Encourages browning and lift | Never swap for powder; you need the browning power here. |
| Egg Yolk | Extra fat and emulsification | Adds a velvety richness that a whole egg alone lacks. |
| Toffee Bits | Textural contrast and sugar boost | They melt slightly into the dough, creating "sugar pockets." |
- 1 cup (227g) Unsalted Grass Fed Butter: Why this? Higher fat content means more browned bits and a richer flavor. (Substitute: Regular unsalted butter)
- 1 tbsp Water: Why this? Replaces moisture lost during the browning process. (Substitute: Milk for a creamier note)
- 1 cup (200g) Dark Brown Sugar: Why this? High molasses content for a chewy, fudgy center. (Substitute: Light brown sugar, though it will be less chewy)
- 1/2 cup (100g) Granulated White Sugar: Why this? Provides the crisp, shattered glass edge texture. (Substitute: Cane sugar)
- 1 tbsp Pure Vanilla Bean Paste: Why this? Intense aromatics and beautiful black specks. (Substitute: Vanilla extract)
- 1 Large Egg + 1 Large Egg Yolk: Why this? The extra yolk creates a more stable emulsion. (Substitute: 1.5 whole eggs, whisked)
- 2 1/4 cups (280g) All Purpose Flour: Why this? The perfect protein balance for structure. (Substitute: 1:1 gluten-free baking flour)
- 1 tsp Baking Soda: Why this? Reacts with molasses for lift. (Substitute: None)
- 3/4 tsp Fine Sea Salt: Why this? Sharpens the sweetness. (Substitute: Kosher salt)
- 1 1/2 cups (250g) Semi Sweet Chocolate Chunks: Why this? Chunks create "pools" of chocolate rather than small dots. (Substitute: Bitter sweet chips)
- 1/2 cup (100g) Toffee bits: Why this? Adds a crunch that echoes the brown butter. (Substitute: Chopped pecans)
Essential Equipment for a Streamlined Baking Flow
To keep things fast, skip the heavy stand mixer. I prefer a simple stainless steel whisk and a sturdy silicone spatula. You'll need a light colored saucepan to brown the butter; if you use a dark non stick pan, you won't be able to see the milk solids turning brown, and you'll likely burn them.
A high-quality baking sheet (like a half sheet pan from Nordic Ware) is also non negotiable. Thin, cheap pans warp in the oven and cause uneven heat distribution, leading to cookies that are burnt on one side and raw on the other. If you’re looking for a different vibe, the technique here is similar to what I use in my Danish Butter Cookies recipe, focusing on high-quality fats for maximum flavor.
Executing the Prep and Bake Flow
- Brown the butter. Place 227g butter in a light colored pan over medium heat until it sizzles, foams, and turns golden brown. Note: Watch for the nutty aroma and brown bits at the bottom.
- Hydrate the fat. Remove from heat and immediately stir in 1 tbsp water. Note: It will hiss; this is normal and necessary for moisture.
- Cream the sugars. Pour the hot butter into a bowl with 200g dark brown sugar and 100g white sugar; whisk vigorously until no oily streaks remain.
- Emulsify the eggs. Add the egg, egg yolk, and 1 tbsp vanilla; whisk for 2 full minutes until the mixture looks like glossy caramel.
- Combine dry ingredients. In a separate bowl, whisk 280g flour, 1 tsp baking soda, and 3/4 tsp sea salt.
- Fold the dough. Add dry ingredients to wet; fold with a spatula until just a few streaks of flour remain.
- Add inclusions. Fold in 250g chocolate chunks and 100g toffee bits until evenly distributed.
- Scoop and set. Using a 3 tbsp scoop, place mounds on a lined tray. Note: If the dough feels too greasy, let it sit for 5 minutes to firm up.
- Bake the batch. Bake at 175°C (350°F) for 10 minutes until edges are firm and dark golden.
- The Pan Bang. Midway through baking and again at the end, tap the pan against the oven rack until ripples form on the cookie surface.
Troubleshooting Common Baking Hurdles and Fixes
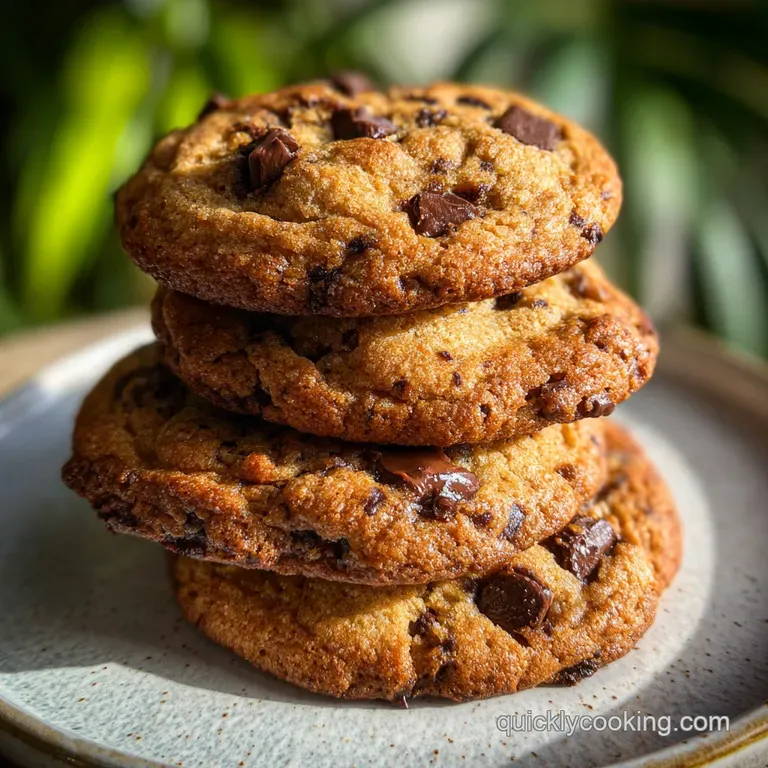
If your cookies don't look like the ones in the photos, don't panic. Baking is a game of variables, and even the humidity in your kitchen can change how the dough behaves. If you love a classic profile but want a faster route, you might also enjoy The Chocolate Chip recipe which focuses on a 30 minute turnaround.
Why Your Cookies Spread Too Much
If your cookies turned into a giant pancake, the butter was likely too hot when you added the eggs, or you didn't whisk the sugar/butter mixture long enough to create a stable structure. Another culprit is "over creaming" if you used a stand mixer on high speed, which incorporates too much air.
| Problem | Root Cause | Solution |
|---|---|---|
| Greasy Finish | Butter didn't emulsify with sugar | Whisk for an extra 60 seconds until "ribbons" form. |
| Tough Texture | Over mixing the flour | Fold in flour by hand until just combined. |
| Pale Cookies | Oven temp too low | Use an oven thermometer to verify 175°C. |
Common Mistakes Checklist
- ✓ Never skip the water back step; without it, the cookies will be dry and crumbly.
- ✓ Use room temperature eggs so they don't seize the warm brown butter.
- ✓ Don't use a dark baking sheet, which absorbs more heat and scorches the bottoms.
- ✓ Measure your flour by weight (280g); "cup" measurements can vary by up to 20%.
- ✓ Let the cookies rest on the hot pan for at least 5 minutes to finish setting.
Scaling Guidelines for Larger Batches
If you're baking for a crowd, you can easily double this recipe. However, when doubling, do not double the salt or spices exactly.
- Scaling Up (2x): Use 2x the flour, butter, and sugar, but only 1.5x the salt and vanilla to avoid an overpowering flavor. Ensure you brown the butter in two separate batches or use a much wider pan to allow for even evaporation.
- Scaling Down (1/2): For a small batch, use 1 egg yolk only (omit the whole egg) and reduce the bake time by 1-2 minutes.
- Baking Shortcut: If you want a different texture entirely, try our Chocolate Cornflake Cookies recipe for a crunch heavy alternative that requires zero browning of butter.
Debunking Cookie Baking Myths
One common misconception is that you must chill the dough for the best flavor. While chilling helps with enzyme breakdown, the brown butter provides so much flavor upfront that you can skip the 24 hour rest and still get a 10/10 result.
Another myth is that "more baking soda equals more lift." In reality, too much soda will give your cookies a metallic, soapy taste and cause them to brown too quickly before the center is cooked. Stick to the 1 tsp limit for the perfect balance.
Storage Guidelines and Reducing Kitchen Waste
Storage: These stay soft for up to 5 days in an airtight container at room temperature. For long term storage, you can freeze the raw dough balls for up to 3 months. Bake them directly from frozen, adding 2 minutes to the total time.
Zero Waste Tips: Don't throw away the "burnt" bits if you over brown your butter slightly strain them through a fine mesh sieve and use the butter anyway; the charred bits can be bitter, but the oil is still gold. Leftover cookie crumbs?
Pulse them in a blender and use them as a base for a cheesecake crust or as a topping for vanilla bean ice cream.
Presentation Tips for the Perfect Cookie Spread
To get that "Instagram worthy" look, use a round cookie cutter or a glass to "scoot" the cookies immediately after they come out of the oven. Place the ring around the cookie and move it in a circular motion to pull in the edges and create a perfect circle.
Finally, never forget the 1 tsp flaky sea salt. Sprinkle it from a height while the cookies are still warm so the crystals stick to the melting chocolate chunks. The contrast between the dark, semi sweet chocolate, the salty crunch, and the nutty butter is what makes these the best brown butter chocolate chip cookies you'll ever bake.

Recipe FAQs
Must I chill brown butter cookie dough before baking?
No, chilling is optional for this recipe. The flavor development from the browned butter is immediate, allowing for same day baking.
How do I prevent my brown butter cookies from spreading too thin?
Ensure the browned butter is slightly cooled, but still liquid, before creaming. Overly hot butter melts the sugars too quickly, leading to excessive spread.
What is the purpose of adding one tablespoon of water back into the browned butter?
It replaces the moisture lost during the browning evaporation. This essential step prevents the final cookie from becoming brittle or greasy, ensuring chewiness.
How can I tell if my butter is perfectly browned without burning it?
Watch for the transition from white foam to clear bubbling, followed by light brown sediment appearing at the bottom. The aroma should smell distinctly nutty, like hazelnuts, just before you remove it from the heat.
Is it true that using only dark brown sugar makes the cookies too soft?
False. While dark brown sugar provides moisture, the ratio of white sugar to brown sugar here is specifically designed to create a crispy edge while maintaining a fudgy center, much like the controlled spread in our Fudgy Football Brownie recipe.
Can I substitute the chocolate chunks with chocolate chips?
Yes, but chunks are recommended for better texture. Chunks create larger molten pools of chocolate, whereas chips often retain their shape better during the bake.
How long should I bake these cookies for a chewy center?
Bake for 10 to 12 minutes at 175°C (350°F). Remove them when the edges are set and deeply golden, but the center still looks slightly underbaked and soft.
Brown Butter Cookies Recipe
Ingredients:
Instructions:
Nutrition Facts:
| Calories | 311 kcal |
|---|---|
| Protein | 3g |
| Fat | 17g |
| Carbs | 37g |
| Fiber | 1.5g |
| Sugar | 24g |
| Sodium | 166mg |
