Chocolate Strawberry Brownies: Fudgy and Fresh
- Time:20 minutes prep + 30 minutes cook + 2 hours chilling = 170 minutes total
- Flavor/Texture Hook: Fudgy, velvety, and snap crisp fruit layers
- Perfect for: Valentine's Day, date nights, or a budget-friendly housewarming gift
- The Ultimate Easy Chocolate Strawberry Brownies
- Avoiding Sogginess from Fresh Fruit
- Timing and Yield Essentials
- Pantry Essentials for Rich Flavor
- Simple Tools for Baking Success
- Building the Layers Step-by-Step
- Fixing Texture and Moisture Issues
- Creative Swaps and Flavor Twists
- Avoiding Texture Myths
- Storing and Saving Your Leftovers
- Presentation and Pairing Ideas
- Recipe FAQs
- 📝 Recipe Card
The Ultimate Easy Chocolate Strawberry Brownies
Imagine it is a rainy Friday night and you have that specific craving for something decadent but you do not want to spend fifty dollars at a gourmet bakery. I remember trying to impress a date years ago with a similar dish, but I just threw chopped berries into the batter.
It was a disaster, a purple, mushy puddle that looked nothing like food. That failure taught me that the fruit belongs on top, not inside. Now, when I pull these out of the oven, the smell of melting butter and toasted cocoa fills the house and I know I am in for a win.
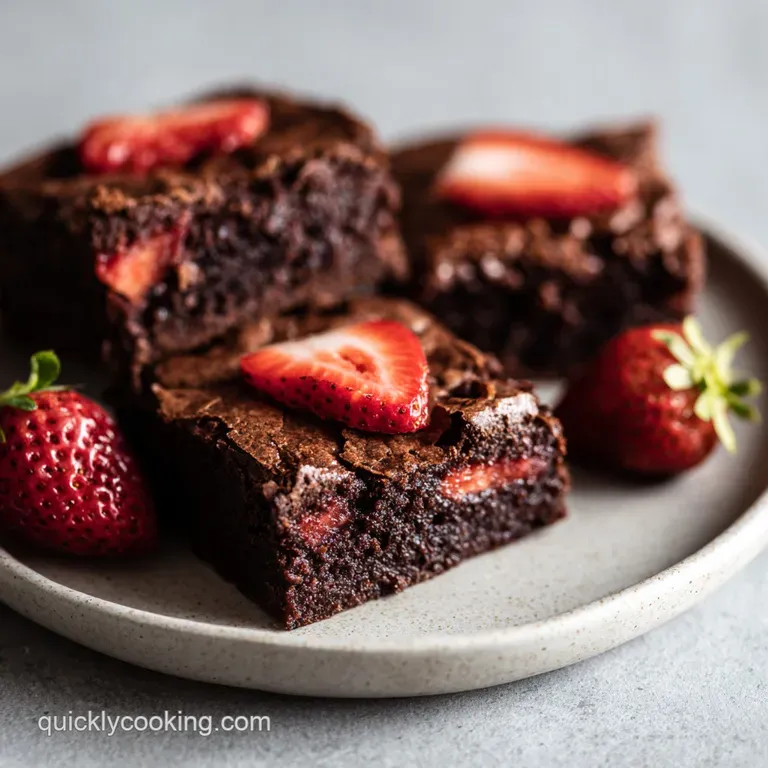
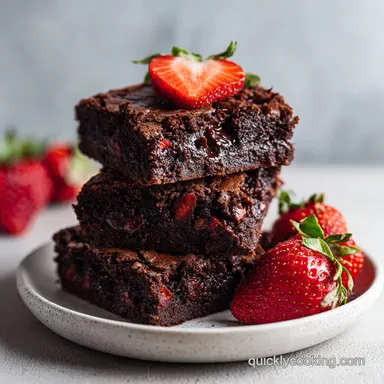
We are going for a specific vibe here: the bottom is a dense, chewy brownie that holds up under pressure. In the middle, you have those jewel toned strawberry rounds, and it is all held together by a dark, silky ganache.
It looks like you spent hours on it, but we are actually using a few clever hacks to keep things fast and affordable. If you have ever wanted to master a show stopping dessert without the professional grade stress, this is the one.
The best part about these treats is the contrast. You get that deep, earthy chocolate hit followed immediately by the bright, tangy juice of the strawberries. It is a texture play too, moving from the soft brownie to the slight crunch of the seeds and the smooth finish of the ganache.
Trust me, once you see how the light hits that glossy top layer, you will never go back to plain boxed mixes again.
Avoiding Sogginess from Fresh Fruit
Getting fruit to play nice with chocolate is all about moisture management. If you just slap berries on a brownie, they will weep juice and ruin the crumb. We use a thin layer of melted jam to create a physical wall between the layers. This keeps the brownie dense and the fruit fresh.
- Sugar Aeration: Whisking the butter and sugar for a full 2 minutes helps dissolve the crystals, which is what creates that iconic, tissue paper thin crackle on top of the brownie base.
- Starch Gelatinization: The flour and cocoa powder work together to absorb the fat from the butter, setting the structure so the brownie doesn't collapse under the weight of the ganache.
- Fat Emulsification: By adding eggs at room temperature, we ensure the fat and water based liquids bond perfectly, leading to a velvety, uniform texture rather than a greasy one.
- Pectin Barrier: The strawberry jam acts as a sealant. Because jam is already reduced, it won't soak into the brownie, effectively waterproofing the base before the fresh strawberries go on.
| Premium Ingredient | Budget Alternative | Flavor Impact | Savings |
|---|---|---|---|
| Pure Vanilla Extract | Imitation Vanilla | Almost undetectable in baked brownies | Save $10-15 |
| Dutch Process Cocoa | Natural Cocoa Powder | Slightly more acidic but still very rich | Save $3-5 |
| Fresh Strawberries | Thawed Frozen Berries | Softer texture, best for a "jammy" style | Save $2-4 |
The choice between stovetop and oven methods usually comes down to how much control you want over the final texture of your base. While the oven is standard for the bake, some people try to "cook" brownies on a stovetop in a skillet.
For this specific layered dessert, the oven is non negotiable because we need that flat, even surface to stack our berries.
| Component Analysis | Science Role | Pro Secret |
|---|---|---|
| Unsalted Butter | Provides tender fat | Melt it completely to ensure a fudgy, not cakey, result. |
| Large Eggs | Bind and lift | Use room temperature eggs so they don't seize the melted butter. |
| Dutch Cocoa | Intense color/flavor | Sift this! Cocoa is notoriously lumpy and will leave dry spots. |
| Dark Chocolate | Ganache structure | Chop it finely so the hot cream melts it instantly without extra heat. |
Timing and Yield Essentials
This recipe makes exactly 16 square servings if you use an 8x8-inch pan. If you are feeding a larger crowd, you can double the ingredients and move to a 9x13-inch pan, but you will need to add about 5-8 minutes to the baking time.
Just keep an eye on the center; you want it set but still slightly jiggly when you shake the pan.
The timing is the most important part of the plan. You have 20 minutes of active prep, followed by 30 minutes in the oven. The real test of patience is the 2 hours of chilling. Do not skip the chill!
If you try to cut these while the ganache is warm, the strawberries will slide right off like they are on a slip and slide. If you are short on time, you can pop the pan in the freezer for 45 minutes to speed things up.
For a smaller batch, you can halve everything and use a loaf pan. Just be aware that the brownies might be a bit thicker, so check for doneness around the 25 minute mark. If you want a deeper chocolate flavor, I often suggest checking out my fudgy brownies for tips on using different chocolate percentages in your base.
Pantry Essentials for Rich Flavor
You likely have most of this in your kitchen right now. We are keeping it simple because high-quality basics yield the best results.
- 1/2 cup (115g) unsalted butter, melted: Why this? Provides the fat base for a chewy, rich texture. (Substitute: Salted butter, just skip the extra salt).
- 1 cup (200g) granulated sugar: Why this? Sweetness and the key to the shiny top. (Substitute: Light brown sugar for a more molasses like flavor).
- 2 large eggs, room temperature: Why this? Provides structure and leavening. (Substitute: 1/2 cup unsweetened applesauce for a denser, vegan ish base).
- 1 tsp (5ml) pure vanilla extract: Why this? Rounds out the cocoa notes. (Substitute: Almond extract for a cherry like twist).
- 1/2 cup (60g) all purpose flour: Why this? The structural backbone. (Substitute: 1:1 gluten-free flour blend).
- 1/2 cup (45g) Dutch processed cocoa powder: Why this? Deep, dark chocolate color and flavor. (Substitute: Regular unsweetened cocoa).
- 1/4 tsp salt: Why this? Enhances the chocolate and fruit flavors. (Substitute: Flaky sea salt for the topping).
- 1/2 cup (90g) semi sweet chocolate chips: Why this? Adds little pockets of melted chocolate. (Substitute: Chopped walnuts for crunch).
- 1 lb (450g) fresh strawberries: Why this? The star of the show. (Substitute: Raspberries work beautifully too).
- 2 tbsp (30ml) seedless strawberry jam: Why this? Acts as the moisture barrier. (Substitute: Apricot jam is a great neutral alternative).
- 1 cup (170g) dark chocolate, chopped: Why this? Creates a stable, rich ganache layer. (Substitute: Milk chocolate for a sweeter finish).
- 1/2 cup (120ml) heavy whipping cream: Why this? Thins the chocolate into a pourable glaze. (Substitute: Full fat coconut milk).
Simple Tools for Baking Success
You do not need a fancy stand mixer for this. In fact, doing it by hand actually prevents you from over mixing the flour, which is the number one cause of "tough" brownies. A large glass bowl is perfect because you can melt the butter right in it and then add everything else.
It saves on washing up, which is a hack I live by.
An 8x8-inch metal baking pan is the gold standard here. Glass takes longer to heat up and longer to cool down, which can lead to overbaked edges. If you only have glass, just drop the oven temp by 25 degrees and keep a close eye on it. You will also want parchment paper.
Trust me, trying to dig these out of a greased pan without parchment is a recipe for heartbreak. Leave a little "overhang" on the sides so you can lift the entire block out once it is chilled.
Finally, a fine mesh sieve is your best friend. Sifting the cocoa and flour might seem like an annoying extra step, but cocoa powder is famous for having hard little lumps that refuse to dissolve in the batter. Sifting takes thirty seconds and ensures your brownies are smooth and professional.
Building the Layers step-by-step

- Prep the station. Heat your oven to 350°F (175°C) and line that 8x8 pan with parchment. Note: The parchment makes it easy to lift the whole dessert out for clean slicing later.
- Whisk the base. Combine melted butter and sugar in a large bowl and whisk hard for 2 minutes. Look for a slightly pale, grainy mixture.
- Emulsify the liquids. Stir in the room temp eggs and vanilla. Whisk until the batter looks glossy and smooth.
- Sift the drys. Use your sieve to add the flour, cocoa, and salt. Note: Sifting prevents those dreaded flour pockets.
- Fold it in. Gently fold with a spatula until just mixed, then toss in the chocolate chips. Stop as soon as the white streaks vanish.
- The first bake. Pour into the pan and bake for 25-30 minutes. Check for a toothpick with moist crumbs, not wet batter. Let it cool completely.
- Seal the surface. Melt the jam and brush it over the cooled brownie. Ensure every inch is covered to block moisture.
- Layer the fruit. Arrange your strawberry rounds in overlapping rows across the top. Note: Keep them in a single layer for easy cutting.
- Make the ganache. Heat the cream until simmering, pour over chopped chocolate, and wait 5 minutes. Stir gently until it turns into a dark, shiny liquid.
- The big chill. Pour the ganache over the berries and refrigerate for 2 hours. Wait until the top is firm to the touch before slicing.
Fixing Texture and Moisture Issues
The most common hurdle with this recipe is the "weeping berry" syndrome. If your strawberries are very ripe, they might leak juice into the ganache. If this happens, your top layer might be a bit softer, but it will still taste incredible.
To avoid this, pat your sliced strawberries dry with a paper towel before placing them on the brownie.
Avoiding a Grainy Ganache Texture
If you stir the chocolate and cream too vigorously or while it is too hot, the fat can separate. This makes the ganache look oily or curdled. If this starts to happen, add a teaspoon of cold heavy cream and whisk gently; usually, it will snap back into a smooth emulsion.
Fixing a Cakey Brownie Base
Brownies turn into cake when you beat too much air into the eggs or use too much flour. To keep them fudgy, fold the flour in by hand and stop the second it is incorporated. If you love a chew heavy dessert, you might also enjoy my Brookies which use a similar folding technique to maintain that dense bite.
| Problem | Root Cause | Solution |
|---|---|---|
| Raw Center | Oven ran cold or pan was glass | Bake for 5 more mins; use a metal pan next time. |
| Sliding Layers | Ganache was poured while too hot | Let ganache cool to room temp before pouring over fruit. |
| Dry Brownies | Overbaked by even 2 minutes | Pull them out when the center still has a tiny jiggle. |
Common Mistakes Checklist
- ✓ Pat strawberries completely dry before layering (prevents the ganache from sliding).
- ✓ Use room temperature eggs (prevents the butter from clumping up).
- ✓ Sift the cocoa powder (eliminates bitter, dry lumps in the base).
- ✓ Wait for the base to be stone cold before adding jam and fruit.
- ✓ Wipe your knife with a warm, damp cloth between every single slice.
- ✓ Don't over whisk after adding flour (keeps the texture fudgy, not tough).
Creative Swaps and Flavor Twists
If you want to change things up, this recipe is incredibly flexible. While the classic chocolate and strawberry combo is hard to beat, you can easily adapt this for different seasons or dietary needs.
- For a Boozy Twist: Add a tablespoon of Grand Marnier or Bourbon to the ganache once it is melted. It adds a sophisticated depth that pairs beautifully with the dark chocolate.
- Vegan/Plant Based Swap: Use a flax egg (1 tbsp ground flax + 3 tbsp water) and vegan butter. For the ganache, use full fat canned coconut milk and dairy-free chocolate chips.
- White Chocolate Contrast: Instead of dark chocolate ganache, use white chocolate. It makes for a much sweeter dessert that looks stunning against the red berries.
- Nutty Addition: Add a layer of sliced almonds or crushed hazelnuts between the jam and the strawberries for an unexpected crunch.
| Servings | Ingredient Adjustments | Pan Size | Total Cook Time |
|---|---|---|---|
| 8 People | Halve all ingredients | 9x5 Loaf Pan | 25-28 mins |
| 16 People | Use schema amounts | 8x8 Square | 30 mins |
| 32 People | Double all ingredients | 9x13 Rect. | 38-42 mins |
Avoiding Texture Myths
A big myth in the baking world is that you need baking powder for brownies. In truth, the eggs provide all the lift you need for a fudgy result. Adding chemical leaveners will turn these into "chocolate cake," which won't support the weight of the strawberries and ganache nearly as well.
Another common misconception is that you can use frozen strawberries without thawing. Frozen berries hold a massive amount of water. If you place them directly on the brownie, they will melt into a soup. If you must use frozen, thaw them completely and drain them in a sieve for an hour before patting them dry.
Storing and Saving Your Leftovers
Because of the fresh fruit and heavy cream, these brownies need to live in the fridge. They will stay fresh for up to 3 days in an airtight container. After that, the strawberries may start to lose their structural integrity and get a bit soft, though they will still be safe to eat.
Zero Waste Tip: If you have leftover strawberry scraps from hulling the berries, don't toss them! Toss them into a small pot with a splash of water and a spoonful of sugar.
Simmer for ten minutes, strain out the solids, and you have a fresh strawberry syrup for your morning coffee or over vanilla ice cream.
You can also freeze the brownie base (without the fruit and ganache) for up to 3 months. Wrap it tightly in plastic wrap and then foil. When you are ready for a treat, thaw it at room temperature, then add the fresh fruit and ganache layers as directed. It is a great way to prep for a party in advance.
Presentation and Pairing Ideas
To get those clean, "bakery style" edges, the secret is a hot knife. Run your sharpest knife under hot tap water, wipe it dry, and make one long, clean slice. Clean the blade and re heat it between every single cut.
It sounds tedious, but it is the only way to prevent the ganache from dragging through the red strawberry layer.
These are incredibly rich, so I usually serve them with a small dollop of unsweetened whipped cream or a splash of cold milk. If you are serving them at a dinner party, a few mint leaves on the side add a pop of color and a fresh scent that balances the heavy chocolate.
You can even sprinkle a tiny pinch of flaky sea salt over the top right before serving to make the flavors "pop."
If you have leftovers that are looking a little sad after a few days, you can chop them up and fold them into softened vanilla bean ice cream. The combination of the fudgy chunks and the fruity swirls makes for a "trash to treasure" sundae that might actually be better than the original brownies.
Just remember to keep everything cold until the moment you eat it!

Recipe FAQs
Can I use frozen strawberries instead of fresh?
No, stick with fresh berries. Frozen strawberries release too much water as they thaw, which will make the brownie base soggy and prevent the ganache from setting properly.
How to ensure the ganache layer is perfectly smooth?
Let the hot cream sit over the chopped chocolate for exactly five minutes before stirring. This allows the heat to penetrate the center of the chocolate pieces, ensuring a stable, glossy emulsion; if you enjoyed this tempering technique, you can apply similar patience to our silky vanilla sponge process for consistent results.
Is it necessary to wait for the brownies to cool completely?
Yes, it is critical. If you add the strawberry jam or ganache while the brownies are still warm, the heat will break the fruit barrier and cause your top layers to slide off the base.
How to keep the strawberry slices from sliding off the brownie?
Pat the strawberry slices completely dry with a paper towel before layering them. Any excess surface moisture will prevent the ganache from adhering to the fruit, causing the layers to separate when you go to slice them.
How to get clean, professional looking slices?
Wipe your knife with a warm, damp cloth between every single cut. This prevents the warm ganache from smearing across the berries and keeps each brownie layer looking sharp and defined.
How long can these brownies stay in the refrigerator?
Keep them stored for up to 3 days in an airtight container. Because of the fresh fruit and heavy cream, they will lose their structural integrity if stored longer, leading to softer, mushier berries.
Is it true that I should whisk the batter vigorously after adding flour?
No, this is a common misconception. You must fold the flour and cocoa powder in gently until just combined; over mixing after the flour is added develops the gluten, resulting in a tough texture instead of a fudgy one.
Chocolate Strawberry Brownies
Ingredients:
Instructions:
Nutrition Facts:
| Calories | 264 kcal |
|---|---|
| Protein | 3.1 g |
| Fat | 15.8 g |
| Carbs | 31.2 g |
| Fiber | 2.8 g |
| Sugar | 23.5 g |
| Sodium | 46 mg |
