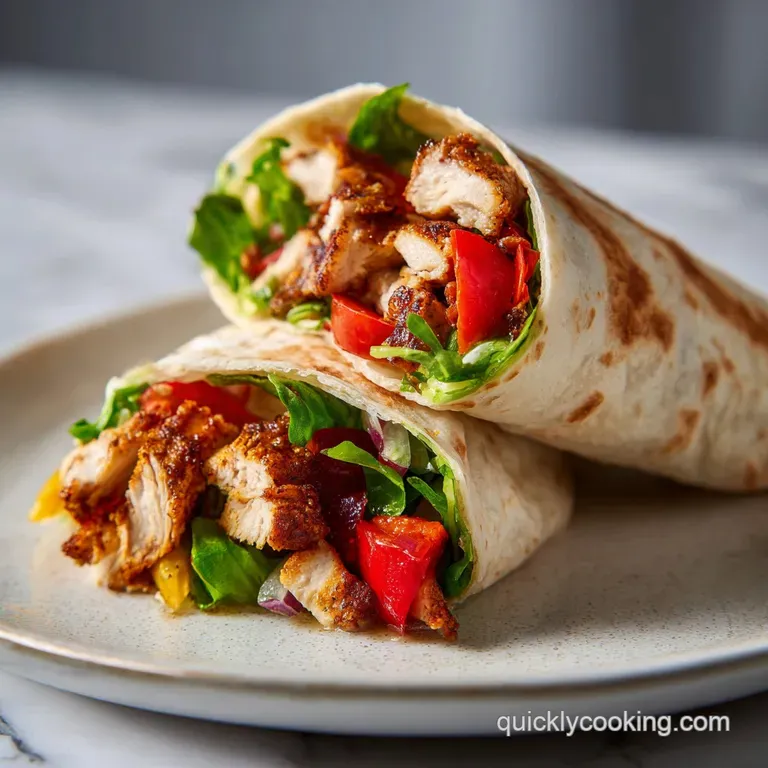
Easy Garlic Chicken Wraps: Crispy and Golden
- Time: Active 10 minutes, Passive 10 minutes, Total 20 minutes
- Flavor/Texture Hook: Golden brown toasted tortilla with molten mozzarella and punchy garlic chicken
- Perfect for: Busy weeknights, high protein meal prep, or a post workout healthy snack
- Easy Garlic Chicken Wrap for Snack and Dinner
- Why This Garlic Technique Works
- Essential Specs and Speed Comparison
- Elements for Your Shopping List
- Kitchen Tools for Busy Cooks
- Master the Perfect Wrap Method
- Troubleshooting Your Garlic Chicken Wrap
- Scaling Your Garlic Chicken Recipe
- Creative Flavor Twists to Try
- Kitchen Myths Debunked
- Smart Storage and Waste Tips
- Plating Your Finished Garlic Wrap
- High in Sodium
- Recipe FAQs
- 📝 Recipe Card
Easy Garlic Chicken Wrap for Snack and Dinner
The second that minced garlic hits the shimmering olive oil, your kitchen transforms. There’s a specific, sharp sizzle that tells you the base of your flavor is locking in. Discover this simple yet flavorful Easy Garlic Chicken Wrap, perfect for a healthy snack or a quick dinner.
I’ve found that the secret isn’t just about the seasoning, but how you treat the garlic itself. If you throw it in too early, it burns and turns bitter; too late, and it’s raw and aggressive. We’re aiming for that sweet spot where it mellows into the chicken juices to create a natural sauce.
Honestly, I used to struggle with wraps that felt "steamed" rather than toasted. You know the ones where the tortilla is soft and a bit gummy. After a few messy attempts, I realized the "press" is the non negotiable step.
By using a heavy plate to weigh down the wrap in the skillet, you force the tortilla into direct contact with the heat. It doesn't just warm up; it fries in its own texture, giving you a crunch that rivals any restaurant.
This recipe is built for speed, but it doesn't sacrifice that specific sensory joy of a hot, crispy meal.
We are keeping things very lean here with Greek yogurt and fresh spinach, but the mozzarella provides that essential pull that makes it feel like a treat. It’s a high efficiency meal that hits every macro without requiring a sink full of dishes.
Let's get into why this specific method works so well for a 20 minute turnaround.
Why This Garlic Technique Works
Getting a chicken wrap right in under 20 minutes requires understanding how heat interacts with the proteins and the wrap itself. It's not just about throwing things in a pan; it's about the sequence.
- Aromatics Infusion: The 5 minute marinade allows the garlic’s sulfur compounds to mingle with the olive oil, ensuring every millimeter of the chicken is coated in flavor before it hits the heat.
- Conduction Toasting: Using a heavy weight during the final toast creates a pressurized environment that melts the cheese faster while dehydrating the surface of the tortilla for maximum crunch.
- Residual Heat Wilting: We don't cook the spinach. By layering it inside the wrap and then toasting the whole package, the residual heat from the chicken and the skillet wilts the greens just enough to soften them without losing their vibrant color or nutrients.
- Carryover Moisture: Removing the chicken when it is opaque but firm ensures it stays juicy during the second "cooking" phase (toasting the wrap), preventing that dreaded rubbery texture.
| Method | Total Time | Final Texture | Best Use Case |
|---|---|---|---|
| Stovetop (This Recipe) | 20 minutes | Shatter crisp exterior | Quick weeknight dinner |
| Oven Baked | 30 minutes | Evenly golden, less crunch | Bulk cooking for families |
| Air Fryer | 15 minutes | Extremely dry and brittle | Single serving snack |
The stovetop method remains king for this recipe because it gives you total control over the browning. While the oven is great for doing ten wraps at once, you lose that direct contact sear that makes the garlic chicken pop. For the best results, stick to a heavy bottomed skillet that holds heat well.
Essential Specs and Speed Comparison
When you're hungry and the clock is ticking, you need to know exactly what you're getting into. This recipe is designed for a 10 minute prep and 10 minute cook time, making it one of the fastest high protein meals in my rotation.
| Thickness of Chicken | Cook Time (Side 1) | Cook Time (Side 2) | Visual Cue |
|---|---|---|---|
| 1/2 inch cubes | 3 minutes | 2-3 minutes | Opaque center, firm touch |
| 1 inch cubes | 5 minutes | 4 minutes | Golden edges, bounce back |
| Strips | 2 minutes | 2 minutes | Curled edges, white throughout |
The 1/2 inch cube is the "goldilocks" size for this dish. It's small enough to cook through rapidly before the garlic has a chance to burn, but large enough to retain a juicy center. If you cut them too small, they'll dry out before you even get a good sear on the outside.
Elements for Your Shopping List
For the best Easy Garlic Chicken Wrap for a Healthy Snack and Dinner, the quality of your garlic and your wrap choice determines the final outcome. Don't reach for the pre minced jarred garlic; it lacks the oils we need for that signature aroma.
- Chicken Breast (12 oz): Lean and high in protein. Why this? It absorbs the garlic and oregano flavors better than darker, fattier cuts.
- Fresh Garlic (4 cloves): The star of the show. Why this? Fresh cloves provide the "sticky" sugars that create a golden crust on the meat.
- Flour Tortillas (2 large): 10 inch size is required for proper folding. Why this? Flour has enough elasticity to hold the heavy chicken filling without tearing.
- Shredded Mozzarella (1 cup): A mild, high melt cheese. Why this? It acts as the "glue" that keeps the chicken and spinach from falling out.
- Non fat Greek Yogurt (2 tbsp): Our healthy cream element. Why this? It provides a tangy contrast to the savory garlic and acts as a moisture barrier.
- Fresh Spinach (1 cup): Packed for volume. Why this? Adds vitamins and a fresh "snap" to balance the warm, melted cheese.
- Olive Oil (1 tbsp): Use a standard extra virgin for flavor.
- Spices: Dried oregano (1/2 tsp), smoked paprika (1/4 tsp), salt, and pepper.
| Original Ingredient | Substitute | Why It Works |
|---|---|---|
| Greek Yogurt | Sour Cream | Similar tang and texture. Note: Higher fat content and calories. |
| Mozzarella | Sharp Cheddar | Melts well but adds a much stronger, saltier flavor profile. |
| Flour Tortilla | Whole Wheat Wrap | Healthier fiber option. Note: More prone to cracking when folded. |
Using Greek yogurt instead of mayo or a heavy dressing is one of my favorite "stealth health" moves. It gives you that velvety mouthfeel without the heavy fat content. If you find the yogurt too tart, you can whisk in a tiny drop of honey or lemon juice to balance it out.
Kitchen Tools for Busy Cooks
I’m a big fan of minimal cleanup. For this recipe, you only need one pan and one bowl. The key is using a skillet that can handle high heat cast iron is my go to because it retains heat so well, but a heavy non stick works perfectly for ensuring the garlic doesn't stick and scorch.
| Ingredient | Science Role | Pro Secret |
|---|---|---|
| Garlic | Flavor Base | Mince then let sit for 2 mins to activate allicin before cooking. |
| Smoked Paprika | Color/Aroma | Provides a "grilled" flavor without needing an actual outdoor grill. |
| Mozzarella | Structural Glue | Use low moisture part skim for a better melt without making the wrap soggy. |
Chef's Tip: If you don't have a kitchen press, use a heavy cast iron skillet as a weight. Place it directly on top of the wraps while they toast. It covers the entire surface area and applies even pressure for a perfectly flat, crispy finish.
Master the Perfect Wrap Method
The assembly is where most people go wrong. If you overstuff it, it will burst. If you under stuff it, you’re eating a mouthful of folded flour. Follow these steps for a tight, restaurant quality roll.
- Marinate the protein. Toss your 12 oz of diced chicken with the olive oil, 4 cloves of minced garlic, oregano, paprika, salt, and pepper in a bowl. Let it sit for 5 minutes. This short window is enough for the salt to penetrate the surface.
- Sear the chicken. Heat your skillet over medium high until it’s shimmering. Spread the chicken in a single layer. Note: Do not crowd the pan, or the chicken will steam instead of searing.
- Develop the crust. Leave the chicken untouched for 3 minutes. You want to see golden edges before you toss them.
- Finish the cook. Toss and cook for another 2–3 minutes. The chicken should be opaque and firm. Move it to a plate immediately to stop the cooking.
- Prep the base. Wipe that skillet clean you don't want burnt garlic bits on your tortilla. Lay the 2 tortillas flat and spread 1 tablespoon of Greek yogurt on each.
- Layer the filling. Place the 1 cup of spinach down first (it acts as a heat shield for the tortilla), followed by the garlic chicken and then the cup of mozzarella.
- The tuck and roll. Fold the left and right sides in about 2 inches, then roll from the bottom up as tightly as possible.
- The final toast. Place the wraps seam side down in the hot skillet. This "welds" the seam shut so it doesn't unravel.
- Apply the pressure. Place a heavy plate or a second skillet on top. Toast for 2 minutes.
- Flip and repeat. Carefully flip the wraps and toast the other side for another 2 minutes until golden and crackling.
Troubleshooting Your Garlic Chicken Wrap
The most common heartbreak with a chicken wrap is the "soggy bottom." This usually happens when the spinach releases too much moisture or the chicken wasn't drained before assembly.
Why Your Wrap Is Soggy
If your wrap feels limp, it’s usually a moisture management issue. If the chicken is still dripping with oil or juice when you put it in the tortilla, that liquid has nowhere to go but into the flour. Always let the chicken rest for a minute on a plate (or even a paper towel) before assembly.
Also, ensure your spinach is bone dry; if you just washed it, spin it or pat it down.
Why the Garlic Tastes Bitter
Garlic turns bitter the second it crosses from "golden" to "dark brown." If your skillet was too hot or you left the garlic in the pan after the chicken was done, you’ve likely overcooked it. The sugars in garlic burn at a lower temperature than the proteins in chicken.
If this happens, you really have to start over with the garlic there's no way to mask that acrid taste.
| Problem | Root Cause | Solution |
|---|---|---|
| Tortilla Cracking | Tortilla is too cold or dry | Microwave the tortilla for 10 seconds under a damp paper towel before rolling. |
| Cheese Not Melting | Heat too high/fast | Lower the heat and use a lid to trap steam during the last 60 seconds of toasting. |
| Chicken is Tough | Overcooked in step 3 | Pull chicken when it's 160°F; the final toasting will bring it to the safe 165°F. |
Sometimes, the simplest mistakes are the ones that ruin the flow. If you find your chicken is sticking to the pan, don't force it. It will naturally release once the crust has formed. If you're looking for more quick poultry ideas, you might enjoy my Chicken Caesar Wraps which use a similar high speed assembly.
Common Mistakes Checklist:
- ✓ Didn't wipe the pan: Burnt garlic from the chicken will stick to the outside of the wrap and taste bitter.
- ✓ Overstuffing: Trying to fit more than 6 oz of chicken in a 10 inch wrap will cause it to tear.
- ✓ Moving the chicken too soon: You'll lose that beautiful garlic crust.
- ✓ Cold tortillas: They will snap and leak cheese into the pan.
- ✓ Forgetting the seam: Always start searing with the seam side down to lock the wrap.
Scaling Your Garlic Chicken Recipe
If you’re feeding a crowd or meal prepping for the week, this recipe scales beautifully, but you have to watch the pan crowding.
- Scaling DOWN (1 serving): Use 6 oz of chicken and 2 cloves of garlic. You can still use the same large skillet, which actually makes it easier to get a great sear because there's more surface area.
- Scaling UP (4-6 servings): Do not double the oil in one go. Work in batches for the chicken. If you put 2 lbs of chicken in one skillet, the temperature will drop, the juices will release, and you’ll end up boiling the meat in its own liquid.
- Spices when scaling: When doubling the recipe, I usually only increase the salt and paprika by 1.5x. Spices can become overwhelming if scaled linearly.
| Feature | Fast Method (This) | Classic Method |
|---|---|---|
| Garlic Prep | Minced for surface area | Whole cloves/confit |
| Cook Time | 20 minutes total | 45-60 minutes |
| Cleanup | 1 Pan, 1 Bowl | Multiple pots/roasting pan |
Creative Flavor Twists to Try
Once you've mastered the basic Easy Garlic Chicken Wrap for a Healthy Snack and Dinner, you can start playing with the profile. This base is incredibly versatile because garlic and oregano play well with so many other cuisines.
Can I make this a Baked Cheesy Garlic Chicken Wrap?
Absolutely. If you want to make a large batch, skip the skillet toasting. Lay all the wraps on a baking sheet, brush the tops with a little melted butter or olive oil, and bake at 400°F (200°C) for about 12 minutes.
They won't be quite as "fried crispy" as the skillet version, but they get a lovely even golden color.
What is the best Low Carb substitution?
If you're watching carbs, swap the flour tortilla for a large collard green leaf or a specialized low carb wrap. Just be aware that collard greens won't "weld" shut like a flour tortilla, so you’ll need to secure them with toothpicks during the sear. For another high protein option that kids love, check out these Crispy Air Fryer Chicken Nuggets which also use a minimal tool approach.
- If you want it spicy
- Add 1/2 tsp of red chili flakes to the chicken marinade.
- If you want it creamier
- Add a few slices of avocado inside before rolling.
- If you want it zesty
- Squeeze half a lime over the chicken right as it finishes cooking.
Kitchen Myths Debunked
There are so many "rules" in the kitchen that just don't hold up when you're trying to cook efficiently.
- Myth 1: Searing seals in juices. This is one of the oldest lies in cooking. Searing actually dries out the exterior slightly to create flavor (the Maillard reaction). The "juiciness" comes from not overcooking the internal temperature.
- Myth 2: You must soak garlic in water to prevent burning. This just makes the garlic steam and prevents it from sticking to the chicken. Instead, just control your heat. If the pan is smoking, it’s too hot for garlic.
- Myth 3: Greek yogurt will curdle if heated. While yogurt can break at high heat, we aren't boiling it here. It’s protected inside the wrap and only gently warmed, so it stays creamy and thick.
Smart Storage and Waste Tips
These wraps are best eaten fresh while the tortilla is still "shattering" crisp. However, they are great for lunch the next day if you handle them right.
- Storage: Store leftovers in an airtight container in the fridge for up to 3 days. I recommend wrapping them in a paper towel first to absorb any moisture that might migrate to the tortilla.
- Freezing: You can freeze these! Wrap the assembled (but NOT toasted) wraps tightly in plastic wrap and then foil. They stay good for 2 months. Thaw in the fridge overnight before toasting in a skillet.
- Reheating: Whatever you do, avoid the microwave. It will turn your crispy wrap into a soggy, chewy mess. Instead, use a toaster oven or a dry skillet on low heat for about 5 minutes per side.
- Zero Waste: Don't toss those spinach stems! Finely chop them and toss them into the chicken sauté. Also, if you have leftover garlic chicken but no wraps, it's fantastic over a bed of quinoa or mixed into a quick pasta.
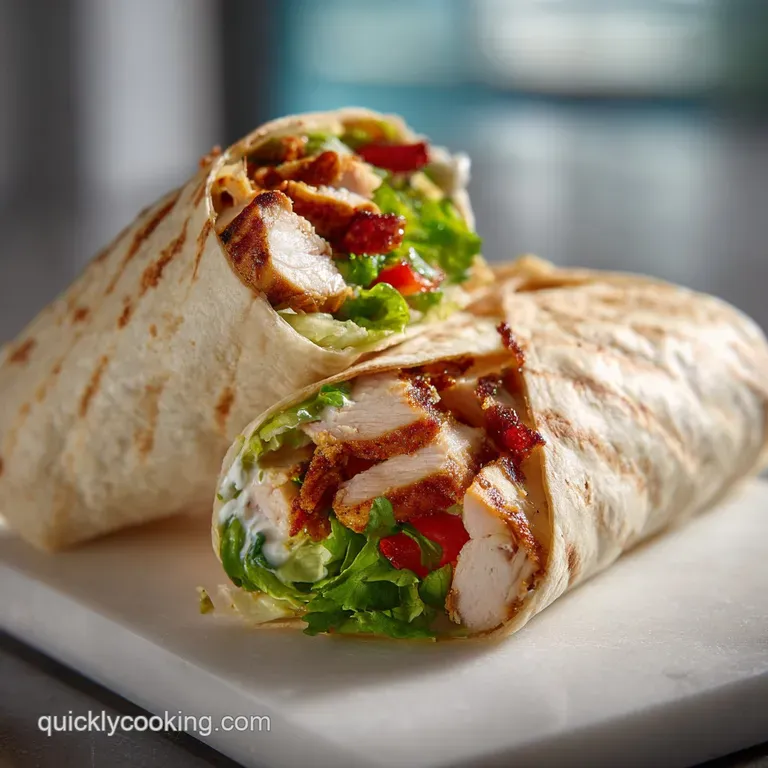
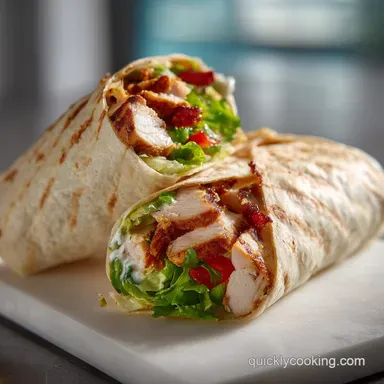
Plating Your Finished Garlic Wrap
We eat with our eyes first, and a wrap can easily look like a brown log if you're not careful. To make it look professional, always slice it on a sharp diagonal. This exposes the layers of melted cheese, vibrant green spinach, and golden chicken.
I like to serve these with a side of extra Greek yogurt mixed with a little sriracha or lemon juice for dipping. Since the wrap is quite savory and heavy on garlic, a side of crisp cucumber slices or a light arugula salad with a vinaigrette provides a necessary palate cleanser.
Chef's Note: To get that perfect clean cut, let the wrap rest for 60 seconds after taking it out of the pan. This allows the cheese to set slightly so it doesn't all ooze out the moment the knife hits it. Use a serrated knife and a gentle sawing motion for the cleanest "window" into your wrap.
The beauty of this dish is that it bridges the gap between a snack and a full blown dinner. Whether you're rushing between meetings or just want something that feels more substantial than a sandwich, this garlic chicken method delivers every single time.
Grab your skillet and get that garlic sizzling you’re only 20 minutes away from the best wrap you’ve had all month.

High in Sodium
985 mg 985 mg (43% 43%)
The American Heart Association recommends limiting sodium intake to no more than 2,300 mg per day, with an ideal limit of about 1,500 mg per day for most adults.
Tips to Reduce Sodium
-
Choose Low-Sodium Cheese-15%
Opt for low-sodium mozzarella cheese or a blend with reduced sodium. This can significantly cut down on the cheese's contribution to the overall sodium content.
-
Minimize Added Salt-25%
The recipe calls for 'Salt and black pepper to taste.' Eliminate all added salt and rely on the spices already present. You can always add a tiny pinch of salt at the table if needed, but aim to skip it entirely.
-
Boost Flavor with Herbs and Spices
While this recipe already includes oregano and paprika, consider adding fresh garlic (which you are already using finely minced), onion powder, cumin, or chili powder to enhance flavor without adding sodium.
-
Consider Unsalted Tortillas-5%
Check the sodium content of your flour tortillas. If they are high in sodium, look for unsalted or low-sodium varieties to reduce intake.
-
Add Fresh Aromatics-5%
Incorporate freshly chopped onion or scallions alongside the minced garlic to build a more robust flavor profile, reducing the need for salt.
Recipe FAQs
Is chicken wrap a healthy meal?
Yes, it serves as a balanced meal. By combining lean chicken breast for protein with fresh spinach and Greek yogurt, you get a nutrient dense profile that works well for a quick dinner.
Are chicken wraps ok for diabetics?
Yes, provided portion sizes are monitored. Focus on the high protein chicken and fiber rich spinach to help moderate the impact of the flour tortilla on blood glucose levels.
What to add to a chicken wrap for dinner?
Include ingredients that add texture and volume. You can enhance your meal by pairing this with sides like our Greek grazing board to turn a simple wrap into a complete dinner spread.
What to put in a chicken snack wrap?
Use the core combination of diced garlic chicken, fresh spinach, and shredded mozzarella. Adding a light spread of Greek yogurt helps bind the ingredients together while keeping the flavor profile lean and savory.
How to prevent the wrap from getting soggy?
Drain the cooked chicken well and ensure spinach is patted dry before assembly. Excess moisture is the primary cause of a soft tortilla, so keep ingredients as dry as possible before rolling.
Is it true I should sear the chicken at high heat to keep it juicy?
Yes, this is essential. Using medium high heat allows you to develop a crust quickly without overcooking the inside, similar to how you would sear the protein in our General Tsos chicken recipe.
How to get a crispy exterior on the tortilla?
Place the wrap seam side down in the skillet and add weight. Using a heavy plate or a secondary skillet to press down ensures even contact with the heat, resulting in a golden brown, crispy finish.
Easy Garlic Chicken Wraps
Ingredients:
Instructions:
Nutrition Facts:
| Calories | 753 kcal |
|---|---|
| Protein | 73.5 g |
| Fat | 31.1 g |
| Carbs | 41.4 g |
| Fiber | 2.5 g |
| Sugar | 2.1 g |
| Sodium | 985 mg |
