Fudgy Chewy Brookies: a Brownie Cookie Hybrid
- Time: Active 25 minutes, Passive 35 minutes, Total 60 minutes
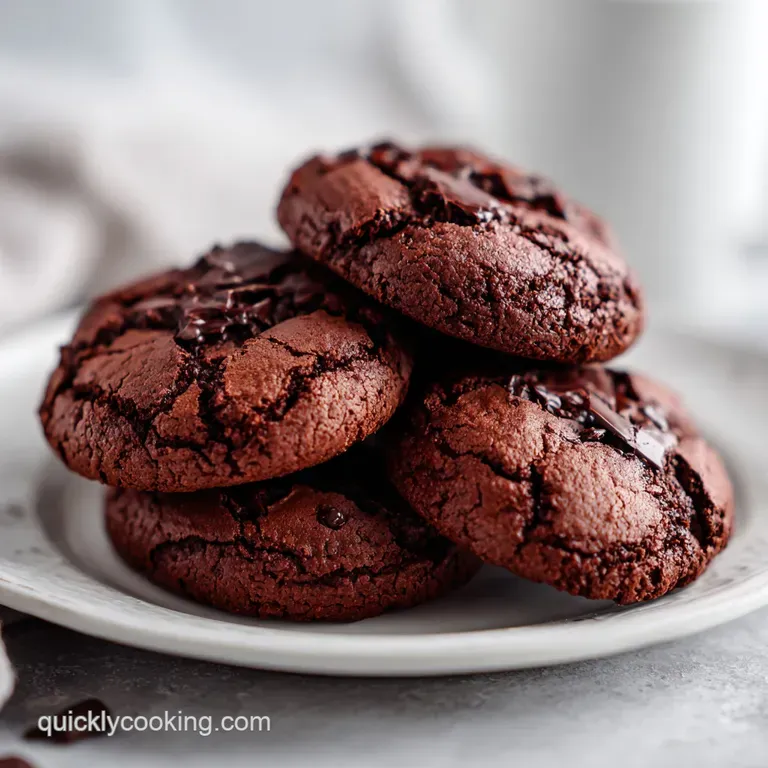
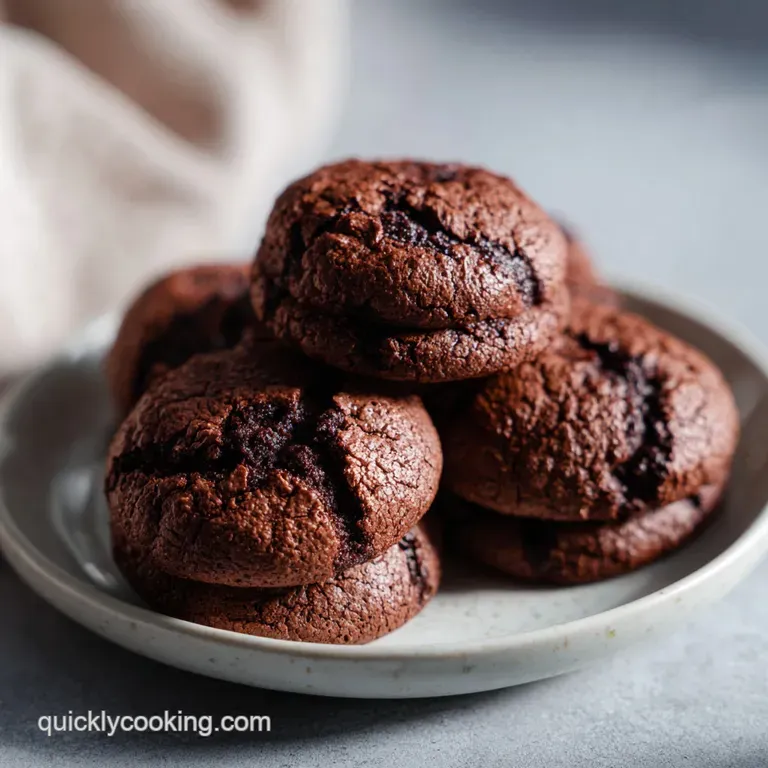
- Flavor/Texture Hook: A velvety, dense chocolate base topped with a golden, chewy cookie crust
- Perfect for: School bake sales, casual family potlucks, or satisfying a serious midnight chocolate craving
- Creating the Ultimate Fudgy Chewy Brookies
- What Actually Makes These Layers Work
- Ingredient Component Analysis Deep Dive
- The Simple Pantry Staples Required
- Minimal Equipment for Maximum Flavor
- Step by Step Layering Guide
- Fixing Texture Issues for Perfect Bars
- Precise Scaling for Any Crowd
- Creative Ways to Customize Results
- Storing and Reheating Fudgy Brookies
- What to Serve With Bars
- Debunking Common Baking Myths
- Recipe FAQs
- 📝 Recipe Card
Creating the Ultimate Fudgy Chewy Brookies
Picture this: It is Friday night, and you have been tasked with bringing "something sweet" to the neighborhood block party. You are standing in your kitchen, staring at a bag of flour and a half empty box of cocoa powder, torn between the gooey comfort of a brownie and the nostalgic snap of a chocolate chip cookie.
Why choose? That is exactly how I ended up making my first batch of these bars. The aroma of melting butter and sugar hitting the warm oven air is enough to bring neighbors to your door before the timer even goes off.
There is something visceral about the way the brownie base yields under your teeth, only to be met by the slight resistance of a perfectly baked cookie top. I remember the first time I served these at a family reunion; my aunt literally chased me down to ask if I had used some sort of sorcery to keep the layers distinct.
No magic, just a bit of simple kitchen physics and a very specific layering technique that keeps everything from turning into a muddy mess. We are going for a texture that is dense, rich, and undeniably satisfying without being overly sweet.
These bars are the solution for the busy cook who needs a high impact dessert without spending four hours in the kitchen or using every bowl in the cupboard. We are talking about basic pantry staples transformed into a masterpiece that looks like it came from a high end bakery.
Honestly, forget those complicated multi step pastries; this is the one people actually want to eat. Grab your mixing bowls and let's get into the nitty gritty of how to pull this off perfectly on your first try.
What Actually Makes These Layers Work
Differential Density: The brownie batter is heavier and more fluid, allowing it to act as a stable foundation while the stiffer cookie medallions sit on top without sinking.
Sugar Dissolution: Whisking the melted butter and granulated sugar vigorously creates that iconic paper thin, crackly brownie skin that contrasts with the soft cookie dough.
Moisture Equilibrium: Using room temperature eggs ensures the fats and liquids bond correctly, preventing the bars from becoming greasy or separating during the 35 minutes in the oven.
Starch Suspension: Chilling the cookie dough for 10 minutes prevents the fats from melting too quickly, which keeps the cookie layer from spreading and merging completely into the brownie base.
| Method | Time | Texture Result | Best For |
|---|---|---|---|
| Standard Pan | 35 minutes | Fudgy center, soft top | Maximum crowd pleasing |
| Individual Muffin Tin | 22 minutes | Crispy edges all around | Kids' parties or lunchboxes |
| Cast Iron Skillet | 30 minutes | Extra chewy, caramelized bottom | Warm dessert with ice cream |
Choosing the right pan is the first step toward success. While the 9x9 inch square pan is the classic choice for a 16 serving yield, don't be afraid to experiment with a skillet if you want those deep, dark, caramelized edges that only cast iron can provide.
Just remember that the thermal mass of a skillet will keep cooking the batter even after it leaves the heat, so you might need to pull it out a few minutes early to maintain that fudgy interior we are all chasing.
Ingredient Component Analysis Deep Dive
| Ingredient | Science Role | Pro Secret |
|---|---|---|
| Dutch Processed Cocoa | Provides deep color and neutralized acidity | Sift it to avoid stubborn "cocoa bombs" in the finished batter |
| Light Brown Sugar | Adds moisture and molasses notes for chewiness | Pack it firmly into the cup to ensure the correct moisture to flour ratio |
| Unsalted Butter | Controls the fat content and prevents over salting | Use high-quality butter with 82% fat for a richer, more velvety crumb |
| Baking Soda | Reacts with brown sugar to provide a slight lift | Ensure it is fresh (less than 6 months old) for the best cookie rise |
Every ingredient in this recipe serves a specific purpose beyond just flavor. For instance, the choice of Dutch processed cocoa powder isn't just about the darker color; it is about how it interacts with the other fats in the brownie layer.
Because it is treated with an alkalizing agent, it creates a smoother, less astringent chocolate profile that doesn't compete with the buttery sweetness of the cookie top.
Chef Tip: If you really want to make the chocolate flavor pop, add a half teaspoon of instant espresso powder to the brownie batter. It won't taste like coffee, but it makes the cocoa taste twice as intense.
The Simple Pantry Staples Required
- 1/2 cup (115g) unsalted butter, melted: Why this? Provides the fat base for the brownie without adding unwanted water. (Substitute: Salted butter, but omit the extra sea salt in the brownie recipe).
- 1 cup (200g) granulated sugar: Why this? Essential for structural integrity and that glossy, crackly brownie top. (Substitute: Caster sugar for even faster dissolution).
- 2 large eggs, room temperature: Why this? Acts as the primary emulsifier to bind the fat and sugar together. (Substitute: 1/2 cup unsweetened applesauce, though the texture will be cakier).
- 1 tbsp vanilla extract: Why this? Rounds out the chocolate notes and adds a floral sweetness. (Substitute: Vanilla bean paste for a more gourmet look).
- 1/2 cup (50g) Dutch processed cocoa powder: Why this? Delivers a deep, dark chocolate flavor with low acidity. (Substitute: Natural cocoa powder, but expect a lighter color).
- 1/2 cup (65g) all purpose flour: Why this? Provides just enough structure to keep the brownie fudgy. (Substitute: 1:1 gluten-free flour blend).
- 1/4 tsp sea salt: Why this? Balances the sugar and heightens the perception of chocolate. (Substitute: Table salt, but use slightly less).
- 1/2 cup (115g) unsalted butter, softened: Why this? Essential for creaming into the cookie dough for a chewy texture. (Substitute: Coconut oil, but it will change the flavor significantly).
- 1/2 cup (100g) light brown sugar, packed: Why this? The molasses content is what makes the cookie layer chewy. (Substitute: Dark brown sugar for a deeper, more caramel like taste).
- 1/4 cup (50g) granulated sugar: Why this? Helps the cookie edges crisp up beautifully. (Substitute: Raw sugar for extra crunch).
- 1 large egg, room temperature: Why this? Adds moisture and lift to the cookie dough. (Substitute: A flax egg for a vegan friendly twist on the top layer).
- 1 1/2 cups (190g) all purpose flour: Why this? The backbone of the cookie, providing chew and body. (Substitute: Oat flour for a heartier, nuttier texture).
- 1/2 tsp baking soda: Why this? Reacts with the brown sugar for the classic cookie rise. (Substitute: 1.5 tsp baking powder, but the texture will be softer).
- 1/2 tsp sea salt: Why this? Cuts through the richness of the semi sweet chips. (Substitute: Smoked salt for a unique, savory finish).
- 1 cup (170g) semi sweet chocolate chips: Why this? Standard chips hold their shape better during the long bake. (Substitute: Chopped dark chocolate bars for gooey puddles).
Minimal Equipment for Maximum Flavor
You do not need a kitchen full of gadgets to make a world class batch of brookies. In fact, keeping things simple often leads to better results because you aren't over processing the dough. All you really need are two medium mixing bowls, a sturdy whisk, and a flexible spatula.
A KitchenAid stand mixer is great if you have one, but honestly, a hand mixer or even a bit of arm power works just as well for the creaming step.
The most important "tool" here is actually the parchment paper. Don't skip the 2 inch overhang; it is the difference between lifting out a perfect block of bars and desperately digging crumbled chocolate out of the corners of a metal pan.
If you're using a glass pan, keep in mind that it retains heat longer than metal, so you might need to adjust your cooling time to avoid over baking the center while the pan sits on the counter.
step-by-step Layering Guide
- Prep the environment. Preheat your oven to 350°F (175°C). Line a 9x9 inch square baking pan with parchment paper. Note: This ensures the bars don't stick and can be lifted out easily for clean cuts.
- Dissolve the brownie sugar. In a medium bowl, whisk 115g melted butter and 1 cup granulated sugar vigorously for 2 minutes. Wait until the mixture looks slightly grainy but well combined.
- Build the brownie base. Add 2 eggs and vanilla to the butter mixture, whisking until the batter is pale and noticeably thickened.
- Incorporate the dry brownie ingredients. Sift in 50g cocoa powder, 65g flour, and 1/4 tsp salt. Fold gently with a spatula until no streaks of white flour remain.
- Anchor the foundation. Pour the brownie batter into the prepared pan. Smooth the surface with a spatula until it reaches all four corners.
- Cream the cookie base. In a separate bowl, beat 115g softened butter with the light brown sugar and 1/4 cup granulated sugar until the mixture is light, airy, and pale yellow.
- Finish the cookie dough. Beat in 1 egg, then stir in 190g flour, baking soda, and 1/2 tsp salt. Fold in the chocolate chips and chill the dough in the fridge for 10 minutes.
- The layering technique. Flatten small portions of the chilled cookie dough into medallions. Place them across the top of the brownie batter like a patchwork quilt.
- The final bake. Bake for 35 minutes until the cookie tops are golden and a toothpick comes out with just a few moist crumbs.
- The hardest step. Allow the pan to cool completely on a wire rack before slicing into 16 bars. Waiting at least 2 hours ensures the fudgy brownie center sets properly.
Fixing Texture Issues for Perfect Bars
One of the most common issues people have with a fudgy chewy brookies recipe is the "sinking cookie" syndrome. This happens when the brownie batter is too thin or the cookie dough is too warm. Chilling that cookie dough for just 10 minutes makes a massive difference in how the layers interact.
If your cookies are diving to the bottom, try making the medallions thinner and wider next time to distribute the weight across the brownie's surface.
To Fix a Greasy Surface
If you notice oil pooling on top of your bars as they cool, it usually means the butter wasn't fully emulsified into the sugar and eggs. This often happens if the eggs were cold. To fix it, you can lightly blot the top with a paper towel while the bars are still warm, but next time, make sure your eggs are truly room temperature before you start whisking.
For Sinking Cookie Dough
When the cookie layer disappears into the brownie, it is usually because the brownie batter wasn't thick enough or the cookie dough was placed in large, heavy lumps. Think of it like a puzzle use smaller, flatter pieces of dough and leave tiny gaps where the brownie can peek through.
This allows the steam to escape without pushing the cookies down.
To Avoid a Dry Base
If your brownie layer feels more like cake than fudge, you likely over measured the flour or over baked the pan. Always use the "spoon and level" method for flour or, better yet, use a kitchen scale.
35 minutes is the sweet spot for most ovens, but start checking at 32 minutes just to be safe.
| Problem | Root Cause | Solution |
|---|---|---|
| Crumbly cookie top | Too much flour in the dough | Measure flour by weight (190g) next time |
| Brownie layer is raw | Oven temperature is too low | Use an oven thermometer to verify 350°F |
| Chocolate chips burnt | Placing pan too close to top element | Bake on the center rack for even heat distribution |
Common Mistakes Checklist:
- ✓ Whisk the brownie sugar and butter for the full 2 minutes (don't cheat the clock!).
- ✓ Ensure eggs are at room temperature to prevent the batter from breaking.
- ✓ Sift the cocoa powder to remove those tiny, bitter lumps.
- ✓ Resist the urge to cut the bars while they are still warm (the center will collapse).
- ✓ Use a metal pan for the sharpest, most even edges.
Precise Scaling for Any Crowd
If you are cooking for a larger party, doubling this recipe is straightforward, but you should move to a 9x13 inch pan. When doubling, keep the salt and spices at 1.5x rather than a full 2x to avoid an overpowering flavor, and extend the bake time by about 5 to 8 minutes.
Always check the center with a toothpick to ensure the larger mass of batter has set.
For a smaller household, you can easily halve the ingredients and use an 8x4 inch loaf pan. When halving the recipe and facing the "half an egg" dilemma, simply whisk one egg in a small bowl and use two tablespoons of the liquid.
Reduce the bake time by about 20% and keep a close eye on it starting at the 25 minute mark.
Creative Ways to Customize Results
Once you have mastered the basic chewy browkies brookies, the world is your oyster. You can swap the semi sweet chips for white chocolate or even peanut butter chips for a completely different profile.
If you want a "Salted Caramel Twist," try drizzling a bit of high-quality caramel sauce over the brownie layer before you add the cookie medallions.
For a Deep Mocha Profile
As mentioned earlier, espresso powder is the secret weapon here. But you can take it a step further by using dark chocolate chunks instead of chips in the cookie layer. The bitterness of the dark chocolate plays beautifully against the sweetness of the brownie, creating a more "adult" dessert that pairs perfectly with a post dinner coffee.
To Create a Nutty Crunch
Adding toasted pecans or walnuts to the brownie batter provides a much needed textural contrast. I recommend folding in about 1/2 cup of chopped nuts at the very end of the brownie mixing process. This doesn't just add flavor; the oils from the nuts actually help keep the brownie layer moist for a longer period.
Storing and Reheating Fudgy Brookies
These bars actually taste better on the second day once the flavors have had time to meld and the moisture has redistributed. Store them in an airtight container at room temperature for up to 4 days.
If you find they are starting to dry out, placing a single slice of white bread in the container will keep them soft and chewy for an extra day or two.
For long term storage, brookies freeze remarkably well. Wrap individual squares in plastic wrap and then place them in a heavy duty freezer bag. They will stay fresh for up to 3 months.
When you're ready to eat, let them thaw on the counter for an hour, or give them a quick 15 second zap in the microwave for that "just out of the oven" gooeyness.
Zero Waste Tip: If you end up with edges that are a bit too crunchy or scraps from trimming the bars, don't throw them away! Crumble them up and use them as a topping for vanilla bean ice cream or fold them into a batch of homemade milkshake.
What to Serve With Bars
While a tall glass of cold milk is the traditional partner for any brownie cookie hybrid, there are plenty of ways to turn these into a plated dessert. A dollop of lightly sweetened whipped cream or a scoop of salted caramel gelato can transform a simple bar into something truly special.
The cold creaminess of the dairy cuts through the intense richness of the double chocolate layers.
If you are serving these at a party, consider a fruit pairing. Fresh raspberries or sliced strawberries add a bright, acidic pop that balances the heavy cocoa. Honestly, I’ve even served these with a small glass of ruby port for a sophisticated dessert course, and it was a massive hit.
The dark berry notes of the wine highlight the fruity undertones of the Dutch processed cocoa.
Debunking Common Baking Myths
One myth that needs to disappear is that you need a specialized "brookie pan" with dividers to get the layers right. As long as your brownie batter has enough structure and your cookie dough is chilled, physics will do the work for you.
You don't need fancy equipment to keep the layers separate; you just need to follow the layering medallions technique we discussed.
Another misconception is that "more is better" when it comes to leavening. Some people think adding extra baking soda will make the bars fluffier. In reality, too much baking soda will make the cookie layer taste metallic and cause it to rise and then collapse, leading to a sunken, greasy mess.
Stick to the half teaspoon it is calibrated perfectly for the acidity in the brown sugar.
Finally, don't believe the lie that you can't over mix brownie batter. While it doesn't have as much flour as a cake, over mixing the brownie base after adding the flour will develop the gluten and turn your fudgy chewy browkies brookies into something tough and bread like.
Fold the flour in by hand and stop the second you see the last white streak disappear. Trust your hands, not the machine, for that final step.

Recipe FAQs
Is it true I can bake these at a higher temperature to save time?
No, this is a common misconception. You must bake these at 350°F (175°C) for the full 35 minutes to ensure the brownie base is cooked through without burning the cookie layer.
How to ensure the brownie layer gets a shiny, crinkly top?
Whisk the melted butter and 1 cup of granulated sugar vigorously for 2 minutes. This process ensures the sugar dissolves properly, which is the secret to achieving that signature crackly finish.
Should I cut the brookies as soon as they come out of the oven?
No, allow them to cool completely in the pan. Slicing them while hot will prevent the fudgy center from setting, resulting in a messy, crumbly bar instead of a clean square.
How to store brookies so they stay soft for several days?
Keep them in an airtight container at room temperature. If they begin to lose their moisture, add a single slice of white bread to the container to help them remain soft and chewy.
Can I freeze brookies for later consumption?
Yes, they freeze remarkably well for up to 3 months. For the best results, wrap each square individually in plastic wrap and store them inside a heavy duty freezer bag.
How to layer the cookie dough on top of the brownie batter?
Flatten small portions of chilled cookie dough into medallions. Place these medallions across the top of the brownie batter to ensure even distribution and uniform baking across the entire pan.
Do I need to grease the baking pan even if I use parchment paper?
No, the parchment paper is sufficient. Leaving a 2 inch overhang on the sides of your 9x9 inch pan is the best method to lift the brookies out cleanly once they have cooled.
Fudgy Chewy Brookies

Ingredients:
Instructions:
Nutrition Facts:
| Calories | 317 kcal |
|---|---|
| Protein | 3.9 g |
| Fat | 15.6 g |
| Carbs | 42.7 g |
| Fiber | 2.1 g |
| Sugar | 29.8 g |
| Sodium | 163 mg |
