Grilled Cheese Burrito: Crispy and Molten
- Time: Active 10 minutes, Passive 15 minutes, Total 25 minutes
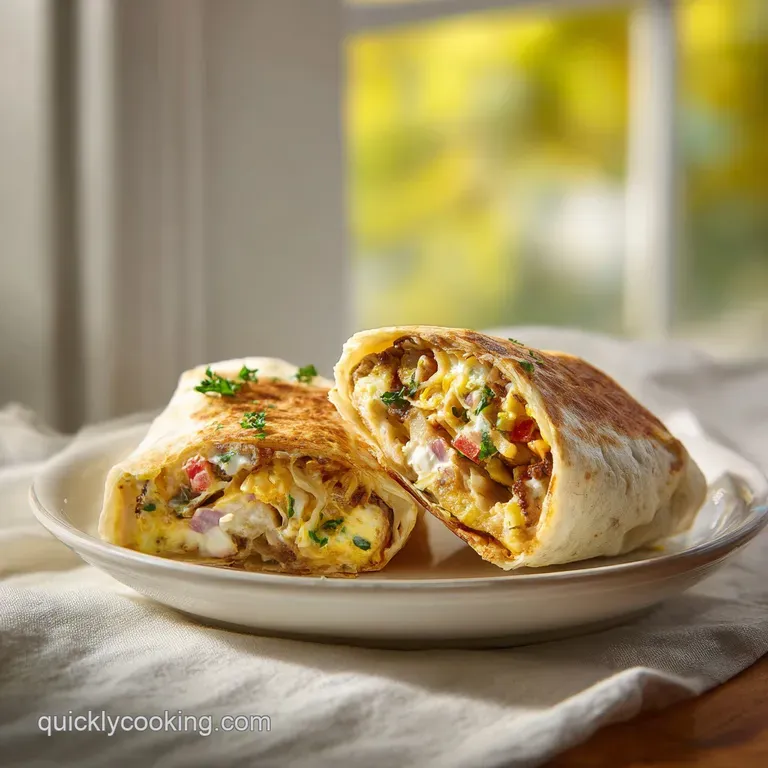
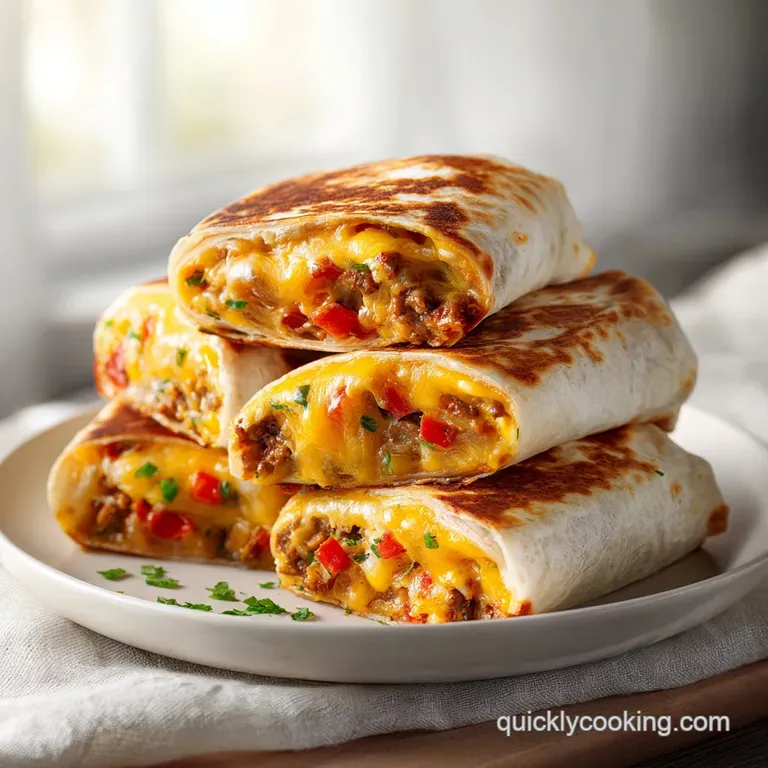
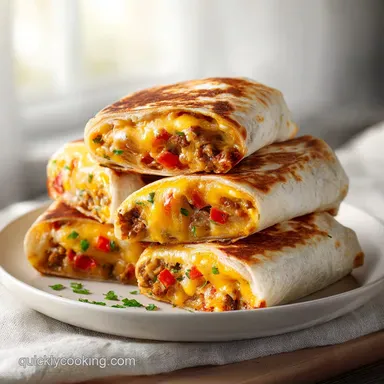
- Flavor/Texture Hook: Mahogany crusted exterior with a velvety, molten center
- Perfect for: High energy game nights or family movie marathons
- Experience the Ultimate Homemade Grilled Cheese Burrito
- How the Cheese Crust Actually Bonds
- Decoding the Component Science Deep Dive
- Essential Elements for Your Burrito Build
- Essential Gear for Fast Cooking
- Step by Step Assembly Guide
- Master the Heat and Texture
- Guidelines for Adjusting Yields
- Debunking Common Burrito Myths
- Substitutions for Diverse Tastes
- Handling Leftovers and Zero Waste
- Perfect Pairings for Your Meal
- Very High in Sodium
- Recipe FAQs
- 📝 Recipe Card
Experience the Ultimate Homemade Grilled Cheese Burrito
Picture this: it is a rainy Friday night, the kind where you want comfort food but don't want to wait an hour for delivery. I remember the first time I tried to fuse a burrito with a grilled cheese. I thought I could just toss a finished burrito into a pan with some oil, but the tortilla just got greasy and limp.
Then I saw that mahogany, lacy cheese crust at a local taco spot and realized the secret wasn't oil at all. It was using the cheese itself as the frying medium. When that cheddar hits the hot skillet, it doesn't just melt, it renders and crisps into a salty, rigid shell that protects the soft interior.
We are making this for those moments when you need a win in the kitchen without spending the whole night at the stove. It is about efficiency and that specific sizzle when the tortilla meets the bubbling cheddar. You aren't just eating a meal; you're experiencing a texture contrast that most home cooks miss.
This isn't about fancy techniques, it's about timing and heat management. You want that beef to be savory and the rice to be zesty so they can stand up to the richness of the nacho cheese and chipotle cream.
The beauty of this dish is how it fits into a busy life. Whether you're feeding a group of hungry friends before the big game or just treating yourself after a long shift, this recipe delivers restaurant quality results in exactly 25 minutes.
We are going to skip the fluff and focus on the mechanics of building a burrito that stays together and develops that signature crunch. Let's get into why this works so well and how you can replicate it perfectly every time.
How the Cheese Crust Actually Bonds
Fat Rendering: As the sharp cheddar hits the medium heat, the milk solids separate from the fat, allowing the cheese to "fry" itself into a rigid lattice.
Starch Suspension: The lime tossed rice acts as a structural sponge, absorbing the moisture from the beef and nacho cheese to prevent the tortilla from becoming soggy.
Thermal Sealing: Pressing the burrito into the melting cheese creates a vacuum seal on the seam, ensuring the fillings stay locked inside during every bite.
Protein Glazing: Simmering the beef with taco seasoning and water creates a thick, concentrated glaze that clings to the meat rather than running out of the burrito.
| Servings | Ingredient Adjustments | Pan Size | Cook Time |
|---|---|---|---|
| 2 people | 1/2 lb beef, 1 cup rice, 2 tortillas | 10 inch skillet | 20 minutes |
| 4 people | 1 lb beef, 2 cups rice, 4 tortillas | 12 inch skillet | 25 minutes |
| 6 people | 1.5 lb beef, 3 cups rice, 6 tortillas | Two 12 inch skillets | 30 minutes |
When you're planning for a crowd, it is much easier to work in batches rather than crowding a single pan. For four people, a standard 12 inch non stick skillet is your best friend.
If you're scaling up, remember that the "grilled cheese" phase happens one or two burritos at a time to ensure that mahogany crust gets the attention it deserves.
Decoding the Component Science Deep Dive
| Ingredient | Science Role | Pro Secret |
|---|---|---|
| Sharp Cheddar | Structural Crisp | Use block cheese; pre shredded has cellulose that prevents the "shatter" texture. |
| Lean Ground Beef (90/10) | Savory Base | Higher lean percentage prevents the burrito from becoming an oil slick inside. |
| Chipotle in Adobo | Emulsified Heat | The vinegar in the adobo sauce cuts through the heavy fat of the nacho cheese. |
| Red Tortilla Strips | Internal Texture | Add these last to maintain their snap against the velvety sour cream. |
Choosing the right beef is the first step toward efficiency. I've tried using 80/20 beef before, but honestly, don't even bother with the extra fat here. You are already getting plenty of richness from the nacho cheese and the grilled cheddar exterior. The 90/10 ratio gives you a meaty, firm texture that holds the taco seasoning glaze perfectly. For a similar flavor profile in a larger format, my Beef Rigatoni Cheese Bake uses this same logic of balancing savory beef with a rich, molten cheese finish.
Essential Elements for Your Burrito Build
To get this right, you need high-quality components that play well together. We aren't just throwing things in a wrap; we are layering for structural integrity and flavor distribution.
- 1 lb lean ground beef (90/10 ratio): The foundation of the meal.
- Substitute: Ground turkey (90/10) - works well but needs an extra pinch of salt.
- 2 tbsp taco seasoning: A mix of paprika, cumin, garlic, and chili powder.
- Substitute: 1 tbsp chili powder + 1 tsp cumin - provides the same smoky depth.
- 1/4 cup water:Why this? Hydrates the spices into a thick, clingy glaze for the beef.
- Substitute: Beef broth - adds a more intense savory note.
- 2 cups steamed long grain white rice: Provides bulk and absorbs excess moisture.
- Substitute: Brown rice - adds a nutty chew but requires longer cooking.
- 1 tbsp fresh lime juice: Brightens the rice and cuts the richness.
- Substitute: Lemon juice - similar acidity, though slightly less tropical.
- 1/2 cup nacho cheese sauce: The "glue" that keeps the interior velvety.
- Substitute: Melted Monterey Jack - less "saucy" but provides a great cheese pull.
- 1/2 cup red tortilla strips: For that essential internal crunch.
- Substitute: Crushed corn chips - same corn flavor and crunch.
- 1/2 cup sour cream: The cooling element for the spice.
- Substitute: Greek yogurt - tangier and higher in protein.
- 1 tbsp chipotle peppers in adobo, minced:Why this? Adds smoky heat and a vibrant orange hue to the cream.
- Substitute: Smoked paprika and cayenne - provides smoke without the vinegary adobo.
- 1 tsp garlic powder: Enhances the savory profile of the cream.
- Substitute: One fresh minced clove - more pungent, use sparingly.
- 4 large flour tortillas (10-12 inches): Must be large enough to contain the layers.
- Substitute: Whole wheat tortillas - slightly tougher but healthier.
- 2 cups shredded sharp cheddar cheese: The star of the "grilled cheese" exterior.
- Substitute: Pepper Jack - adds a spicy kick to the outer crust.
- 1/4 cup pickled jalapeño slices (optional): For those who want extra heat.
- Substitute: Fresh jalapeños - brighter heat, less tang.
Essential Gear for Fast Cooking
Efficiency in the kitchen starts with having the right tools within arm's reach. You don't need a professional kitchen, but a few specific items make the difference between a messy wrap and a crisp, mahogany finish.
- Large Non Stick Skillet: This is non negotiable for the cheese crust. A cast iron works, but a high-quality non stick ensures the cheese releases without tearing.
- Wide Flat Spatula: You need something with surface area to press the burrito down firmly into the melting cheese.
- Mixing Bowls: One medium for the lime rice and one small for the chipotle cream.
- Tongs: Helpful for rotating the burrito if you want to crisp the sides.
- Chef’s Knife: For mincing the chipotle peppers and slicing the finished burritos.
If you find yourself making these often for meal prep, having a dedicated space for your "assembly line" helps. I usually set this up like a taco bar. For more ideas on how to prep ahead efficiently, check out my Quick Breakfast Burritos which also utilize a streamlined assembly method.
step-by-step Assembly Guide
- Brown the beef. In a large non stick skillet over medium high heat, brown the 1 lb ground beef until fully cooked, breaking it into small crumbles. Note: Small crumbles ensure even distribution in every bite.Cook 6-8 minutes until no pink remains.
- Glaze the meat. Drain excess fat from the skillet. Stir in 2 tbsp taco seasoning and 1/4 cup water. Simmer until the liquid reduces into a thick, glossy glaze.
- Prep the rice and cream. In a medium bowl, toss 2 cups steamed rice with 1 tbsp lime juice. In a small bowl, whisk 1/2 cup sour cream, 1 tbsp minced chipotle, and 1 tsp garlic powder until smooth and pale orange.
- Build the base. Lay a tortilla flat. Place 1/2 cup rice in the center, leaving 2 inches on the sides. Top with a quarter of the beef.
- Add the sauces. Drizzle 2 tbsp nacho cheese sauce over the beef, followed by a dollop of chipotle cream.
- Add the crunch. Sprinkle 2 tbsp red tortilla strips and optional jalapeños over the sauces.
- Roll the burrito. Fold the sides toward the center, then roll tightly from the bottom up. Note: A tight roll prevents the nacho cheese from leaking during the grilling phase.
- Melt the exterior cheese. Wipe the skillet clean and return to medium heat. Sprinkle 1/2 cup shredded cheddar directly onto the pan in a circle.
- Sear the crust. Once the cheese begins to bubble, place the burrito seam side down on the cheese. Press down firmly with a spatula for 1-2 minutes until the cheese forms a rigid, mahogany colored crust.
- Finish and serve. Carefully lift the burrito with a spatula. The cheese should be fused to the tortilla. Serve immediately while the crust is shatter crisp.
Master the Heat and Texture
Getting the cheese crust right is the hardest part of a Grilled Cheese Burrito. If your heat is too high, the cheese burns before it sticks. If it's too low, it just melts into a puddle and stays greasy.
You are looking for that "Goldilocks" medium heat where the cheese bubbles and the oil starts to separate, but it hasn't turned black yet.
Why Your Cheese Won't Stick
If the cheese is sliding off the tortilla, it's usually because there is too much moisture or oil in the pan. Make sure you wipe the skillet completely clean after browning the beef. Any leftover beef fat will act as a lubricant and prevent the cheese from bonding to the flour tortilla.
Also, ensure you are using a sharp cheddar; milder cheeses have a higher moisture content and don't crisp up as effectively.
| Problem | Root Cause | Solution |
|---|---|---|
| Cheese is oily/floppy | Heat too low or too much oil | Increase heat to medium; wipe pan dry before adding cheese. |
| Tortilla is soggy | Wet fillings or slow rolling | Drain beef thoroughly; use steamed (not wet) rice. |
| Burrito bursts open | Overfilling | Limit fillings to the center 1/3 of the tortilla. |
Common Mistakes Checklist
- ✓ Use room temperature tortillas (cold ones crack and leak).
- ✓ Shred your own cheese from a block (avoids anti clumping powders).
- ✓ Pat the pickled jalapeños dry before adding (prevents steam pockets).
- ✓ Let the rice cool slightly before assembly (prevents the tortilla from steaming from the inside).
- ✓ Press the burrito firmly into the cheese for the full 2 minutes.
Guidelines for Adjusting Yields
When scaling this recipe down for a solo dinner, the math is simple. Use a small 8 inch skillet and half a pound of beef. You can freeze the remaining beef for another night. For a half batch, use one small egg's worth of liquid if you were making a dough, but here, just reduce the water and seasoning by half.
The cook time for the beef will drop by about 2 minutes since there is less thermal mass in the pan.
If you are scaling up for a party of eight, do not try to fit eight burritos in one pan. The cheese needs space to spread and crisp. I recommend using two skillets simultaneously or keeping finished burritos in a 200°F oven on a wire rack.
Avoid placing them directly on a baking sheet, as the bottom cheese crust will lose its shatter crisp texture and become chewy. Use a wire rack so air can circulate around the entire mahogany crust.
Debunking Common Burrito Myths
"You need oil to fry the burrito." This is a huge misconception. The cheddar cheese itself contains enough fat to fry the exterior. Adding extra oil or butter will actually prevent the cheese from becoming rigid and "shatter crisp." The fat in the cheese renders out, and the milk solids fry in that fat, creating the crust.
"Any cheese will work for the crust." Actually, low-fat cheeses or soft cheeses like mozzarella will never give you that rigid, mahogany finish. You need the specific fat to protein ratio found in sharp cheddar or Monterey Jack.
Mozzarella will just stay stringy and gooey, which is great for a pizza but terrible for a structural burrito crust.
"Steaming the tortilla is optional." While it feels like an extra step, heating your tortilla for 10 seconds makes the gluten more pliable. This allows you to roll a tighter burrito, which is the only way to ensure the nacho cheese doesn't leak out and ruin your beautiful cheese crust in the skillet.
Substitutions for Diverse Tastes
| Original Ingredient | Substitute | Why It Works |
|---|---|---|
| Ground Beef | Black Beans | High protein and fiber. Note: Mash slightly to help them stay inside the wrap. |
| Nacho Cheese | Queso Blanco | Creamier and milder. Note: Results in a less "fast food" style flavor. |
| Flour Tortilla | Corn Tortilla | Traditional corn flavor. Note: Must use two small ones (taco style) as they don't roll as large. |
If you are looking for a completely different flavor profile while keeping the "grilled cheese" soul, you might enjoy a Spinach Ricotta Grilled Cheese recipe. It uses the same logic of a crisp exterior but leans into Mediterranean flavors like tangy tomatoes and velvety ricotta.
Handling Leftovers and Zero Waste
Storage: Store assembled (but not yet grilled) burritos in the fridge for up to 3 days. Wrap them tightly in foil to prevent the tortilla from drying out. If you have already grilled the cheese crust, it is best eaten immediately, but it can be stored for 24 hours.
Reheating: To revive that crust, avoid the microwave at all costs. The microwave will turn your crisp cheese into a rubbery mess. Instead, place the burrito back in a dry skillet over medium low heat for 3-4 minutes per side.
This will slowly melt the interior while re crisping the exterior.
Zero Waste: Don't throw away the leftover chipotle peppers! Mince the remaining peppers in the tin and freeze them in an ice cube tray with a little bit of the adobo sauce.
Each cube is roughly one tablespoon, perfect for the next time you make this recipe or for adding smoky heat to a morning scramble. If you have leftover lime cilantro rice, it makes an excellent base for a quick fried rice the next day.
Perfect Pairings for Your Meal
Since this burrito is incredibly rich and savory, you want sides that offer acidity and freshness to balance the palate. A simple cucumber and radish salad with a vinegary dressing works wonders. The crunch of the fresh vegetables offsets the velvety interior of the burrito.
If you want to stay in the theme of high efficiency comfort, serve this with a side of quick pickled onions. Simply slice a red onion thin and submerge it in lime juice and salt for 10 minutes while you cook the beef.
The bright pink onions add a pop of color and a sharp tang that cuts right through the nacho cheese. For a dipping sauce, a side of cool salsa verde provides a herbal, tart contrast to the smoky chipotle cream.
Honestly, a simple bowl of chilled watermelon chunks is also a surprisingly refreshing way to end such a savory meal.

Very High in Sodium
1780 mg of sodium per serving (77% of daily value)
The American Heart Association recommends limiting sodium intake to no more than 2,300mg per day, ideally aiming for 1,500mg for most adults.
Tips to Reduce Sodium
-
Swap Nacho Cheese Sauce-25%
The nacho cheese sauce is a major sodium contributor. Replace it with a low-sodium cheese alternative or a homemade sauce using nutritional yeast for cheesiness and low-sodium broth.
-
Rethink Taco Seasoning-20%
Pre-made taco seasonings are often loaded with sodium. Create your own blend using unsalted spices like paprika, cumin, chili powder, garlic powder, and onion powder, and add a pinch of salt only if needed.
-
Control Chipotle Peppers-15%
Chipotle peppers in adobo sauce can be high in sodium. Use only a small amount, or rinse them under water before mincing to reduce sodium content.
-
Choose Low-Sodium Tortillas-5%
While not the primary source, some tortillas can contribute sodium. Look for brands that are specifically labeled as low-sodium or check the nutrition facts panel.
-
Boost Flavor with Fresh Herbs and Spices
Emphasize the use of fresh herbs like cilantro and lime zest, along with a wider variety of unsalted spices such as coriander, smoked paprika, and oregano, to enhance flavor without adding sodium.
-
Opt for Low-Sodium Sour Cream-5%
If available, choose a light or low-sodium version of sour cream. If not, regular sour cream contributes a smaller amount of sodium compared to other ingredients.
Recipe FAQs
What is in a grilled cheese burrito?
The filling includes seasoned ground beef, lime infused rice, nacho cheese, chipotle sour cream, and red tortilla strips. The exterior is finished by searing the burrito directly onto a layer of melted sharp cheddar cheese in the skillet.
What cheese is good for a burrito?
Sharp cheddar is best for the exterior crust. Shred it from a block yourself to ensure it melts into a rigid, mahogany crust without the anti clumping powders found in pre-shredded bags.
What to put in a grilled burrito?
Stick to the core ingredients of ground beef, lime rice, nacho cheese, and chipotle cream for the best structure. You can also add pickled jalapeños, but ensure you pat them dry first to prevent excess steam from softening the tortilla.
Is there a grilled cheese burrito at chipotle?
No, this specific recipe is a homemade version designed to replicate the signature grilled cheese-crust technique at home. If you enjoy mastering the heat controlled crust technique used here, you can apply similar sensory doneness cues to our Baked Feta Pasta for perfectly caramelized edges.
How to keep the tortilla from cracking while rolling?
Use room temperature tortillas for maximum flexibility. Cold tortillas are brittle and prone to tearing when folded, so let them sit on the counter for a few minutes before assembly.
How to get a crispy cheese crust?
Sprinkle a half cup of shredded cheddar directly onto a medium heated skillet and press the burrito into it. Hold it firmly with a spatula for one to two minutes until the cheese is browned and rigid.
Is it true I can use corn tortillas for this burrito?
Yes, you can, but you must overlap two small corn tortillas to mimic the size of one large flour wrap. Since corn tortillas are smaller and less pliable, they require this double layer technique to hold the seasoned beef and rice filling securely.
Grilled Cheese Burrito
Ingredients:
Instructions:
Nutrition Facts:
| Calories | 942 calories |
|---|---|
| Protein | 49.2 g |
| Fat | 47.8 g |
| Carbs | 76.4 g |
| Fiber | 4.2 g |
| Sugar | 4.8 g |
| Sodium | 1780 mg |
