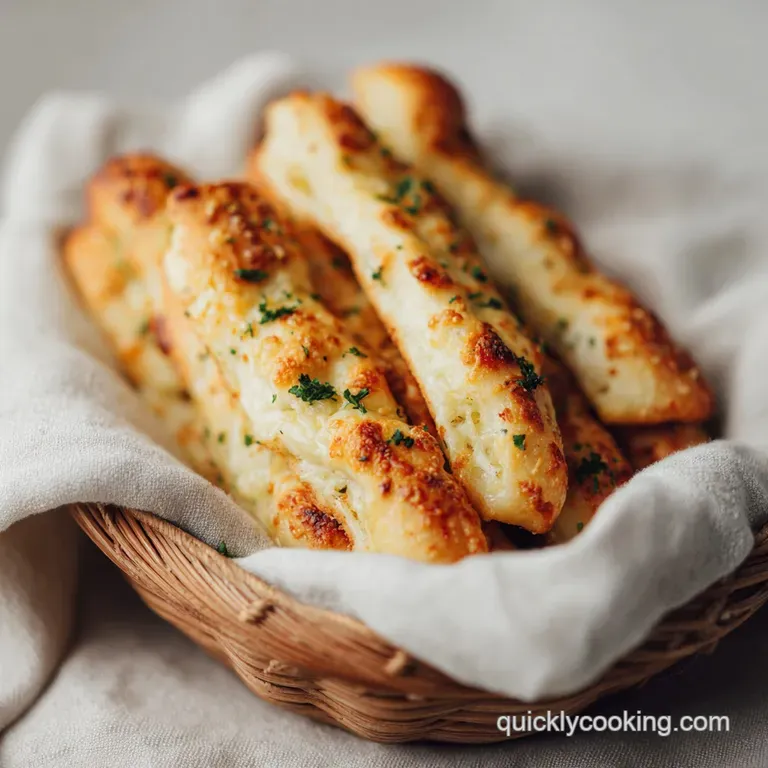
Cheesy Breadsticks: Golden and Crispy
- Time: Active 10 minutes, Passive 12 minutes, Total 22 minutes
- Flavor/Texture Hook: Shatter crisp bottom with a velvety, pulling cheese top
- Perfect for: Game night, busy weeknights, or as a fast side for pasta
- How to Make the Best Cheesy Breadsticks
- Essential Specs for Fast Success
- Component Deep Dive and Analysis
- Gathering Simple Budget Friendly Ingredients
- Basic Tools for Maximum Crunch
- Simple Steps for Cheesy Results
- Fixing Common Breadstick Baking Issues
- Scaling This Recipe for a Party
- Tasty Flavor and Diet Variations
- Storing and Saving Your Leftovers
- Making Your Appetizer Look Stunning
- Common Myths Debunked
- Recipe FAQs
- 📝 Recipe Card
How to Make the Best Cheesy Breadsticks
The aroma of garlic butter hitting a hot oven is something that instantly pulls everyone into the kitchen. I remember the first time I tried making these, I was starving after a long shift and only had a bag of pre shredded cheese and some store-bought dough.
I didn't want to wait for a slow rise or deal with flour all over my counters. I just wanted something that would sizzle and satisfy that specific craving for salty, buttery carbs without a massive cleanup or a huge bill.
Right then, I realized that the secret isn't in expensive artisan ingredients but in how you handle the heat. When you dimple that dough with your fingertips, you create little valleys where the garlic butter pools and the cheese anchors itself. It’s a fast win that feels like a total treat.
We're talking about a 22 minute turnaround from "I'm hungry" to pulling a pan of bubbling, golden goodness out of the oven. Trust me, once you hear that first crunch, you'll never bother with the delivery version again.
We've all been there, looking at a menu and seeing a tiny order of breadsticks for ten bucks. It's wild when you realize you can make 13 servings at home for a fraction of that cost.
This cheesy breadsticks recipe is my go to hack because it uses basic pantry staples like garlic powder and dried oregano to create a flavor profile that rivals any big name pizza joint.
It’s simple, it’s fast, and it works every single time because we're focusing on the mechanics of the melt.
Essential Specs for Fast Success
Before we get our hands into the dough, let's talk about why this specific setup works. We are aiming for a high intensity bake at 425°F (220°C).
This temperature is crucial because it triggers a rapid expansion in the dough, creating those airy pockets we love, while simultaneously browning the cheese before the bread turns into a brick. It's a fine balance, but 12 minutes is the sweet spot for that mahogany finish.
Heat Intensity: The 425°F (220°C) environment ensures the cheese fats render quickly, frying the top layer of the crust.
Friction Control: Using olive oil and cornmeal on the pan creates a non stick barrier that also adds a gritty, professional style crunch to the bottom.
Emulsion Stability: Whisking the melted butter with garlic powder and Italian seasoning creates a thick glaze that stays on top of the dough rather than soaking in and making it soggy.
Hydration Management: Letting the dough rest if it snaps back allows the gluten to relax, which is the only way to get that thin, even stretch without tearing.
| Method | Time | Texture | Best For |
|---|---|---|---|
| Standard Oven | 12 minutes | Shatter crisp bottom, chewy middle | Most home kitchens and bulk batches |
| Air Fryer | 8 minutes | Extra crunchy edges, very fast | Small portions or reheating leftovers |
| Pizza Stone | 10 minutes | Charred, bubbly, artisan style | Those who want a smoky, wood fired vibe |
If you are cooking for a crowd, the standard oven method is your best friend. It allows you to use a large rimmed baking sheet to maximize your surface area. This means more "edge pieces" which, let's be honest, are the best part.
If you’re just looking for a quick snack for one or two, the air fryer is a great flavor hack that saves even more time on the preheat.
Component Deep Dive and Analysis
Understanding what each ingredient does helps you make better decisions in the kitchen. For example, why do we use both mozzarella and Parmesan? It isn't just for the taste. Mozzarella provides that iconic velvety pull and moisture, while Parmesan adds the salt and the structural "lace" that browns into those beautiful dark spots.
It's a team effort that gives you the best of both worlds.
| Ingredient | Science Role | Pro Secret |
|---|---|---|
| 1 lb Pizza Dough | Structural base | Bring to room temperature for 30 mins to avoid the "snap back" effect. |
| Whole milk Mozzarella | Fat and moisture | Shred it yourself from a block; pre shredded has cellulose that prevents a smooth melt. |
| Cornmeal | Thermal barrier | It creates tiny air gaps between the dough and pan for a crispier undercarriage. |
| Garlic Butter Glaze | Flavor and browning | The fats in the butter help the Italian seasoning bloom and release its oils. |
Using whole milk mozzarella is one of those budget friendly hacks that makes a world of difference. The higher fat content means it melts at a lower temperature and stays fluid longer. If you use the low-fat or "part skim" stuff, you’ll find the cheese gets tough and rubbery once it cools down.
Since we're making easy homemade cheesy breadsticks, we want that indulgence without the gourmet price tag.
Gathering Simple Budget Friendly Ingredients
You don't need a trip to a specialty grocery store for this. Most of these items are probably sitting in your pantry right now. The beauty of this garlic cheesy breadsticks setup is that it relies on dried herbs, which actually stand up better to the high heat of the oven than fresh ones, which can often burn and turn bitter.
- 1 lb pizza dough: You can grab this from the deli section or use a dry mix. Why this? It provides the gluten structure needed for a chewy, bread like interior.
- 2 tbsp extra virgin olive oil: Use this to coat the pan. Why this? It has a high enough smoke point for 425°F and adds a fruity depth.
- 1 tbsp cornmeal: Just a sprinkle on the oiled pan. Why this? Prevents sticking and adds that classic "pizza shop" texture to the bottom.
- 2 cups whole milk mozzarella: Freshly shredded is the way to go. Why this? Provides the best melt and those long, dramatic cheese pulls.
- 1/2 cup Parmesan cheese: Finely grated for a salty kick. Why this? Adds a sharp flavor and helps create a golden brown crust.
- 1/2 tsp dried oregano: Sprinkle this over the cheese. Why this? Adds an earthy, floral note that cuts through the heavy fat.
- 3 tbsp unsalted butter: Melted for the base glaze. Why this? It carries the garlic flavor and helps the top of the dough brown.
- 1 tsp garlic powder: Mixed into the butter. Why this? Distributes flavor more evenly than fresh garlic, which can burn in 12 mins.
- 1 tsp dried Italian seasoning: A blend of herbs for complexity. Why this? A fast way to add basil, rosemary, and thyme notes without buying five jars.
- 1/4 tsp fine sea salt: Just a pinch. Why this? Enhances the natural sweetness of the dough and the richness of the butter.
| Original Ingredient | Substitute | Why It Works |
|---|---|---|
| Pizza Dough (1 lb) | Canned Biscuit Dough | Similar yeast profile. Note: Will be flakier and more buttery than traditional dough. |
| Mozzarella Cheese | Monterey Jack | High fat and moisture. Note: Very mild flavor, great for melting but lacks the "pull." |
| Garlic Powder | Fresh Garlic (2 cloves) | Intense aroma. Note: Mince very finely and mix with butter to prevent burning. |
Using canned biscuits is a classic "mom hack" for when you're in a total rush. You just press the biscuits together into one large sheet and follow the rest of the recipe. It won't have quite the same chew as a traditional cheesy breadsticks with pizza dough version, but in a pinch, it's a flavor winner. If you're looking for more fast cheesy snacks, pair this with a Mozzarella Sticks Recipe for the ultimate party platter.
Basic Tools for Maximum Crunch
You don't need a fancy pizza oven or a stone for this. In fact, a simple rimmed baking sheet is actually better for these breadsticks because it allows you to press the dough right into the corners. This creates those crispy, fried edges where the cheese meets the metal.
A good pastry brush is also helpful for getting an even layer of that garlic butter without deflating the dough.
I usually just use a standard half sheet pan. If you find your pans are a bit thin, you might want to double them up to prevent the bottom from browning too fast before the cheese bubbles. And for the love of all things crispy, use a pizza cutter or a very sharp chef's knife.
Using a dull blade will just drag the cheese off the bread and leave you with a mess.
- Large Rimmed Baking Sheet: Essential for containing the oil and shaping the dough.
- Pastry Brush: For even distribution of the garlic herb emulsion.
- Box Grater: Shredding your own cheese is a fast hack for a better melt.
- Pizza Cutter: Makes those clean, straight cuts through the hot cheese.
Simple Steps for Cheesy Results
- Preheat your oven to 425°F (220°C) and generously oil a large rimmed baking sheet with the olive oil. Note: This high heat is what gives you the crispy bottom.
- Place the dough in the center of the pan and use your fingertips to dimple and stretch it toward the edges.
- Let the dough rest for 5 minutes if it starts snapping back toward the center. Wait until it stays in place before adding toppings.
- Whisk together the melted butter, garlic powder, Italian seasoning, and sea salt in a small bowl.
- Brush the dough surface lightly with about half of the garlic butter mixture.
- Sprinkle the shredded mozzarella and Parmesan evenly over the dough, pushing it all the way to the edges.
- Bake for 10–12 minutes until the cheese is bubbling with mahogany toasted spots.
- Remove from the oven and immediately brush with the remaining garlic butter for a glossy finish.
- Let it sit for 2 minutes before using a pizza cutter to slice into long, even sticks.
Fixing Common Breadstick Baking Issues
One of the most frustrating things is pulling a pan out and finding a soggy, limp middle. This usually happens if the dough was too cold or if you used too much oil. When the dough is cold, it takes longer for the center to heat up, but the cheese on top is already melting and releasing oils.
This creates a barrier that prevents the steam from escaping the bread.
Why Your Breadsticks Are Soggy
If the center feels doughy or wet, it’s often because the oven wasn't fully preheated or the dough was used straight from the fridge. Always give your oven at least 20 minutes to reach 425°F (220°C).
Another culprit is using too much "wet" topping if you decide to add veggies, make sure they are patted dry.
Why Your Cheese Is Oily
Whole milk mozzarella is fatty, which is good, but if it gets too hot too fast, the fat can separate. If you see a pool of oil, don't panic. Just blot it gently with a paper towel before cutting. This often happens with lower quality cheeses or if the Parmesan is very oily.
| Problem | Root Cause | Solution |
|---|---|---|
| Dough won't stretch | Cold gluten | Cover and let it sit at room temperature for 10 more minutes. |
| Bottom is burnt | Dark pan or thin metal | Move the rack to a higher position or use a lighter colored baking sheet. |
| Cheese didn't brown | Low oven temp | Switch to the broiler for the last 60 seconds of cooking. |
- ✓ Always preheat your oven for at least 20 minutes to ensure even heat distribution.
- ✓ Pat your dough dry if it has any condensation on it before oiling.
- ✓ Shred your mozzarella from a block to avoid the anti clumping powder in pre shredded bags.
- ✓ Don't skip the cornmeal; it’s the secret to a professional feeling crunch.
- ✓ Brush the second half of the butter after baking for that restaurant style shine.
Scaling This Recipe for a Party
If you're hosting a big game day or a birthday party, you’ll definitely want to double or triple this. Because we're making quick cheesy breadsticks, the workflow is pretty straightforward.
However, remember that most home ovens can't handle four pans at once without the temperature dropping significantly.
When scaling up, it's best to work in batches. While one pan is baking, you can be dimpling and prepping the next one. If you double the recipe (2 lbs of dough), you don't actually need to double the salt or the Italian seasoning increase those by about 1.5x to keep the flavors from becoming overwhelming.
- For 6 people (Half batch): Use 1/2 lb of dough and a smaller 9x13 pan. Reduce bake time by about 2 minutes.
- For 26 people (Double batch): Use two large baking sheets. Rotate the pans halfway through the 12 minute bake to ensure even browning.
- Baking 2x: If you have a convection oven, you can do both at once, but lower the temp to 400°F (200°C) to account for the moving air.
If you find yourself making a massive batch of appetizers, you might want to mix things up. Check out my Cheesy Potato Burritos for another budget friendly option that uses similar ingredients in a totally different way.
Tasty Flavor and Diet Variations
The classic garlic and cheese combo is hard to beat, but sometimes you want a little more personality. One of my favorite budget friendly hacks is adding a "spicy kick" using just a few pantry items. It transforms the dish without adding more than a few cents to the total cost.
The Spicy Jalapeño Kick
Before you put the cheese on, spread a thin layer of canned diced jalapeños (drained well). Top with the mozzarella and a sprinkle of red pepper flakes. The heat cuts through the richness of the butter and cheese perfectly.
It's a fast way to make homemade cheesy breadsticks feel a bit more grown up.
The gluten-free Swap
You can absolutely use a gluten-free pizza dough for this. Just be aware that GF dough doesn't "stretch" the same way. You'll need to press it into the pan using a bit more oil on your hands. Since GF dough tends to brown faster, keep an eye on it at the 8 minute mark.
- Everything Bagel Style: Swap the Italian seasoning for everything bagel spice.
- Pesto Swirl: Dollop small bits of pesto over the cheese before baking.
- Bacon and Ranch: Add cooked bacon bits and serve with a side of ranch dressing.
Storing and Saving Your Leftovers
Breadsticks are best eaten fresh, but let's be real sometimes we make too many. If you have leftovers, don't just throw them in a plastic bag while they're hot. This will trap steam and turn your crispy crust into a rubbery mess. Let them cool completely on a wire rack first.
Fridge Life: These will stay good in an airtight container for up to 4 days. To reheat, avoid the microwave if you can. An air fryer at 350°F for 3 minutes will bring back that "shatter" crunch.
Freezing: You can freeze these for up to 2 months. Wrap them in foil and then place in a freezer bag. To reheat, go straight from the freezer to a 375°F oven for about 8 minutes.
Zero Waste Hack: If you have end pieces that got a bit too crunchy or dry, don't toss them! Cut them into small cubes and toss them in a salad as cheesy garlic croutons. They add incredible flavor to a simple Caesar salad.
You can also pulse them in a food processor to make the most incredible cheesy breadcrumbs for topping macaroni and cheese or pasta bakes.
Making Your Appetizer Look Stunning
Presentation is half the fun, especially when you've made the best cheesy breadsticks recipe on a budget. Instead of just piling them on a plate, try a "dip and pull" setup.
Place a small bowl of marinara or warm ranch dressing in the center of a large wooden board and arrange the sticks in a sunburst pattern around it.
Dusting the sticks with a tiny bit more fresh Parmesan or a sprinkle of chopped parsley right before serving adds a pop of color and makes them look like they came from a high end bistro. It’s a simple hack that takes about ten seconds but makes a huge difference in how they're received.
- The Fan Out: Overlap the sticks slightly to show off the cheesy layers.
- Dipping Duos: Serve with both a red sauce (marinara) and a white sauce (garlic butter or ranch).
- The Herb Dust: A final pinch of oregano adds aroma as the sticks are carried to the table.
Common Myths Debunked
One big myth is that you need "00 flour" or some special high protein flour to get a good crust. While that’s great for artisan loaves, for a quick cheesy breadsticks recipe, standard all purpose dough from the store works perfectly because the fats in the cheese and butter provide the flavor and tenderness.
The high heat does the rest of the work.
Another misconception is that you should "seal in the moisture" by covering the pan. In reality, we want the moisture to escape so the bottom can fry in the olive oil. Covering the pan would just steam the dough, giving you a texture more like a soft dinner roll rather than a crispy breadstick.
We're looking for that sizzle, not a steam.
Finally, don't believe the idea that you have to use fresh garlic for it to taste "real." In a over high heat bake, fresh garlic can often turn bitter or burn if it's on the surface.
Garlic powder, when emulsified with butter, provides a more consistent, mellow flavor that permeates the entire stick without the risk of those burnt, acrid bits. This is one of those budget hacks where the cheaper option actually yields a better result for this specific cooking method.

Recipe FAQs
Which cheese is best for cheese sticks?
Use a combination of whole milk mozzarella and finely grated Parmesan. Whole milk mozzarella provides that classic gooey melt, while the Parmesan adds a sharper salty depth that browns beautifully in the oven.
What are the two ingredient cottage cheese breadsticks?
This recipe does not use cottage cheese. We use standard pizza dough, melted butter, and a blend of mozzarella and Parmesan to achieve the authentic texture and flavor profile.
Is breadstick dough the same as pizza dough?
Yes, they are essentially the same. Using 1 lb of standard pizza dough serves as the perfect base for these sticks; if you enjoyed the ease of working with this dough, see how we apply similar Italian flavor layering techniques to create balanced vegetable dishes.
What herbs go well with cheesy breadsticks?
Dried Italian seasoning and oregano are the gold standard. These herbs complement the garlic butter emulsion perfectly without overwhelming the flavor of the melted mozzarella.
How to keep the crust from becoming rubbery?
Cool the breadsticks completely on a wire rack before storing. Placing them in a container while warm traps steam, which softens the crust; always reheat in an air fryer at 350°F for 3 minutes to restore the original crunch.
How to handle dough that snaps back while stretching?
Let the dough rest for 5 minutes if it resists stretching. This allows the gluten to relax, making it much easier to dimple and stretch the dough all the way to the edges of your oiled baking sheet.
How to tell when the breadsticks are finished baking?
Bake until the cheese bubbles with mahogany toasted spots and the crust reaches a deep golden brown. This usually takes between 10 12 minutes in an oven preheated to 425°F.
Homemade Cheesy Breadsticks
Ingredients:
Instructions:
Nutrition Facts:
| Calories | 203 calories |
|---|---|
| Protein | 8.1g |
| Fat | 10.7g |
| Carbs | 18.2g |
| Fiber | 0.6g |
| Sugar | 0.8g |
| Sodium | 338.5mg |
