Danish Butter Cookies: Shatteringly Crisp
- Time: Active 30 minutes, Passive 15 minutes, Total 45 minutes
- Flavor/Texture Hook: Shatteringly crisp with a velvety, vanilla forward finish
- Perfect for: Holiday gifting, tea time snacks, or budget-friendly gourmet treats
- Authentic Danish Butter Cookies for the Ultimate Blue Tin
- Science Behind the Snap and Shatter of Butter Cookies
- Essential Yield and Timing Specs for Fast Cookie Success
- Simple Ingredients That Create Professional Quality Butter Cookies
- Minimal Tools Required for Piping Elegant Butter Cookie Shapes
- Step by Step Guide to Perfecting Your Piping Technique
- Fixing Common Dough Mistakes to Ensure Sharp Defined Ridges
- Flavorful Twists to Customize Your Homemade Butter Cookie Batch
- Scaling the Batch for Large Gifting Tins
- Science Based Myths About Butter Cookies
- Smart Storage and Zero Waste Tips for Long Lasting Freshness
- Classic Garnish Ideas for That Signature European Bakery Look
- Recipe FAQs
- 📝 Recipe Card
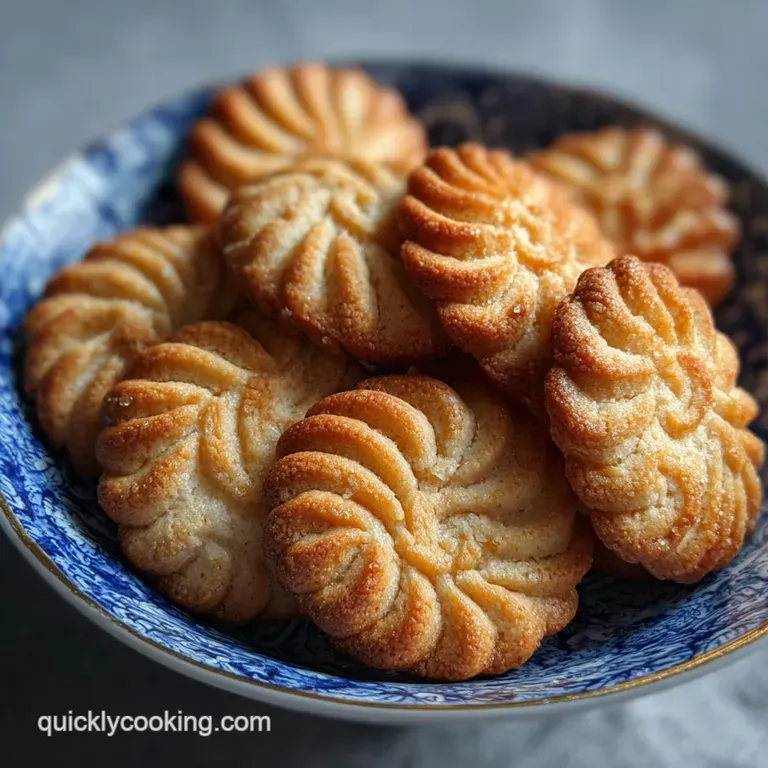
Authentic Danish Butter Cookies for the Ultimate Blue Tin
I still remember the "clink" of the metal lid on that iconic blue tin sitting on my grandmother's coffee table. The air would instantly fill with the scent of toasted sugar and high-quality fat the second the seal broke. But let's be honest, we've all been hurt before.
You open that tin hoping for a buttery treat, only to find a sewing kit. That disappointment is what drove me to recreate these at home, but without the three hour labor usually associated with piped cookies.
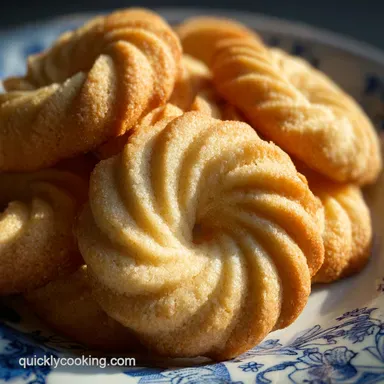
We've all seen recipes that result in a blobby, greasy mess that looks nothing like the beautiful swirls we expect. I spent a weekend throwing out batches that spread too much or were so stiff they broke my piping bag. This version is built for speed and reliability.
We're using a specific ratio that allows the dough to flow through a star tip while maintaining every single ridge once it hits the heat.
You don't need a massive budget or rare ingredients to get that high end European bakery result. By focusing on the temperature of your fat and the aeration of the sugar, we create a structure that snaps when you bite it. It's about working smart, not hard.
Let's get into how we make these fast, cheap, and undeniably better than the store-bought version.
Science Behind the Snap and Shatter of Butter Cookies
The Physics of Defined Ridges: High fat butter combined with a lower moisture content prevents the flour's gluten from developing, ensuring the cookie holds its piped shape rather than melting into a puddle.
This lack of water means the sugar stays in a crystalline state longer, creating that signature "snap" instead of a chewy texture.
- Fat Plasticity: Keeping butter at exactly 65°F allows it to hold air bubbles during creaming, which act as tiny leavening agents without the need for baking powder.
- Starch Suspension: Sifting the flour ensures it integrates quickly with the fat, coating every granule to prevent toughness.
- Solidity through Cooling: The almond extract doesn't just add flavor; its alcohol content evaporates rapidly in the oven, helping to "set" the outer crust of the cookie faster.
- Sugar Recrystallization: As the cookies cool, the granulated sugar re solidifies, providing the structural integrity needed for a shattering crumb.
| Method | Time | Texture | Best For |
|---|---|---|---|
| Piped Swirls | 30 minutes | Extra crispy ridges | Gifting and classic look |
| Sliced Log | 15 minutes | Dense and sandy | High speed batch prep |
| Cookie Press | 20 minutes | Delicate and thin | Large parties and variety |
Choosing the right method depends on your time. If you are in a rush, the sliced log method skips the piping bag entirely, though you lose those beautiful ridges that catch the light.
For the most authentic experience, the piped swirls are the way to go, especially if you want to mimic the variety found in the classic tins.
Essential Yield and Timing Specs for Fast Cookie Success
| Component | Detail | Pro Secret |
|---|---|---|
| European Butter | Structural Fat | Use 82% fat content for a richer, velvety mouthfeel. |
| Granulated Sugar | Sweetener/Texture | Creaming for 3 minutes creates the micro air pockets needed for lift. |
| All Purpose Flour | The Framework | Leveling the cup is non negotiable to prevent a dry, sandy cookie. |
Simple Ingredients That Create Professional Quality Butter Cookies
- 1 cup (226g) Unsalted European style butter: Must be softened but cool (65°F). Why this? Higher fat and lower water content prevent the dough from spreading excessively.
- 3/4 cup (150g) Granulated white sugar: Regular table sugar works best here. Why this? Provides the necessary grit for aeration during the creaming process.
- 1 large egg: Ensure it is room temperature to prevent the butter from curdling. Why this? Acts as the primary binder and provides a hint of moisture.
- 2 tsp vanilla extract: Use a good quality extract for the best aroma. Why this? The primary flavor profile that defines a true Danish cookie.
- 1/4 tsp almond extract: A tiny amount goes a long way. Why this? Adds that "bakery" mystery note that rounds out the sweetness.
- 1/2 tsp fine sea salt: Don't use coarse salt here. Why this? Dissolves instantly to balance the heavy fat and sugar.
- 2 cups (250g) all purpose flour: Must be leveled and sifted before adding. Why this? Sifting ensures a light, velvety crumb without any flour clumps.
For the butter, if you're on a budget, regular unsalted butter works, but you might need to chill the dough for 10 minutes before piping to keep it firm. If you're out of vanilla extract, a vanilla bean paste is a luxurious swap, though it will add little black specks to your cookies. If you're looking for another project after this, the technique of creaming fat is very similar to what I use in my Sugar Cookie Cheesecake recipe.
Minimal Tools Required for Piping Elegant Butter Cookie Shapes
You don't need a kitchen full of gadgets, but a few specific items make this fast. A stand mixer is the most efficient way to cream the butter, but a hand mixer works if you've got the arm strength for 5 minutes of whisking. The most important tool is your piping bag.
Don't use the thin plastic ones; they will burst under the pressure of this dough. A canvas bag or a heavy duty silicone bag is your best friend here.
You will also need a large open star tip (like a Wilton 1M or 2D). This creates the deep grooves that stay defined during baking. If you don't have a piping bag, you can use a sturdy freezer bag with a corner snipped off, but you won't get those professional ridges.
A couple of heavy weight baking sheets and parchment paper are the final essentials. Avoid greasing the pans directly, as this encourages the cookies to slide and spread.
step-by-step Guide to Perfecting Your Piping Technique

- Prep the station. Preheat your oven to 350°F and line two large baking sheets with parchment paper. Note: Parchment provides the "grip" the dough needs to stay in place while piping.
- Aerate the fat. Place the 226g of cool, softened butter and 150g of sugar in your mixer bowl. Beat on medium high for 3 to 4 minutes until the mixture is pale, fluffy, and looks like whipped cream.
- Emulsify the flavors. Add the egg, vanilla extract, almond extract, and salt. Beat for another minute until the liquid is fully incorporated and the batter is smooth.
- Incorporate the flour. Turn the mixer to the lowest setting and gradually add the 250g of sifted flour. Mix until just combined and no white streaks remain. Note: Overmixing at this stage will make the cookies tough.
- Load the bag. Fit your piping bag with a large star tip and fill it with about half of the dough. Note: Only filling half makes it much easier to squeeze and control the shapes.
- Pipe the swirls. Hold the bag vertically and pipe 2 inch circles or "S" shapes onto the parchment. until you have about 1 inch of space between each cookie.
- The Golden Bake. Slide the sheets into the oven and bake for 12 to 15 minutes. until the edges are just barely golden and the centers look set.
- Cooling phase. Let the cookies sit on the hot pan for 5 minutes to firm up. until they can be moved without breaking.
- Final Set. Transfer to a wire rack to cool completely. This is when the final "snap" develops as the sugar cools.
Chef's Tip: If your kitchen is warm and the dough feels oily, pop the filled piping bag in the fridge for 5 minutes. This firms up the butter just enough to ensure the ridges don't melt away in the oven.
Fixing Common Dough Mistakes to Ensure Sharp Defined Ridges
Why Your Cookies Spread into Puddles
This is the most frequent heartbreak. Usually, it happens because the butter was too soft (approaching 70°F or higher) or the oven wasn't fully preheated. When the butter melts before the flour structure sets, the cookie collapses.
| Problem | Root Cause | Solution |
|---|---|---|
| Flat Cookies | Butter too warm | Chill piped cookies for 10 minutes before baking. |
| Tough Texture | Overmixed flour | Mix flour by hand or on the lowest speed only until combined. |
| Won't Pipe | Dough too cold | Hold the piping bag in your hands for a minute to let body heat soften it. |
Common Mistakes Checklist
- ✓ Always sift your flour to ensure there are no lumps that clog the piping tip.
- ✓ Never use a warm baking sheet; let them cool completely between batches.
- ✓ Use a kitchen scale for the flour; even an extra tablespoon can make the dough too stiff to pipe.
- ✓ Check your oven temp with an external thermometer; these cookies are sensitive to heat fluctuations.
- ✓ Don't skip the salt; it's what makes the butter flavor pop instead of just being sweet.
Flavorful Twists to Customize Your Homemade Butter Cookie Batch
While the classic vanilla almond combo is the gold standard, these are incredibly easy to dress up. You can dip half of the cooled cookie into melted dark chocolate and sprinkle with sea salt. It transforms a simple tea cookie into something that looks like it cost five dollars a piece at a boutique. If you are a fan of chocolate and want something with a bit more chew, check out my Chocolate Blossom Cookies recipe.
Another favorite variation is the "Christmas Style." Add a half teaspoon of cardamom to the flour mixture for a Scandinavian twist that smells like the holidays. You can also press a small piece of candied cherry or a single almond into the center of the swirls before baking. If you love the idea of a spiced cookie but want something even faster, my Cinnamon Roll Cookies recipe is a great efficiency focused alternative.
Scaling the Batch for Large Gifting Tins
When you need to make 50 or 100 cookies, scaling is straightforward but requires a few adjustments to keep the quality high.
- Scaling Down (1/2 Batch): Use one small egg or beat a large egg and use half by weight (about 25g). Reduce the baking time by 2 minutes as the smaller volume in the oven can lead to faster browning.
- Scaling Up (2x or 3x): Keep the spices and extracts at a 1.5x ratio first, then taste. Too much almond extract can become soapy in large quantities. Work in batches when piping; keep the extra dough in a cool spot (not the fridge) so it stays pliable.
| Premium Ingredient | Budget Alternative | Flavor Impact | Savings |
|---|---|---|---|
| Vanilla Bean | Vanilla Extract | Less visual speckling | Save $4-6 |
| European Butter | Store Brand Unsalted | Slightly less creamy | Save $3-5 |
| Almond Extract | Lemon Zest | Brighter, citrusy finish | Save $2 |
The budget swaps work because the high sugar content still provides the crunch you want. Using store brand butter might result in a slightly thinner cookie, but the flavor remains excellent as long as you don't overbake them.
Science Based Myths About Butter Cookies
One common misconception is that you need "special" cake flour for a delicate crumb. In reality, the high fat to flour ratio in Danish butter cookies does the work of tenderizing for you. All purpose flour actually provides the necessary protein structure to hold those intricate piped shapes.
Using cake flour can often result in a cookie that is too fragile to even pick up.
Another myth is that you must chill the dough for hours. While chilling helps with many cookies, if this dough gets too cold, it becomes impossible to pipe. You'll end up bursting your bag or hurting your wrist.
The "efficiency" secret is using cool butter (65°F) from the start, which gives you the perfect consistency for immediate piping without the wait time.
Smart Storage and Zero Waste Tips for Long Lasting Freshness
Storage Guidelines: These cookies are the kings of shelf life. Because of the low moisture content, they stay crisp for up to 2 weeks in an airtight container at room temperature.
If they do start to soften, you can refresh them in a 300°F oven for 3 minutes to drive out any absorbed humidity. For long term storage, they freeze beautifully for up to 3 months. Just make sure to layer them with parchment paper so the ridges don't rub off.
Zero Waste Tips: If you have broken cookies or crumbs at the bottom of your container, don't throw them out. These crumbs make an incredible crust for a tart or a base for a cheesecake. You can also fold them into softened vanilla ice cream. If you have leftover egg whites from other recipes, you can actually use them to make a quick royal icing to drizzle over these. If you're into no bake treats with crumbs, you'll love my Biscoff Truffles recipe.
Classic Garnish Ideas for That Signature European Bakery Look
To get that professional finish, consistency is your best friend. Try to pipe every cookie to the same 2 inch diameter. You can even trace circles on the underside of your parchment paper as a guide.
A light dusting of coarse sparkling sugar (sanding sugar) before they hit the oven gives them a beautiful shimmer and an extra crunch that mimics the high end brands.
For a final touch, once the cookies are cooled, you can fill the centers of the "O" shapes with a tiny dot of raspberry jam or lemon curd. It adds a pop of color and a tart contrast to the rich, buttery base. Just remember that adding jam will shorten the shelf life to about 3 days, as the moisture from the fruit will eventually soften the cookie. Keeping it simple with the classic vanilla almond flavor is usually the most efficient and crowd pleasing route. If you're looking for another classic, my The Chocolate Chip recipe is a great one to have in your back pocket for your next bake.

Recipe FAQs
What is the difference between Danish butter cookies and shortbread?
Danish butter cookies are generally crisper and piped. Shortbread relies on a higher ratio of fat to flour, resulting in a sandy, crumbly texture, often baked in simple shapes or pressed.
Danish cookies typically include egg and vanilla/almond, giving them a slightly more complex flavor and structure to hold piped forms.
What makes Danish butter cookies so good?
high-quality, high fat European butter provides superior flavor and texture. The best ones use a specific creaming technique to incorporate air, which keeps them light while the low moisture content ensures they snap perfectly when bitten.
What is the famous Danish brand of butter cookies?
Royal Dansk is the most famous brand, recognizable by its iconic blue tin. These cookies are known globally for their simple, buttery flavor and distinctive piped swirl shapes.
What country makes the best butter cookies?
Denmark generally holds the reputation for the definitive butter cookie standard. Their baking tradition emphasizes the pure flavor of high fat dairy, which is crucial for achieving the signature melt-in-your mouth quality.
How do I ensure my piped cookies hold their shape and don't spread?
Chill the dough or work quickly with cool butter (around 65°F). The key is preventing the fat from softening before the flour structure sets in the heat; mastering this fat ratio logic is also crucial for our Sugar Cookie Cheesecake recipe.
Can I substitute the almond extract for something else?
Yes, you can substitute with lemon zest for a brighter flavor profile. The almond extract provides a classic, slightly exotic note, but lemon zest adds a lovely acidic lift that cuts through the rich butter.
Is it true you need special flour to achieve that delicate, sandy crumb?
No, this is a common misconception. Standard all-purpose flour works well if you incorporate it gently and do not overmix; the high butter content does the primary tenderizing work, ensuring you get the necessary structure to hold those piped ridges.
Homemade Danish Butter Cookies
Ingredients:
Instructions:
Nutrition Facts:
| Calories | 187.6 kcal |
|---|---|
| Protein | 2.0 g |
| Fat | 11.1 g |
| Carbs | 20.1 g |
| Fiber | 0.4 g |
| Sugar | 8.8 g |
| Sodium | 69.4 mg |
