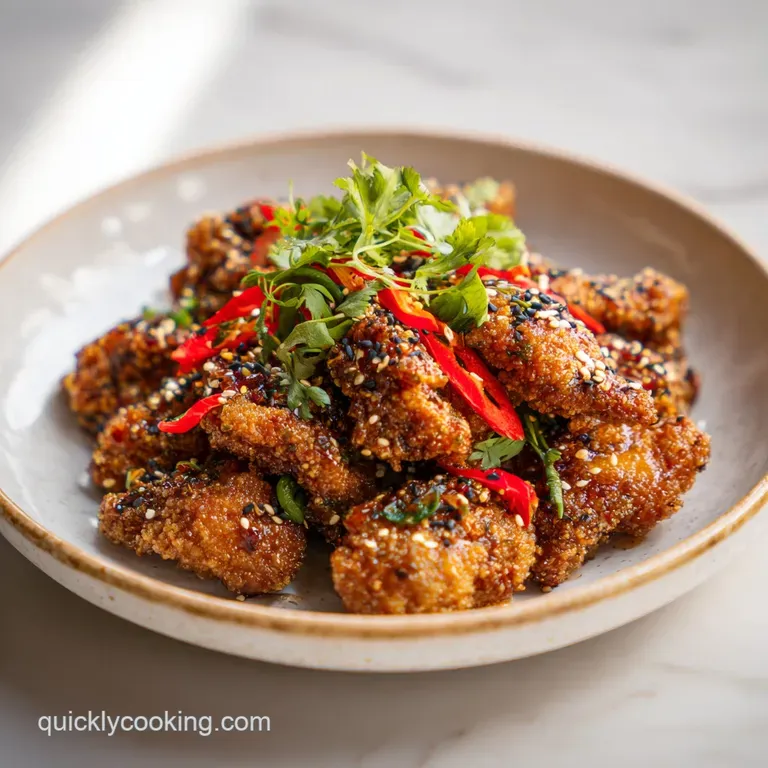
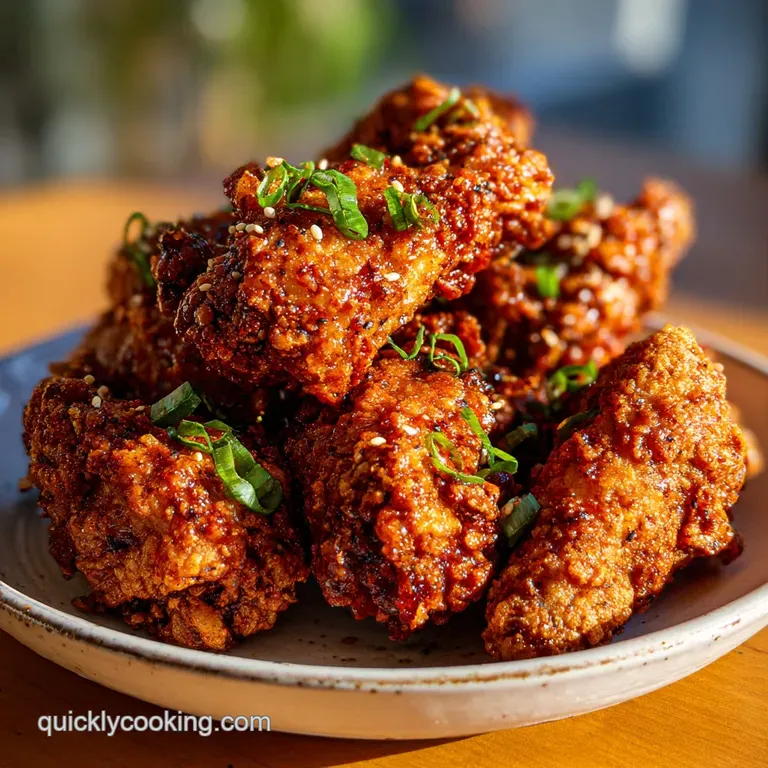
Korean Fried Chicken with Shatteringly Crisp Crust
- Time: Active 20 minutes, Passive 25 minutes, Total 45 minutes
- Flavor/Texture Hook: A glass like shatter followed by a velvety, spicy gochujang glaze.
- Perfect for: High impact weekend dinners or a crowd-pleasing game day spread.
- The Secret to Achieving Shatter Crisp Korean Fried Chicken
- Essential Recipe Specs for Perfect Results Every Time
- Gathering the Components for Your Signature Spicy Glaze
- The High Efficiency Kitchen Tools You Will Actually Need
- Executing the Three Step Flow for Maximum Culinary Impact
- Solving Texture Issues and Avoiding Common Frying Pitfalls
- Quick Substitutions and Flavor Variations for Every Palate
- Smart Storage and Efficient Reheating for Next Day Crunch
- Finishing Touches and Authentic Side Pairings for Service
- Very High in Sodium
- Recipe FAQs
- 📝 Recipe Card
The Secret to Achieving Shatter Crisp Korean Fried Chicken
Imagine standing on a neon lit corner in Seoul while the rain drums against the pavement, but all you can hear is the rhythmic, tectonic "crunch" coming from the small shop next to you.
That sound isn't just noise; it's the signature of a crust so thin and aerated it practically shatters like tempered glass the moment your teeth hit it. I remember my first attempt at home I ended up with a soggy, heavy mess that looked more like a sad nugget than the airy masterpiece I’d been craving.
It was a total disaster until I stopped treating it like standard southern chicken and started treating it like a science experiment in moisture management.
The real breakthrough happened when I realized we aren't just "cooking" the coating; we're dehydrating it. By the time that second fry is finished, the chicken should feel light, almost hollow to the touch, and the "sizzle" should have settled into a gentle hiss.
We’ve all been there, staring at a plate of limp poultry, but trust me on this: once you nail the balance of potato starch and the vodka trick, you’ll never look at a standard flour dredge the same way again.
It's about efficiency and precision, moving the chicken through the oil with purpose so it comes out golden and dry, not heavy with grease.
Getting this right means being okay with a little bit of a mess for a massive payoff. We’re going to move fast, keeping the oil temperature steady and the sauce ready to go the second the heat hits that second fry.
There’s no room for a leisurely pace here; we want that sauce to hit the hot crust and glaze it instantly, forming a lacquer that stays crispy until the very last bite. Let’s crack on and get that oil preheated, because once we start, it’s a high speed run to the finish line.
The Physics of the Shatter
Internal Steam Management: Double frying works by first setting the proteins and then, in the second pass, rapidly evaporating any residual moisture trapped in the crust's microscopic crevices.
This creates a rigid, lacy matrix of potato starch that stays structurally sound even when introduced to a high moisture sauce.
Chef Tip: Freeze your ginger for 10 minutes before grating. It prevents the ginger from turning into a stringy pulp and allows the grater to slice through the fibers cleanly, releasing more of that sharp, citrusy juice into your marinade.
Essential Recipe Specs for Perfect Results Every Time
To keep your kitchen running like a professional line, we need to hit specific markers. Accuracy is the difference between chicken that’s oily and chicken that’s truly "candy coated" in crunch.
| Thickness | Internal Temp | Rest Time | Visual Cue |
|---|---|---|---|
| 3 cm pieces | 74°C | 3 minutes | Uniform golden brown mahogany |
| 4 cm pieces | 74°C | 4 minutes | Deep amber with visible air bubbles |
| 5 cm pieces | 74°C | 5 minutes | Darker gold; no visible steam escaping |
Maintaining the flow of the kitchen means prepping your station before the first piece of chicken touches the oil. If you’re juggling the sauce while the chicken is in its first fry, you’ll miss the temperature dip, and your crust won't set correctly.
It’s all about the sequence: marinade, sauce prep, batter, then the double fry sprint.
Gathering the Components for Your Signature Spicy Glaze
Every ingredient in this list serves a mechanical purpose. We aren't just looking for flavor; we're looking for viscosity, caramelization, and a specific moisture to fat ratio. For the best results, stick to the exact quantities provided in the schema to ensure your batter doesn't become too thin or your sauce too runny.
- 2 lbs boneless chicken thighs: Cut into bite sized pieces. Why this? Thighs remain succulent and withstand the high heat of the double fry process better than breasts.
- 1 tsp salt & 1/2 tsp black pepper: The foundational seasoning for the meat itself.
- 1 tbsp grated ginger & 2 cloves minced garlic: These aromatic elements penetrate the protein during the quick 20 minute marinade.
- 2 tbsp vodka: Why this? Alcohol evaporates faster than water, creating more air pockets for a lighter, crispier crust.
- 1/2 cup potato starch: Why this? It has larger starch granules than cornstarch, leading to a much more substantial "crunch."
- 1/4 cup all purpose flour: Provides a bit of protein structure so the starch doesn't just flake off.
- 1/2 tsp baking powder: Releases CO2 when hitting the hot oil, further aerating the coating.
- 1/2 cup ice cold water: Keeping the batter cold prevents gluten development, ensuring the crust is crisp rather than bread like.
- 3 tbsp gochujang: The fermented backbone of the sauce, providing heat and body.
- 3 tbsp honey & 2 tbsp brown sugar: These provide the stickiness and help the sauce lacquer onto the chicken.
- 2 tbsp soy sauce & 1 tbsp rice vinegar: Balancing the sweetness with salt and acid.
- 1 tsp toasted sesame oil: Adds a nutty depth that rounds out the sharp heat.
- 4 cups vegetable oil: Use a high smoke point oil like canola or peanut for the frying stages.
| Component | Science Role | Pro Secret |
|---|---|---|
| Potato Starch | High Amylopectin | Always whisk the starch right before dipping; it settles quickly. |
| Vodka | Inhibits Gluten | Use 40% ABV vodka; it prevents the flour from becoming "bready." |
| Baking Powder | Leavening | Ensure it's fresh (less than 6 months old) for maximum lift. |
| Gochujang | Emulsification | Whisk into cold aromatics to prevent the paste from clumping. |
When you're looking for a similar punch of heat but want something faster for a Tuesday night, you might find my Korean Spicy Chicken recipe to be a great alternative that skips the frying but keeps the soul of the dish.
The High Efficiency Kitchen Tools You Will Actually Need
Efficiency in frying requires the right vessel. A heavy bottomed pot, like a Dutch oven or a traditional wok, is your best friend here. These vessels hold heat significantly better than thin stainless steel pans, which is crucial because the oil temperature will plummet the moment you add the cold chicken.
You’ll also need a wire cooling rack set over a baking sheet. Never and I mean never put your freshly fried chicken directly onto paper towels. The towels trap the steam coming off the hot meat, which immediately re hydrates the crust you just worked so hard to dry out.
A wire rack allows air to circulate around the entire piece, keeping it "shatter crisp" from top to bottom. A digital probe thermometer is also non negotiable for monitoring the 180°C oil.
Executing the Three Step Flow for Maximum Culinary Impact
1. The Flavor Foundation (Prep)
- Place the 2 lbs of chicken thigh pieces into a large bowl and toss with 1 tsp salt, 1/2 tsp pepper, 1 tbsp ginger, and 2 cloves of minced garlic.
- Add the 2 tbsp of vodka to the bowl and mix well. Note: Let this sit for 20 minutes to allow the flavors to penetrate the meat.
2. The Batter & First Fry (The Set)
- In a separate bowl, whisk together the 1/2 cup potato starch, 1/4 cup flour, and 1/2 tsp baking powder.
- Gradually whisk in the 1/2 cup ice cold water until a thin, crepe like batter forms.
- Heat 4 cups of vegetable oil in your pot until it reaches 180°C.
- Dredge each piece of chicken in the batter and carefully drop into the oil. Fry for 7 minutes until pale golden and the exterior feels firm.Note: Do this in batches to prevent the oil temperature from dropping too low.
3. The Golden Crunch (Finishing)
- Remove chicken to a wire rack and let rest for 2 minutes.
- Increase the oil heat back to 190°C and return all chicken to the pot. Fry for another 3 minutes until the crust is a deep mahogany and audibly "shatters" when tapped.
4. The Sauce Glaze (Tossing)
- In a large wok or skillet, combine the 3 tbsp gochujang, 3 tbsp honey, 2 tbsp brown sugar, 2 tbsp soy sauce, 1 tbsp rice vinegar, 1 tsp sesame oil, and 2 cloves of garlic.
- Simmer over medium heat until the sauce thickens and forms large, slow bubbles.
- Add the hot chicken to the sauce and toss vigorously for 30 seconds to coat every crevice.
Chef Tip: Use a pair of long wooden chopsticks to toss the chicken in the sauce. They are more agile than tongs and won't accidentally tear the delicate, crispy skin you've just perfected.
While this version is the gold standard for crunch, if you're ever in the mood for a more traditional, breaded American style, my Publix Fried Chicken recipe offers a completely different, but equally satisfying, texture profile.
Solving Texture Issues and Avoiding Common Frying Pitfalls
Frying can be temperamental, especially when dealing with high starch batters. The most common hurdle is the oil temperature. If you find your chicken feels heavy or greasy, it’s almost always because the oil wasn't hot enough, allowing the fat to soak into the batter instead of instantly searing the exterior.
The Crust is Falling Off
This usually happens if the chicken was too wet before the batter was applied or if the batter itself was too thick. The vodka helps here, but if the chicken pieces have excess moisture, the steam will push the crust away from the meat during the fry.
| Problem | Root Cause | Solution |
|---|---|---|
| Soggy crust after saucing | Sauce too thin or watery | Reduce sauce further until it coats a spoon thickly. |
| Greasy, heavy texture | Oil temp dropped below 160°C | Fry in smaller batches and wait for temp recovery. |
| Crust is too hard/chewy | Too much all purpose flour | Increase potato starch ratio for a lighter "lacy" finish. |
Common Mistakes Checklist
- ✓ Pat the chicken pieces with a paper towel if they look overly wet after the marinade.
- ✓ Always use ice cold water; warm water starts the gluten development immediately.
- ✓ Use a thermometer; "guessing" the oil temp is the fastest way to ruin a batch.
- ✓ Don't skip the rest between fries; it allows internal moisture to move to the surface to be evaporated in the second fry.
- ✓ Whisk the batter frequently, as potato starch settles at the bottom of the bowl within minutes.
Quick Substitutions and Flavor Variations for Every Palate
If you're out of a specific ingredient, don't panic. The mechanics of this recipe are flexible as long as you maintain the starch to liquid ratio.
| Original Ingredient | Substitute | Why It Works |
|---|---|---|
| Potato Starch | Cornstarch | Similar crunch, though the crust will be slightly thinner and more delicate. |
| Vodka | Rice Wine or Gin | Provides the same rapid evaporation; gin adds a slight herbal note. |
| Gochujang | Sriracha + Miso | Sriracha provides heat, while miso adds the necessary fermented funk. |
- The Non Spicy Soy Garlic Twist
- Replace the gochujang and honey with 1/2 cup soy sauce, 1/4 cup brown sugar, and a massive amount (6-8 cloves) of minced garlic.
- The Korean Fried Chicken Burger
- Use whole boneless thighs instead of bite sized pieces. Double the fry time for the first round and serve on a toasted brioche bun with kimchi slaw.
- gluten-free Adaptation
- Replace the 1/4 cup all purpose flour with extra potato starch or rice flour. It will be even crispier, though slightly more fragile.
Smart Storage and Efficient Reheating for Next Day Crunch
Storing fried chicken is usually a recipe for disappointment, but the double fry method actually holds up better than most. Store leftovers in an airtight container in the fridge for up to 3 days. To revive the crunch, avoid the microwave at all costs it will turn the crust into rubber.
Instead, use an air fryer at 190°C for 4-5 minutes, or a toaster oven.
Zero Waste Tip: Don't toss the leftover spicy sauce! If you have extra in the pan, toss it with some steamed rice or use it as a base for a spicy mayo the next day.
The potato starch that settles at the bottom of your batter bowl can also be dried out and used to thicken soups or stews later in the week.
Comparing Stovetop vs. Oven Results
While we are focusing on the traditional stovetop fry, some people ask if the oven can compete. It's a trade off between health and the specific "shatter" texture we're after.
| Method | Texture Result | Total Time | Best For |
|---|---|---|---|
| Deep Fry (Stovetop) | Shatter crisp, lacy | 45 minutes | Authentic experience and maximum crunch. |
| Air Fryer/Oven | Firm, crunchy, drier | 55 minutes | Health conscious prep with easier cleanup. |
Finishing Touches and Authentic Side Pairings for Service
When it comes to presentation, this chicken is the star, but it needs a refreshing sidekick to cut through the intensity of the glaze. In Korea, this is almost always "Chi Mu," which is a simple pickled radish. The sharp acidity and cold crunch of the radish reset your palate between bites of the hot, spicy chicken.
The Authentic Sidekick
To make a quick version, dice a large daikon radish into 1 cm cubes. Submerge them in a mixture of equal parts sugar, white vinegar, and water with a pinch of salt. Let it sit for at least 30 minutes.
The contrast between the cold, sweet tart radish and the fiery, sizzling chicken is what makes this meal iconic.
The Garnish Flourish
Don't just dump the chicken on a plate. Use a wide, shallow bowl to show off the pile. Sprinkle generously with toasted sesame seeds and finely sliced green onions. For an extra punch of color and heat, add a few rings of fresh red chili.
If you're feeling adventurous, a light drizzle of extra honey right before serving adds a glossy sheen that looks incredible under dining room lights. Right then, you're ready to serve! Don't wait this is best enjoyed while the sauce is still tacky and the chicken is piping hot.

Very High in Sodium
1275 mg mg of sodium per serving (55% % of daily value)
The American Heart Association recommends limiting sodium intake to about 2,300mg per day.
Sodium Reduction Tips for Your Korean Fried Chicken Recipe
-
Reduce Added Salt-25%
Decrease the amount of added salt from 1 tsp to 1/2 tsp. This will significantly lower the sodium content without drastically affecting the flavor. Consider tasting and adjusting to your preference later.
-
Low-Sodium Soy Sauce-20%
Substitute regular soy sauce with a low-sodium soy sauce. This simple swap can reduce the overall sodium in the dish without sacrificing the umami flavor.
-
Reduce Soy Sauce-15%
Reduce the amount of soy sauce from 2 tbsp to 1 tbsp, and increase honey and/or brown sugar to compensate for the loss of liquid volume.
-
Spice It Up!
Enhance the flavors using other spices and herbs to compensate for the reduced salt. Try adding extra ginger, garlic, or a pinch of red pepper flakes for a flavor boost without the sodium.
-
DIY Gochujang-10%
Consider making your own gochujang to control the sodium content. Many store-bought versions are very high in sodium. Adjust the recipe by adding less salt.
-
No Salt added-25%
Omit added salt completely in your recipe. The soy sauce and gochujang still provide some saltiness, and the other flavors can shine through more clearly.
Recipe FAQs
What makes Korean fried chicken different from American fried chicken?
The batter and frying method. Korean fried chicken uses a very thin, high starch (often potato starch) batter and a mandatory double fry technique, resulting in an extremely thin, glass like crust that stays crisp.
Is Korean fried chicken called KFC?
No, although sometimes people confuse them. KFC universally refers to Kentucky Fried Chicken, an American brand; the Korean version is distinct in its cooking technique and sauce profile, often labeled as "Chikin" or "Korean Fried Chicken."
Is Korean fried chicken very unhealthy?
Yes, due to the double frying process. Deep frying significantly increases the fat content compared to baking or air frying methods, though this texture is key to its signature appeal.
What makes for great Korean fried chicken?
A shatteringly crisp crust that resists sogginess after saucing. This is achieved by using potato starch and rapid moisture evacuation during the second fry; if you master temperature control here, you'll nail the texture, much like precise heat management in a Roasted Garlic Herb recipe.
How do I ensure my crust stays crispy after tossing in the sauce?
Toss the chicken immediately after the second fry into a simmering, reduced sauce. The sauce must be thick enough to lacquer onto the chicken instantly without drowning it in moisture.
How can I make the batter lighter and crispier without deep frying?
Incorporate a liquid that evaporates rapidly. Add two tablespoons of vodka or white rum to your cold water batter mix; the alcohol boils off quicker than water, creating more air pockets.
Is it true that I must use boneless thighs for this style of chicken?
No, but thighs yield the best results for high heat frying. Thigh meat stays juicier and is more forgiving of the long frying process than breast meat, which can dry out easily.
Korean Fried Chicken Recipe

Ingredients:
Instructions:
Nutrition Facts:
| Calories | 812 calories |
|---|---|
| Protein | 45.2 grams |
| Fat | 47.6 grams |
| Carbs | 47.5 grams |
| Fiber | 1.2 grams |
| Sugar | 25.4 grams |
| Sodium | 1275 milligrams |
