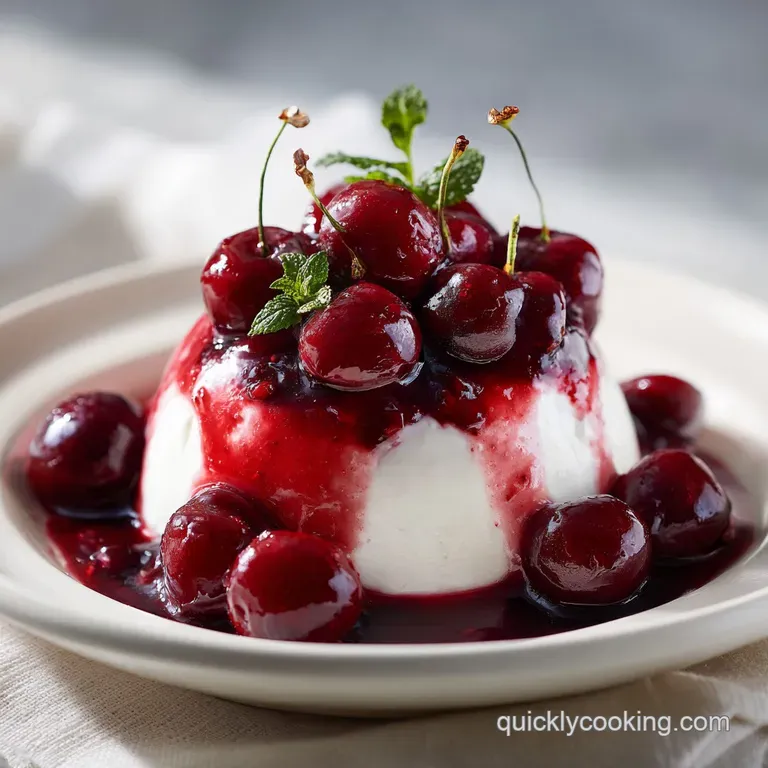
No Bake Cherry Yum Yum: Creamy and Crisp
- Time: Active 20 minutes, Passive 240 minutes, Total 260 minutes
- Flavor/Texture Hook: Shatter crisp graham base with a cloud like cream layer and tangy ruby fruit
- Perfect for: Summer potlucks, last minute hosting, or high volume family gatherings
- Mastering This Easy No Bake Cherry Yum Yum Recipe
- Performance Metrics and Key Texture Benchmarks
- Selecting Every Element for Budget Friendly Success
- Minimal Tools for a Maximum Flavor Result
- Building Layers from the Foundation to Topping
- Correcting Texture Issues for a Clean Slice
- Creative Adjustments for Every Season and Occasion
- Preservation Tactics and Smart Freezer Storage Tips
- Creating a Full Menu Around This Dessert
- Recipe FAQs
- 📝 Recipe Card
Mastering This Easy No Bake Cherry Yum Yum Recipe
Have you ever cut into a layered dessert only to have the bottom crumble into a wet, sandy mess that looks nothing like the neat squares you saw in the recipe? I remember making this for a neighborhood block party years ago, and by the time it hit the table, the cherry juice had turned my crust into a sad, pink soup.
It was a total texture failure. The mistake most people make is adding the cream layer directly onto room temperature crumbs. The moisture from the cheese seeps right in before it even has a chance to set.
This specific method is your targeted fix for that exact problem. We are going to use a simple temperature hack freezing the base to create a solid moisture shield.
This isn't just about throwing things in a dish; it’s about the physics of fat and sugar working together to give you a clean, professional slice every single time. We’re keeping things budget friendly by using smart pantry staples that perform better than the expensive gourmet versions.
We’ve all been there with "no bake" recipes that end up being "no structure" recipes. But this version is different. By the time we’re done, you’ll have a dessert that holds its shape on a plate while staying light and airy on the fork.
You don't need a fancy oven or hours of prep to get a result that looks like it came from a high end bakery. Let’s get into why this logic actually holds up in the kitchen.
- Fat Based Shield
- Freezing the butter soaked crumbs for 10 minutes solidifies the lipids, preventing the cream cheese moisture from migrating into the cracker layer.
- Aeration Maintenance
- Folding the whipped topping in a circular motion preserves the nitrogen bubbles, ensuring the filling stays fluffy rather than turning into a dense block.
- Acidic Balance
- The addition of lemon juice to the canned fruit lowers the pH, which brightens the flavor profile and cuts through the heavy fat of the cream cheese.
- Starch Stability
- The powdered sugar contains a tiny amount of cornstarch which acts as a secondary stabilizer for the low-fat cream cheese.
| Servings | Ingredient Adjustments | Pan Size | Total Chill Time |
|---|---|---|---|
| 6 people | Half all ingredients (1 egg hack N/A) | 8x8 inch square | 3 hours |
| 12 people | Standard recipe (see list below) | 9x13 inch glass | 4 hours |
| 24 people | Double ingredients (work in batches) | Two 9x13 dishes | 5 hours |
This table helps you decide exactly how much to buy at the store before you even start. If you're feeding a crowd, doubling the recipe is a breeze, but you’ll want to give it an extra hour in the fridge to ensure the center of those larger dishes sets up properly.
Performance Metrics and Key Texture Benchmarks
Understanding the behavior of your ingredients is the secret to a fast and flavor packed result. We are using low-fat cream cheese here not just for the budget, but because it often contains more stabilizers (like carob bean gum) than the full fat versions, which actually helps a no bake dessert keep its shape in warmer weather.
It’s a smart hack that saves money and improves the "slice ability" of your dish.
| Ingredient | Science Role | Pro Secret |
|---|---|---|
| low-fat Cream Cheese | Structural Base | Use room temperature cheese to avoid a "gritty" texture in the filling. |
| Light Brown Sugar | Moisture & Grip | The molasses content helps the crust bind tighter than white sugar alone. |
| Lemon Juice | Flavor Catalyst | This tiny amount "wakes up" the dull, canned sweetness of the cherry filling. |
| Whipped Topping | Aeration Agent | Never stir this in; always fold to keep the filling cloud like and light. |
Choosing between fresh fruit and the shortcut version is usually a matter of time and money. While fresh cherries are beautiful, they often release too much water unless you cook them down into a jam, which takes forever. For a fast weeknight win, the canned shortcut is actually the superior choice for texture.
| Method | Prep Time | Texture Result | Best For |
|---|---|---|---|
| Fresh Cherry Compote | 45 minutes | Chunky, tart, slightly watery | Small dinner parties |
| Shortcut (Canned) | 5 minutes | Velvety, consistent, stable | Large groups/Potlucks |
The canned version provides a predictable thickener (usually cornstarch) that prevents the fruit from sliding off the cream layer. It’s the ultimate budget friendly move that actually yields a more reliable result for this specific dessert.
Selecting Every Element for Budget Friendly Success
Right then, let's look at what you need to grab from the store. I'm all about store brands here there's honestly no need for name brand graham crackers or cream cheese for this dish. The flavors are going to meld so beautifully that the "value" versions will taste just as good as the premium ones.
- 2 cups (200g) Graham cracker crumbs: These provide the structural "shatter" of the base. Why this? Pre crushed crumbs save 10 minutes of manual labor and ensure an even, tight crust.
- 1/2 cup (113g) Unsalted butter, melted: The glue that holds the foundation together. Why this? Unsalted allows you to control the seasoning with the sea salt added later.
- 2 tbsp Light brown sugar: Adds a hint of caramel depth to the crust. Why this? Brown sugar is more hygroscopic, helping the crumbs stay together better than white sugar.
- 1/4 tsp Sea salt: Enhances the butteriness. Why this? A tiny bit of salt makes the sweet layers pop without being cloying.
- 16 oz (450g) low-fat cream cheese: The tangy, creamy heart of the dish. Why this? low-fat sets firmer than full fat, making for cleaner, more stable dessert squares.
- 1/2 cup (60g) Powdered sugar, sifted: Sweetens the cream layer smoothly. Why this? Powdered sugar dissolves instantly, preventing that "crunchy" sugar feel in the filling.
- 1 tsp Pure vanilla bean paste or extract: Adds that essential floral aroma. Why this? Vanilla bridges the gap between the tangy cheese and the sweet cherries.
- 8 oz (225g) Light whipped topping: Provides the volume and "fluff." Why this? Stabilized topping stays airy for days, unlike homemade whipped cream which can deflate.
- 21 oz (600g) No sugar added cherry pie filling: The ruby red crowning glory. Why this? No sugar added lets the natural cherry tartness shine through the sweet cream.
- 1 tsp Lemon juice: The flavor brightener. Why this? It mimics the flavor of fresh fruit and cuts the "canned" aftertaste.
Minimal Tools for a Maximum Flavor Result
You don't need a high tech kitchen to pull off a stunning cherry yum yum. In fact, keeping it simple is better. A 9x13-inch glass baking dish is my go to because you can see those beautiful red and white layers from the side. Plus, glass holds the cold better than metal once it's out of the fridge.
You'll also want an electric hand mixer. While you could beat the cream cheese by hand, you’ll never get it quite as silky and glossy without those mechanical beaters.
A sturdy rubber spatula is non negotiable for the folding step you need something flexible to scrape the bottom of the bowl without smashing all the air out of your whipped topping. Finally,, find a heavy bottomed glass or a measuring cup with a flat base.
You’ll use this to press the crumbs down; using your fingers usually results in an uneven crust that falls apart.
Building Layers from the Foundation to Topping

- Combine 200g graham cracker crumbs, 113g melted butter, 2 tbsp brown sugar, and 1/4 tsp sea salt in a medium bowl. Note: Stir until it looks like wet beach sand with no dry spots.
- Reserve exactly 1/4 cup (about 25g) of this mixture in a small baggie for the final garnish later.
- Press the remaining mixture into your 9x13-inch glass dish using the flat bottom of a glass. until the surface is flat and tightly packed.
- Freeze the crust for 10 minutes. Note: This creates the "moisture barrier" that prevents a soggy bottom.
- Beat 450g softened low-fat cream cheese and 60g sifted powdered sugar in a large bowl. until the mixture is smooth and glossy.
- Fold in 1 tsp vanilla and 225g whipped topping using a circular motion. until no white streaks remain and the volume is high.
- Spread the cream mixture over the frozen crust carefully using an offset spatula. until the layer is level and touches all four corners.
- Stir 1 tsp lemon juice into the 600g chilled cherry pie filling in a separate bowl. Note: This adds a fresh, zesty kick to the canned fruit.
- Spoon the cherry topping over the cream layer, spreading gently with the back of a spoon. until the red fruit completely hides the white cream.
- Sprinkle with the reserved crumbs and chill in the refrigerator for at least 4 hours. until the filling is firm to the touch.
Correcting Texture Issues for a Clean Slice
Even with the best intentions, things can go sideways. But don't panic most no bake issues are easily fixed with a little bit of temperature management. The most common struggle is a filling that feels too soft or a crust that refuses to stay together.
The Filling Is Too Soft
If your slices are sliding around like a melted sundae, the culprit is usually temperature. If the cream cheese wasn't beaten enough or the whipped topping was stirred too aggressively, you've lost the air that provides structure. Or, simply, it hasn't spent enough time in the cold.
| Problem | Root Cause | Solution |
|---|---|---|
| Runny Center | Whipped topping deflated | Chill for an extra 2 hours or place in the freezer for 30 minutes before serving. |
| Gritty Filling | Cold cream cheese | Always ensure cheese is room temp before mixing to ensure it emulsifies with the sugar. |
| Crumbly Base | Not enough pressure | Use a heavy glass to pack the crumbs tighter next time; for now, serve in bowls. |
The key is patience. This is one of those dishes that actually tastes better on day two because the flavors have had time to "marry." If you're in a rush, you can cheat by putting it in the freezer for 30 minutes, but don't leave it there too long or you'll lose that velvety mouthfeel.
Common Mistakes Checklist
- ✓ Soften the cream cheese for at least 60 minutes before starting (prevents lumps).
- ✓ Sift the powdered sugar to avoid tiny white dots of sugar in your filling.
- ✓ Pat the crumbs into the corners of the pan first, then the center.
- ✓ Never use "tub" butter/margarine for the crust; it has too much water and will make the base soggy.
- ✓ Ensure the pie filling is chilled before adding it to the cream layer to prevent melting the "cloud."
Creative Adjustments for Every Season and Occasion
One of the reasons I love this no bake cherry yum yum is how adaptable it is. If you find yourself in a pinch or just want to change the flavor profile, there are several ways to pivot without spending extra money.
If you want X, do YIf you want a richer base: Swap half the graham crumbs for crushed pretzels to get a salty sweet vibe. If you want a deeper chocolate flavor: Use chocolate graham crackers and top with a few shavings of dark chocolate.
If you want a lighter version: Use Greek yogurt instead of half the cream cheese (though note it will be softer).
For a fancy holiday twist, you can try my Dark Chocolate Ganache Tart technique by drizzling melted chocolate over the cherries once they've set. If you prefer a smaller, more portable version for kids, checking out a Mini Cherry Cream Cheese Pies recipe is a great way to use the same ingredients in a muffin tin.
The Protein Plus Swap
If you're looking to make this a bit more substantial, you can actually mix a scoop of unflavored or vanilla protein powder into the cream cheese layer. The powder acts as a further stabilizer, much like the cornstarch in the sugar, and it makes the dessert feel a bit more filling.
Just be sure to add an extra tablespoon of milk or water if the mixture becomes too thick to fold.
The Black Forest Twist
To turn this into a "Black Forest" inspired treat, replace the graham crackers with crushed Oreo cookies or any cocoa based biscuit. The dark, bitter notes of the cocoa perfectly complement the tartness of the cherries and the sweetness of the vanilla cream.
It looks stunning and tastes much more expensive than it actually is.
Preservation Tactics and Smart Freezer Storage Tips
This dessert is a champion of longevity. Because we used stabilized whipped topping and low-fat cheese, it doesn't weep or separate as quickly as a traditional cheesecake might. It’s the perfect candidate for meal prepping for a weekend event.
Storage GuidelinesFridge: Keep it tightly covered with plastic wrap or a lid. It will stay fresh and delicious for up to 4 days. After that, the crust might start to lose its "shatter" and become a bit softer. Freezer: You can freeze the entire dish!
Wrap it in a double layer of plastic wrap and then a layer of foil. It will last for 2 months. To serve, let it thaw in the fridge for 4-6 hours. Don't thaw it on the counter, or the layers might separate.
Zero Waste Tips If you have leftover graham cracker crumbs, don't toss them! Toast them in a dry pan for 2 minutes and sprinkle them over yogurt or oatmeal for a crunchy breakfast topping.
If you have a bit of cherry filling left in the can, it’s incredible swirled into a morning smoothie or served over a scoop of plain vanilla ice cream.
Creating a Full Menu Around This Dessert
Since this is such a bright and creamy finish, it pairs best with savory, salty main courses. I love serving this after a heavy meal like a slow cooked pot roast or a tray of smoky BBQ ribs. The acidity in the cherries cleanses the palate perfectly.
If you’re hosting a tea party or a lighter brunch, these squares are a dream alongside something crunchy. You could pair them with my Danish Butter Cookies for a mix of textures the soft yum yum against the snap of a butter cookie is a match made in heaven.
"No bake desserts are always flavorless" is a myth I hear all the time. The truth is that no bake recipes rely on high-quality extracts and the contrast of temperatures. Because we aren't cooking the ingredients, the flavor of the vanilla and the tang of the cheese remain "raw" and vibrant.
Another myth is that you must use full fat ingredients for it to set. As we've seen, the stabilizers in low-fat cream cheese actually work in our favor here, giving us that budget friendly win without compromising the final result.
Right then, you're ready to hit the kitchen and make the best version of this classic you've ever had!

Recipe FAQs
How to prevent the graham cracker crust from becoming soggy?
Freeze the crust for 10 minutes before adding the cream layer. This solidifies the butter, creating a crucial fat-based moisture barrier that prevents the crust from absorbing liquid from the filling.
Is it possible to serve this dessert immediately after assembly?
No, you must chill it for at least 4 hours. This duration is necessary for the cream cheese mixture to set firmly and for the flavors to meld properly.
How to achieve a smooth, glossy cream cheese layer without lumps?
Beat the low-fat cream cheese and powdered sugar thoroughly with an electric mixer. Ensuring the cream cheese is fully softened to room temperature before starting is the key to a professional, lump free texture.
Can I use frozen cherries instead of canned pie filling?
No, this recipe is specifically formulated for no-sugar added cherry pie filling. Using frozen fruit would introduce excess liquid and alter the delicate balance of the dessert; if you want to practice balancing sweet and acidic flavors in other desserts, see how we use the same principle in our Banana Bundt Cake.
How to fold the whipped topping without deflating the airy mixture?
Use a rubber spatula and a gentle circular motion. Maintaining aeration is vital for the light, cloud like texture of the middle layer.
How long can I store this dessert in the refrigerator?
You can keep it refrigerated for up to 24 hours. Beyond one day, the graham cracker base may begin to lose its signature crispness even with the protective fat barrier.
How to brighten the flavor of the cherry topping?
Stir 1 teaspoon of lemon juice directly into the cherry pie filling. This simple addition cuts through the sweetness and provides a necessary tart contrast to the creamy base.
No Bake Cherry Yum Yum
Ingredients:
Instructions:
Nutrition Facts:
| Calories | 324 kcal |
|---|---|
| Protein | 4.7 g |
| Fat | 19.1 g |
| Carbs | 34.1 g |
| Fiber | 1.2 g |
| Sugar | 19.8 g |
| Sodium | 215 mg |
