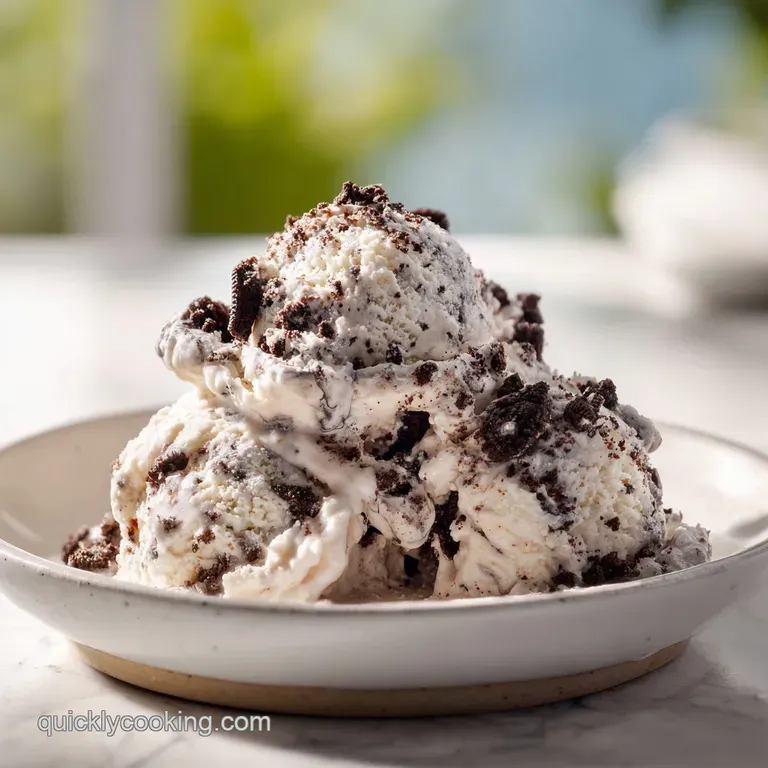
Cookies Cream Ice Cream No Machine Required
- Time: Active 15 minutes, Passive 6 hours, Total 6 hours 15 mins
- Flavor/Texture Hook: Silky vanilla base paired with the dark cocoa shatter of cookies.
- Perfect for: High efficiency dessert prep, budget-friendly gatherings, and hot summer nights.
- Cookies Cream Ice Cream No Machine Required with Vanilla Extract
- Science of the Velvety Freeze
- Quick Setup and Recipe Specs
- Selecting the Right Ingredients
- Simple Tools for Fast Success
- Step-by-Step Churnless Mixing
- Solving Texture and Melting Issues
- Scaling for Large Groups
- Tasty Variations and Flavor Twists
- Storing for Long-Term Freshness
- Best Ways to Serve Dessert
- Debunking Ice Cream Myths
- Recipe FAQs
- 📝 Recipe Card
Cookies Cream Ice Cream No Machine Required with Vanilla Extract
I still remember the absolute chaos of my first summer hosting a backyard BBQ. My old crank style ice cream maker decided to seize up exactly forty minutes before guests arrived. I had a bowl of half frozen slurry and a growing sense of dread.
In a moment of high efficiency desperation, I ditched the machine entirely, grabbed my hand mixer, and whipped up a batch of no churn cookies and cream ice cream.
The result? Better than the machine. It was richer, smoother, and didn't have that annoying icy crunch. This recipe provides luscious, no churn Cookies Cream Ice Cream with Vanilla Extract by utilizing simple pantry staples.
We're skipping the rock salt and the mechanical churning in favor of a method that takes about fifteen minutes of actual work. It’s the ultimate kitchen hack for anyone who wants high end results on a budget.
Since that day, I haven't touched my ice cream machine. Why bother with the noise and the freezer bowl space when you can get a velvety texture with just a few whisks? This recipe is fast paced and streamlined for the home cook who values speed without sacrificing quality.
We're going to use dark cocoa cookies to get that iconic "Cookies Cream Ice" look, and a heavy hit of vanilla to keep it classic.
Science of the Velvety Freeze
Air Suspension: Whipping the cream creates a network of tiny air bubbles that provide a soft, scoopable structure. These bubbles act as insulators, preventing the mixture from freezing into a solid block of milk ice.
Freezing Point Depression: The high sugar content in sweetened condensed milk prevents the water in the cream from forming large, jagged ice crystals. This chemical interaction ensures the final product remains silky on the tongue rather than crunchy.
| Method | Total Time | Texture | Cleanup |
|---|---|---|---|
| Traditional Churn | 24 hours 45 mins | Airy/Light | High (Machine parts) |
| No Churn Shortcut | 6 hours 15 mins | Velvety/Dense | Low (One bowl) |
| store-bought | 10 mins (Drive) | Varies | None |
Choosing the no churn method isn't just about saving money on a machine; it’s about efficiency. While a churned ice cream incorporates more air (called overrun), the no churn version is denser and more indulgent. If you've ever tried my Chocolate Blossom Cookies recipe, you know I'm a fan of treats that punch above their weight class in terms of effort versus reward.
Quick Setup and Recipe Specs
Before we start mixing, efficiency is key. You want all your gear and ingredients ready to go because the temperature of your cream is non negotiable. If the cream warms up even a few degrees while you're hunting for a spatula, you'll lose that critical volume.
Component Analysis
| Ingredient | Science Role | Pro Secret |
|---|---|---|
| Heavy Whipping Cream | Provides fat and air | Use 36% fat or higher for stability |
| Condensed Milk | Prevents ice crystals | Chill the can to maintain cream temp |
| Vanilla Extract | Flavor and antifreeze | Alcohol in extract keeps scoop soft |
| Fine Sea Salt | Flavor balancer | Sharpens the cocoa notes in the cookies |
Selecting the Right Ingredients
To keep this budget smart, you don't need the most expensive organic cream, but you do need the right fat percentage. Look for "Heavy Whipping Cream" rather than just "Whipping Cream." That extra 4-6% of milkfat is what prevents your ice cream from feeling greasy or thin.
- 2 cups cold heavy whipping cream: Must be min 36% milkfat. Why this? High fat ensures the cream holds air bubbles permanently when frozen.
- Substitute: Heavy cream powder (reconstituted with less water) works in a pinch but reduces creaminess.
- 14 oz sweetened condensed milk: Chilled for at least 2 hours. Why this? The high sugar to water ratio is what keeps the base from freezing solid.
- Substitute: Cream of coconut (full fat) for a tropical, dairy-free twist.
- 1 tbsp pure vanilla extract: Don't skimp here. Why this? Adds the floral base note that makes the cookies pop.
- Substitute: Vanilla bean paste for those beautiful black speckles.
- 1/4 tsp fine sea salt: Essential for balance. Why this? It cuts through the cloying sweetness of the condensed milk.
- Substitute: Table salt (use slightly less as it's more dense).
- 2 cups dark cocoa sandwich cookies: Roughly chopped. Why this? Provides the "shatter" and textural contrast to the velvet base.
- Substitute: Any generic "Oreo" style cookie works it's more budget friendly.
- 1/2 tsp espresso powder: The secret weapon. Why this? You won't taste coffee; it just makes the chocolate cookies taste deeper.
- Substitute: Very finely ground instant coffee.
Simple Tools for Fast Success
Efficiency starts with the right kit. You don't need a pantry full of gadgets, but a cold bowl is your best friend here. If your kitchen is warm, pop your mixing bowl in the freezer for ten minutes before you start.
- Large Mixing Bowl: Stainless steel or glass is best as they hold the cold better than plastic.
- Hand Mixer or Stand Mixer: A KitchenAid with the whisk attachment makes short work of the heavy cream.
- Large Metal Spatula: For folding in the cookies without deflating the air you just worked so hard to incorporate.
- 9x5 Loaf Pan: The perfect shape for deep freezing and easy scooping later.
- Plastic Wrap: To prevent "freezer funk" from migrating into your cream.
step-by-step Churnless Mixing

Phase 1: Cold Prep
Chill your 14 oz sweetened condensed milk and your mixing bowl. Checkpoint: Ensure the cream is straight from the fridge (40°F or 4°C). If the cream is even slightly room temp, the fat globules won't trap air.
Phase 2: Building Structure
Pour the 2 cups cold heavy whipping cream into your chilled bowl. Beat on medium high speed until stiff peaks form. This usually takes 3 to 4 minutes. You’ll know you’re there when you lift the beaters and the cream stands straight up without drooping.
Note: Do not overbeat or you'll end up with vanilla butter.
Phase 3: The Fold
In a separate small bowl, whisk together the chilled condensed milk, 1 tbsp vanilla extract, 1/4 tsp salt, and 1/2 tsp espresso powder. Gently pour this mixture into the whipped cream. Using a large spatula, fold the two together until no white streaks remain.
Use a "cut and fold" motion to keep the air inside.
Phase 4: Inclusion Mix
Add 1.5 cups of the chopped cocoa cookies. If you like a more uniform color, crush some of the cookies into fine dust before adding. Fold gently. Much like making an Oreo Balls recipe, the contrast of the dark cookie against the white cream is what makes this visual.
Phase 5: Deep Chill
Pour the mixture into your 9x5 loaf pan. Top with the remaining 0.5 cups of cookie chunks. Checkpoint: Press plastic wrap directly onto the surface of the cream. This prevents a skin from forming. Freeze for 6 hours until firm to the touch.
Solving Texture and Melting Issues
The biggest hurdle with "cookies cream ice cream no machine required" is managing the texture. If it's too hard, you didn't whip the cream enough. If it's too soft, your condensed milk wasn't cold enough or your freezer isn't set low enough.
Fixing a Greasy Texture
If your ice cream feels "filmy" on the roof of your mouth, the cream was likely over whipped. Once the fat starts to separate from the liquid, it creates a buttery texture that doesn't melt cleanly. To fix this in future batches, stop whipping the moment the cream holds its shape.
Maintaining the Cookie Crunch
No one likes a soggy cookie. To keep the bits crunchy, don't chop them too finely. Large chunks take longer to absorb moisture from the cream.
| Problem | Root Cause | Solution |
|---|---|---|
| Icy Texture | Too much water/low-fat | Use 36% heavy cream only |
| Too Soft | Not enough freeze time | Freeze for full 6 hours at 0°F |
| Flat Flavor | Missing salt/vanilla | Increase salt to 1/2 tsp |
Common Mistakes Checklist
- ✓ Using "Half and Half" instead of heavy cream (it won't whip).
- ✓ Forgetting to chill the condensed milk (it will deflate the whipped cream).
- ✓ Not covering the surface with plastic (leads to freezer burn).
- ✓ Over mixing the cookies (turns the whole batch grey).
- ✓ Skipping the espresso powder (the chocolate won't pop).
Scaling for Large Groups
Scaling Down (½ batch): This is easy. Use 1 cup cream and about 7 oz of condensed milk (half a can). Use a smaller container, like a 4x4 glass dish, and reduce freeze time to 4 hours.
Scaling Up (2x batch): Double the cream and milk, but only use 1.5x the salt and espresso powder to avoid overpowering the base. Use two separate loaf pans rather than one giant container to ensure the center freezes at the same rate as the edges.
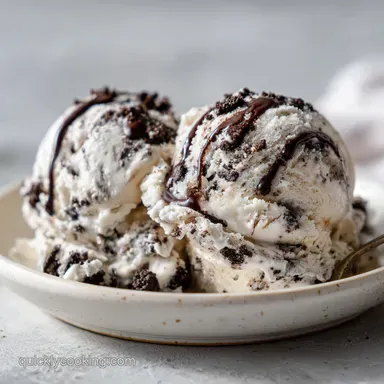
Chef's Tip: Grate a little extra dark chocolate over the top before freezing. The fine shavings melt instantly on the tongue, creating a "stracciatella" effect that makes the budget friendly base feel like a $12 pint.
Tasty Variations and Flavor Twists
Salted Caramel Variation
Swirl in 1/4 cup of salted caramel sauce right before the final freeze. Do not over mix; you want thick ribbons of caramel that stay distinct from the vanilla base.
Lowering the Glycemic Load
While this is a sugar forward dessert, you can use a sugar-free sweetened condensed milk alternative (often made with erythritol). Note that the texture will be slightly icier since sugar is a primary antifreeze agent.
A Quick Protein Boost
Mix in 1 scoop of vanilla whey protein powder into the condensed milk before folding. This adds about 25g of protein to the whole batch without significantly altering the flavor profile.
Storing for Long Term Freshness
Storage: Keep in the coldest part of your freezer (usually the back) for up to 2 weeks. After that, the fat can begin to absorb smells from the freezer. Always keep the plastic wrap pressed against the surface.
Zero Waste: If you have leftover cookies that have gone stale, they are actually perfect for this! The moisture in the ice cream softens them anyway, so don't throw away those bottom of-the bag crumbs. Use them as a "dust" layer at the bottom of the pan.
Best Ways to Serve Dessert
For the perfect scoop, take the pan out of the freezer 5 to 8 minutes before you plan to serve. This "tempering" period allows the edges to soften slightly, making it much easier to get those beautiful, round globes of ice cream.
The Ultimate Pairing Guide
This ice cream is quite rich, so it pairs beautifully with something acidic or bitter. A handful of fresh raspberries or a shot of hot espresso poured over a scoop (affogato style) is incredible. If you're feeling adventurous, serve a scoop alongside my Danish Butter Cookies recipe for a textural masterpiece.
Tips for Perfect Scoops
Dip your ice cream scoop into a glass of hot water between every serving. The heat helps the metal glide through the dense cream, and the moisture prevents the ice cream from sticking to the scoop. It's a small efficiency that makes a big difference when you're serving a crowd.
Debunking Ice Cream Myths
Many people think you need an expensive machine to get professional results. The truth is, churning is just one way to incorporate air. By whipping the cream first, we are "pre loading" the air into the mixture, achieving the same physical result without the mechanical help.
Another myth is that "no churn" is always too sweet. While condensed milk is sugary, the addition of sea salt and espresso powder chemically balances the palate. It tricks your taste buds into focusing on the cocoa and vanilla rather than just the sugar.
This makes the "cookies cream ice cream no machine required" approach a legitimate gourmet option.

Recipe FAQs
Can I substitute heavy whipping cream with half and-half?
No, using half and-half will fail. It contains too little milkfat (usually under 18%) to hold the air structure needed for a creamy, no-churn result.
How long must the ice cream freeze before it is scoopable?
Freeze for a minimum of six hours until firm. For the best texture, allow it to temper on the counter for 5 to 8 minutes before scooping.
How to incorporate the cookies without turning the entire base grey?
Roughly chop the cookies into large pieces and fold them in last using a gentle cut-and-fold motion. This preserves the white base color and textural contrast.
Is it true that adding espresso powder makes the ice cream taste like coffee?
No, this is a common misconception. The small amount of espresso powder intensifies the natural bitterness of the cocoa, deepening the chocolate flavor without adding discernible coffee taste.
What is the role of condensed milk in this no-churn recipe?
It prevents large ice crystal formation. The high sugar content lowers the freezing point of the water, ensuring the final product remains dense and velvety, not hard like a block of ice.
How to achieve a professional, airy texture without an ice cream maker?
Beat the heavy cream to stiff peaks first. This traps the necessary air volume before you gently fold in the dense base mixture, a technique similar to what we use for stable fillings in our No Bake Chocolate recipe.
What is the best way to serve this ice cream for superior mouthfeel?
Temper the pan for 5 to 8 minutes on the counter. Dip your serving scoop in hot water between each serving to ensure the best glide and a clean presentation, much like when portioning dense fillings in our Chewy Monster Cookies recipe.
No Machine Cookies Cream
Ingredients:
Instructions:
Nutrition Facts:
| Calories | 379 kcal |
|---|---|
| Protein | 5.2 g |
| Fat | 24.2 g |
| Carbs | 36.0 g |
| Fiber | 0.4 g |
| Sugar | 27.8 g |
| Sodium | 163 mg |
