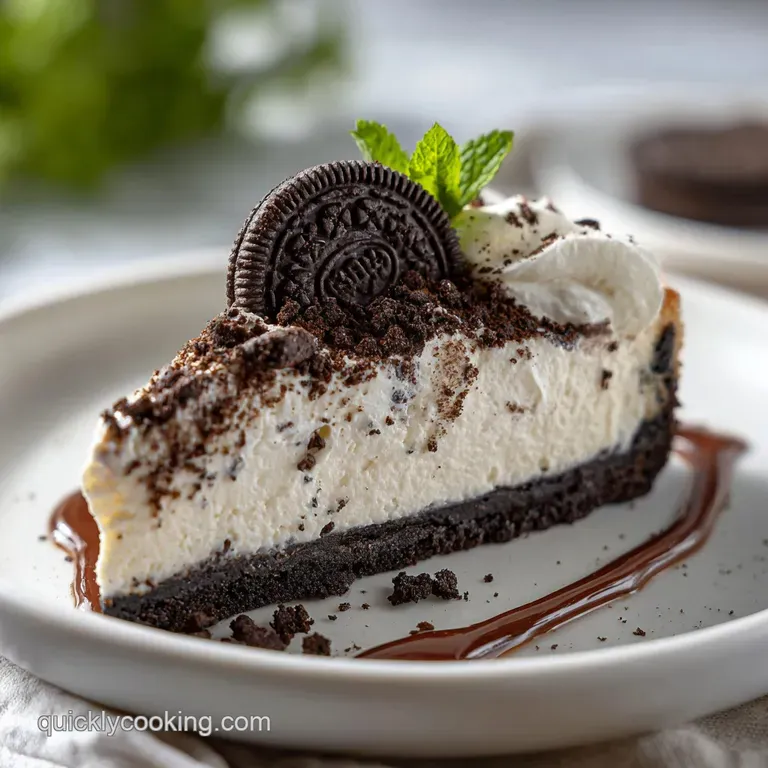
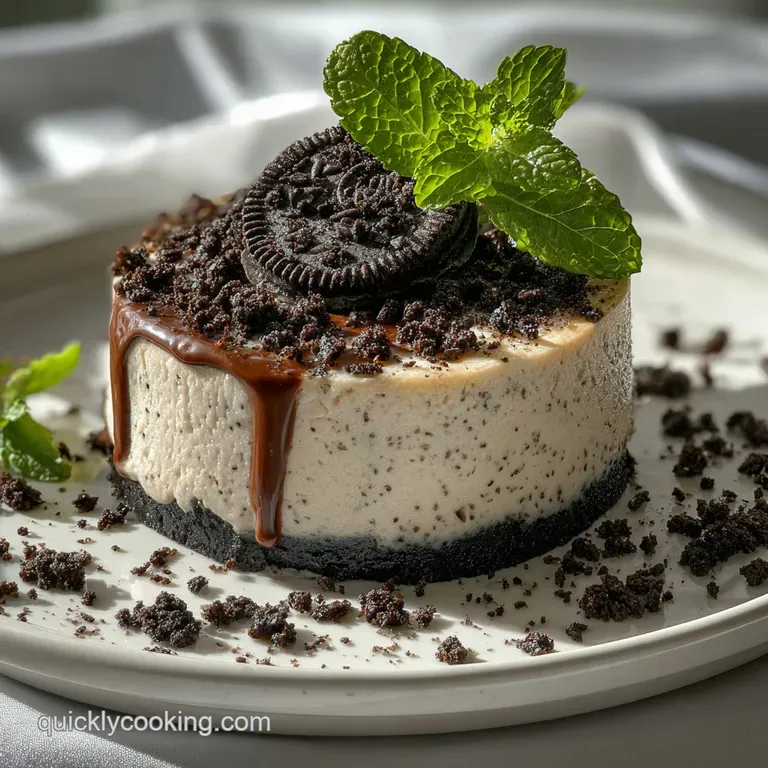
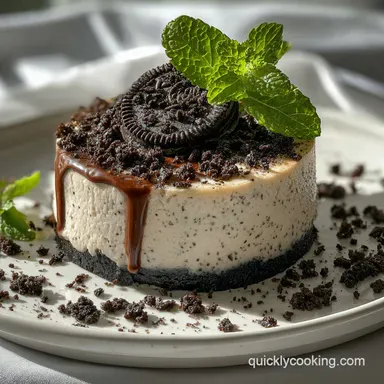
Oreo Cheesecake: Dense and Velvety
- Time: Active 20 minutes, Passive 55 minutes, Total 1 hours 15 mins (plus chilling)
- Flavor/Texture Hook: Deep cocoa crunch meeting silky, tangy cream
- Perfect for: Milestone birthdays, weekend indulgence, or impressing a crowd
- The Secret to a Velvety Oreo Cheesecake
- Baking Metrics and Time Requirements
- Essential Components for Flavor and Texture
- Minimalist Gear for High Efficiency Results
- Systematic Steps for the Ultimate Finish
- Managing Mistakes and Fixing Common Issues
- Adjusting Ingredients for Different Dietary Needs
- Storing Leftovers and Reducing Kitchen Waste
- Creative Ideas for Finishing and Plating
- Recipe FAQs
- 📝 Recipe Card
The Secret to a Velvety Oreo Cheesecake
The first time I attempted an Oreo Cheesecake, the noise of thirty cookies hitting my food processor at seven in the morning nearly woke the neighbors. It starts as a heavy, rhythmic thumping that eventually settles into a fine, sandy whisper of dark cocoa.
That scent of crushed chocolate wafers and sweet cream filling is unmistakable, and it's the exact moment I know something incredible is about to happen.
I've spent years figuring out why some cheesecakes feel like a brick while others are light as air. I used to think the cracks on top were just a badge of honor for home cooks, but I was wrong. It’s all about how you treat the air inside the batter and how you manage the cool down.
This version is my high efficiency blueprint for a dessert that doesn't just look good on a plate, it actually delivers that specific, rich mouthfeel you only get from high end bakeries.
We are going to skip the complicated water baths today. Instead, we’re leaning into a low and slow baking method that preserves the velvety texture without the stress of leaking pans. You'll get that satisfying shatter of the cookie crust against the smooth filling in every single bite.
Trust me, once you see that clean slice come out of the pan, you’ll never go back to store-bought versions.
Baking Metrics and Time Requirements
Before we get our hands into the cookie crumbs, let’s look at the timing and benchmarks. This recipe relies on specific temperature windows to ensure the fat doesn't separate and the eggs don't scramble. Efficiency is about knowing when to walk away and when to hover over the oven door.
The Physics of the Cool Down
Success in this recipe depends on residual heat rather than direct flame. The carryover cooking continues even after the oven is off, which prevents the surface from drying out and snapping into those dreaded cracks.
By cooling it slowly, we allow the protein structure to set firmly while keeping the moisture trapped inside.
| Thickness | Internal Temp | Rest Time | Visual Cue |
|---|---|---|---|
| 3 inches | 150°F | 1 hours | Slight jiggle in the center 2 inches |
| 2.5 inches | 145°F | 45 minutes | Edges look matte and set |
| 1.5 inches | 140°F | 30 minutes | Center moves like firm jelly |
Getting the internal temperature right is the difference between a grainy mess and a silky dream. If you don't have a thermometer, just watch for that specific "wobble." It shouldn't ripple like water; it should move as one cohesive unit, like a perfectly set panna cotta. If you find yourself craving something even faster, you might enjoy my No Bake Chocolate recipe which skips the oven entirely.
Essential Components for Flavor and Texture
Selecting the right building blocks is the most important part of the process. I’ve seen people try to use low-fat cream cheese to save a few calories, but the result is always watery and lacks that signature tang. We need the fat to act as a stabilizer for the air we incorporate during the mixing phase.
Ingredient Deep Dive
| Ingredient | Science Role | Pro Secret |
|---|---|---|
| Cream Cheese | Primary Structure | Use brick style only for the lowest water content |
| Large Eggs | Protein Binder | Add one at a time to keep the emulsion stable |
| Sour Cream | Acidic Tenderizer | Breaks down protein strands for a softer crumb |
| Fine Sea Salt | Flavor Enhancer | Cuts through the sugar to highlight the cocoa |
Always make sure your ingredients are at room temperature. If the cream cheese is even slightly cold, you'll end up with tiny white lumps that no amount of whisking can fix. I usually pull my ingredients out of the fridge at least two hours before I start. If you’re a fan of these flavor profiles, you’ll find similar science at play in my Black Velvet Cake recipe.
Minimalist Gear for High Efficiency Results
You don't need a pantry full of gadgets to make a world class dessert. I prefer using a standard 9 inch springform pan because it makes the release process effortless. If you don't have one, a deep pie dish works, but you'll lose that dramatic vertical height that makes this dish so iconic.
- Food Processor: For the finest crust, this is essential. If you don't have one, a rolling pin and a sturdy freezer bag will do the trick, though it takes a bit more elbow grease.
- Electric Hand Mixer: A stand mixer is great, but a hand mixer gives you more control over the air incorporation. We want to avoid whipping too much air into the eggs, which can cause the cake to rise and then collapse.
- Large Mixing Bowl: Use glass or stainless steel. Plastic can sometimes hold onto oils that affect the flavor of the delicate cream filling.
- Flat bottomed Measuring Cup: This is my favorite trick for pressing the crust into the corners of the pan. It gives you a perfectly even base without getting your fingers sticky.
Chef Tip: Freeze your butter for 10 minutes before melting it. This small temperature shock helps the butter bind more tightly to the cookie crumbs, preventing a greasy base.
Systematic Steps for the Ultimate Finish
Let’s get into the actual process. Follow these steps closely, and pay attention to what the batter looks like at each stage. The visual cues are more important than the timer.
- Pulse the cookies. Throw 30 whole Oreo Cookies into the processor and blitz until they look like dark sand. Note: Don't leave large chunks here or the crust will crumble when sliced.
- Bind the base. Mix the crumbs with 5 tbsp melted unsalted butter and 1/4 tsp fine sea salt. Press this firmly into the bottom of your pan and 1 inch up the sides.
- Bake the crust. Slide it into the oven at 350°F for 8 minutes until the cocoa aroma fills the kitchen. Let it cool completely.
- Cream the cheese. Beat 32 oz softened cream cheese and 1 cup granulated sugar until the mixture looks like glossy silk. This usually takes about 3 minutes.
- Add the tang. Fold in 1 cup room temperature sour cream and 1 tbsp vanilla bean paste. Note: Vanilla paste provides those beautiful black flecks that look so professional.
- Incorporate eggs slowly. Add 4 large eggs one-by-one. Mix on the lowest speed until just combined. Over mixing here is the number one cause of cracks.
- Add the crunch. Gently fold in 15 coarsely chopped Oreo Cookies. You want large pieces here so they don't dissolve into the batter.
- The gentle bake. Pour the batter over the crust and bake at 325°F for 55 minutes until the edges are set but the center still jiggles.
- Controlled cooling. Turn the oven off and crack the door open. Let it sit inside for 1 hour before moving it to the counter. This is vital for the texture.
- Final garnish. Whip 1 cup cold heavy cream with 1/4 cup powdered sugar until stiff peaks form. Pipe onto the chilled cake and top with 6 halved cookies.
| Original Ingredient | Substitute | Why It Works |
|---|---|---|
| Sour Cream (1 cup) | Greek Yogurt (full fat, 1 cup) | Similar acidity. Note: Result will be slightly more firm/tangy |
| Vanilla Bean Paste | Vanilla Extract (1 tbsp) | Same flavor profile but without the visual bean flecks |
| Granulated Sugar | Cane Sugar (1 cup) | Larger crystals but melts fine during the creaming stage |
If you're feeling adventurous and want to try another variation of this flavor, check out my Sugar Cookie Cheesecake recipe. It uses a similar base logic but with a completely different flavor profile.
Managing Mistakes and Fixing Common Issues
Even the best cooks run into trouble sometimes. The good news is that most cheesecake "failures" are actually still quite delicious. It's usually just a cosmetic issue that can be hidden with a bit of whipped cream or extra cookie crumbs.
Why Your Crust Is Soggy
This usually happens if the butter wasn't fully incorporated or if the crust wasn't pre baked. The pre baking step creates a moisture barrier that keeps the filling from soaking into the crumbs. If you find the bottom is wet, try placing the pan on a lower rack next time to ensure the base gets enough direct heat.
Why the Filling Is Lumpy
This is the classic "cold cheese" problem. If you forgot to take the cream cheese out of the fridge, don't try to power through it. You can soften it quickly by placing the sealed foil bricks in a bowl of warm water for 15 minutes.
If the batter is already lumpy, you can try passing it through a fine mesh sieve, though it’s a bit tedious.
| Problem | Root Cause | Solution |
|---|---|---|
| Large surface cracks | Temperature shock | Cool the cake inside the oven with the door cracked |
| Dense, gummy texture | Over mixing eggs | Mix eggs on low speed for the shortest time possible |
| Filling leaking from pan | Improper seal | Use a high-quality springform or wrap the base in foil |
Common Mistakes Checklist:
- ✓ Always use full fat brick cheese; spreadable cream cheese in a tub has too much air and water.
- ✓ Tap the filled pan firmly on the counter five times to release trapped air bubbles.
- ✓ Ensure the sour cream is at room temperature to prevent the fat from seizing.
- ✓ Never skip the cooling hour in the oven; it's the secret to that velvety finish.
- ✓ Chill the finished cake for at least 6 hours (preferably overnight) before slicing.
Adjusting Ingredients for Different Dietary Needs
Sometimes you need to scale this up for a party or down for a quiet night in. If you are cutting the recipe in half, use a 6 inch pan and reduce the baking time by about 15 minutes.
If you’re doubling it, I highly recommend making two separate cakes rather than one giant one, as the center of a double sized cake will likely remain raw while the edges burn.
For a gluten-free version, simply swap the standard cookies for gluten-free chocolate sandwich cookies. They behave almost exactly the same in the crust and filling. If you want to make "mini" versions, this batter works perfectly in cupcake liners. Just bake them for about 18 to 22 minutes at the same temperature. For more inspiration on small batch treats, you might like my Mini No Bake recipe.
| Servings | Ingredient Adjustments | Pan Size | Cook Time |
|---|---|---|---|
| 6 people | Half all ingredients, use 2 eggs | 6 inch pan | 40 minutes |
| 12 people | Standard recipe (as written) | 9 inch pan | 55 minutes |
| 24 people | Double all ingredients | Two 9 inch pans | 55-60 minutes |
Storing Leftovers and Reducing Kitchen Waste
Cheesecake is one of those rare desserts that actually tastes better on the second day. The flavors have time to meld, and the moisture redistributes throughout the filling. Store any leftovers in an airtight container in the fridge for up to 5 days.
If you find yourself with extra cookie crumbs or broken bits from the garnish, don't throw them away. I like to keep a "crumb jar" in my freezer. These are perfect for sprinkling over vanilla ice cream or folding into a quick batch of brownies.
If you have leftover heavy cream that you didn't whip, you can use it in your morning coffee or to enrich a pasta sauce.
For long term storage, this Oreo Cheesecake freezes beautifully. Wrap individual slices tightly in plastic wrap and then a layer of foil. They will stay fresh in the freezer for up to 3 months. When you're ready to eat, just thaw a slice in the fridge for a few hours.
Creative Ideas for Finishing and Plating
When it comes to serving, the presentation can be as simple or as elaborate as you like. A clean slice is the hallmark of a great cheesecake. To get that "perfect" look, dip a sharp knife into hot water and wipe it dry between every single cut. This prevents the filling from dragging and smearing across the dark crust.
Plating Enhancements
- The Chocolate Drizzle: Melt a handful of semi sweet chocolate chips with a teaspoon of coconut oil and drizzle it over the whipped cream.
- Extra Texture: Save a few whole cookies to stick vertically into the whipped cream dollops for a high end look.
- Contrast: A few fresh raspberries on the side provide a bright, acidic pop that cuts through the heavy cream and chocolate.
Flavor Myths
One common myth is that you must use a water bath for a successful cheesecake. While water baths provide the most even heat, they are prone to leaking and can be dangerous to move.
A low temperature bake (325°F or lower) followed by a long, slow cool down achieves 95% of the same result with 0% of the risk.
Another misconception is that the "jiggle" means it's raw. If the center doesn't jiggle when you pull it out, you’ve actually overbaked it. Overbaked cheesecake loses its silky quality and becomes more like a dense sponge cake. Trust the jiggle; it will firm up perfectly as it cools!
Enjoy your baking journey there's nothing quite like the first bite of a homemade masterpiece.

Recipe FAQs
Can I substitute low-fat cream cheese for the full fat bricks?
No, stick to full fat brick style. low-fat versions contain too much added water, which destabilizes the fat matrix, leading to a watery and grainy final texture.
How to prevent the classic surface cracks on my Oreo Cheesecake?
Cool the cake slowly inside the turned off oven. Turn the oven off when the internal temperature hits 150°F, crack the door open, and let it rest inside for at least one hour before removing it.
How to achieve a perfectly uniform and crisp cookie crust?
Pre-bake the crust for 8 minutes at 350°F until fragrant. This crucial step sets the butter binder and creates a barrier, preventing the filling from making the base soggy.
Is it true that overmixing the eggs is the primary cause of a dense cake?
Yes, overmixing eggs introduces too much air. Mix eggs one at a time on the lowest speed only until they are just incorporated; excessive mixing causes the structure to rise rapidly and subsequently collapse during cooling.
How to get that signature clean slice without smearing the filling?
Dip a sharp knife in hot water and wipe it dry between every cut. This clears residue and ensures the cutting edge remains hot enough to slice through the chilled cream cleanly.
Can I skip the 6-hour chilling requirement and serve it sooner?
No, a minimum of 6 hours of chilling is essential. The chilling time allows the proteins to fully set and the moisture to redistribute, which is necessary for that velvety mouthfeel you want.
How to quickly soften cream cheese if I forgot to pull it out early?
Place the foil wrapped bricks in a bowl of warm water for 15 minutes. Ensure the foil is completely sealed to prevent water from seeping in, which would add unwanted moisture to your batter.
Oreo Cheesecake Recipe
Ingredients:
Instructions:
Nutrition Facts:
| Calories | 729 kcal |
|---|---|
| Protein | 11 g |
| Fat | 52 g |
| Carbs | 57 g |
| Fiber | 2 g |
| Sugar | 45 g |
| Sodium | 440 mg |
