Ultimate Crispy Japanese Chicken Karaage Recipe
- Time: Active 15 minutes, Passive 40 minutes, Total 55 minutes
- Flavor/Texture Hook: Shatter crisp crust with a gingery umami center
- Perfect for: High speed weeknight dinners or impressive party snacks
- Mastering Techniques for High Efficiency Crunch
- Essential Recipe Specs and Timing Goals
- Starch and Spirit Component Analysis
- Smart Ingredient Choices and Better Swaps
- Minimal Kitchen Tools for Busy Cooks
- Simple Steps for Better Golden Chicken
- Troubleshooting Common Mistakes and Coating Issues
- Scaling the Recipe for Any Crowd
- Debunking Fried Chicken Misconceptions
- Storage Solutions and Zero Waste Ideas
- Beautiful Presentation Tips for Better Plates
- High in Sodium ⚠️
- Recipe FAQs
- 📝 Recipe Card
Mastering Techniques for High Efficiency Crunch
The Physics of the Shatter Crisp Crust: Potato starch creates a rigid, non greasy network while the double fry forces out residual steam for a dry, loud crunch. This two stage heating process ensures the moisture stays in the meat while the skin dehydrates into a crisp shell.
- Enzymatic Tenderization: Fresh ginger contains zingibain, an enzyme that helps break down protein fibers during the 45 minutes marinade.
- Alcohol Volatilization: The sake and mirin serve a dual purpose, neutralising any "chickeny" odors while evaporating rapidly in the oil to create tiny air pockets in the crust.
- Starch Gelatinization: Using a high ratio of potato starch over flour prevents the coating from becoming bread like or heavy.
- Thermal Momentum: Resting the chicken between the first and second fry allows the internal heat to finish cooking the center without burning the outside.
| Thickness | Internal Temp | Rest Time | Visual Cue |
|---|---|---|---|
| 1 inch cubes | 165°F | 3 minutes | Clear juices when pierced |
| 1.5 inch cubes | 165°F | 4 minutes | Deep golden brown crust |
| Large strips | 165°F | 5 minutes | Shatter crisp skin texture |
Making sure your chicken hits that internal temperature is the difference between a juicy bite and a rubbery one. If you love this flavor profile, you might also enjoy the char grilled depth of my Japanese Chicken Yakitori recipe which uses similar aromatics but a completely different cooking method. Both are staples in my kitchen when I need an umami fix.
Essential Recipe Specs and Timing Goals
When we talk about efficiency, timing is everything. You don't want to be standing over a pot of oil for an hour. By prepping your 1.5 lbs boneless, skin on chicken thighs into uniform 1.5 inch pieces, you ensure that every single morsel finishes at the exact same moment.
This consistency is the hallmark of a cook who knows their craft.
The specs for this recipe are built around the 4 servings yield. You’re looking at about 10 minutes of actual cook time once the oil is hot. The marinade requires 45 minutes to really do its job, but that’s passive time where you can be prepping a side or just relaxing.
Don't rush the marinade; those 3 tbsp of soy sauce and 2 tbsp of freshly grated ginger need that window to penetrate the meat fibers.
One thing I've learned the hard way: don't skip the sea salt. Even though there's soy sauce, that 0.5 tsp of sea salt provides the necessary surface tension for the marinade to cling. It’s a small detail, but it’s what separates the "good" from the "I need the recipe for this" level of cooking.
Starch and Spirit Component Analysis
| Ingredient | Science Role | Pro Secret |
|---|---|---|
| Potato Starch | High amylose content | Use "Katakuriko" for the whitest, crispiest finish |
| Sake | Protease activator | Removes gamey notes and tenderizes the thigh meat |
| Ginger | Protein breakdown | Grate it fresh; bottled ginger lacks the active enzymes |
| Chicken Thighs | Fat to meat ratio | Keep the skin on; it renders into extra crunch |
Adding a tiny bit of all purpose flour to the starch just 2 tbsp gives the coating a bit more structural integrity. If you go 100% starch, the crust can sometimes be too fragile and fall off.
This mix is my secret for a "bulletproof" coating that survives the trip from the pan to the plate without losing its integrity.
Smart Ingredient Choices and Better Swaps
To get the best results, you need the right components. We are using 1.5 lbs boneless, skin on chicken thighs because the fat in the skin is essential for flavor. We’ll also need 2 tbsp freshly grated ginger, 3 cloves minced garlic, and the liquid gold trio: 3 tbsp soy sauce, 2 tbsp sake, and 1 tsp mirin.
For the coating, have 1 cup potato starch and 2 tbsp all purpose flour ready.
Don't forget the seasoning: 0.5 tsp sea salt, 0.5 tsp toasted sesame oil, and 0.25 tsp black pepper. Finally, you’ll need 4 cups neutral oil for frying (grapeseed or canola works best).
| Original Ingredient | Substitute | Why It Works |
|---|---|---|
| Sake | Dry Sherry | Similar acidity and sugar content. Note: Slightly nuttier flavor. |
| Mirin | Honey + Water | Mimics sweetness and glossiness. Note: Use 1/2 tsp honey with 1/2 tsp water. |
| Potato Starch | Cornstarch | Provides crunch but slightly harder texture. Note: Less "flaky" than potato starch. |
If you find yourself out of potato starch, cornstarch is your best friend, though the texture will be a bit more like a traditional fried chicken than the craggy, light shell of authentic karaage. It's a trade off I make often when I'm in a rush and realize the pantry is bare.
It's always better to cook than to order out.
Minimal Kitchen Tools for Busy Cooks
I’m a big believer in not cluttering your kitchen with single use gadgets. For this recipe, you really only need a heavy bottomed pot or a Dutch oven. A cast iron skillet also works, but a deeper pot prevents oil splatters from making a mess of your stove.
A digital thermometer is the one "fancy" tool I insist on; guessing oil temperature is a recipe for greasy chicken.
You'll also need a wire cooling rack set over a baking sheet. This is non negotiable. If you put hot fried chicken directly onto paper towels, the bottom will sit in its own steam and turn into a soggy sponge in seconds. The rack allows air to circulate around the entire piece, keeping that 360 degree crunch intact.
Chef's Tip: If you don't have a wire rack, use the rack from your toaster oven or even a clean oven rack propped up on some cans. Anything to get that airflow moving.
Simple Steps for Better Golden Chicken

Phase 1: Flavor Infusion
- Cut chicken. Slice your 1.5 lbs chicken thighs into 1.5 inch cubes. Note: Uniformity ensures even cooking.
- Mix marinade. Combine ginger, garlic, soy sauce, sake, mirin, sea salt, sesame oil, and black pepper in a bowl.
- Marinate meat. Toss the chicken in the mixture and let sit for 45 minutes until the liquid is mostly absorbed.
- Prepare coating. Mix the potato starch and all purpose flour in a shallow dish.
Phase 2: The Starch Shield
- Dredge pieces. Press each piece of chicken firmly into the starch mixture. Note: Squeeze the chicken to make sure the starch sticks.
- Rest chicken. Let the coated pieces sit for 5 minutes until the starch looks slightly damp.
- Heat oil. Bring 4 cups of neutral oil to 350°F (180°C) in your pot.
Phase 3: The Double Fry
- First fry. Fry in batches for 3 minutes until pale golden and firm.
- Rest meat. Remove to the wire rack and let rest for 3 minutes. Note: This allows the internal moisture to redistribute.
- Second fry. Increase oil heat to 375°F (190°C) and fry for 1 minute until deep golden and crackling.
Troubleshooting Common Mistakes and Coating Issues
Solving Coating Adhesion Issues
If your coating is sliding off the chicken like an oversized coat, it’s usually because the chicken was too wet before it hit the starch. The marinade should be absorbed, not dripping. If there's a pool of liquid in the bowl, drain it off before dredging.
Another culprit is the "rest" period. If you drop the chicken into the oil the second you coat it, the starch hasn't had time to hydrate and bond with the protein. Giving it that 5 minute breather makes a world of difference.
| Problem | Root Cause | Solution |
|---|---|---|
| Soft coating | Steam trapped inside | Increase heat for second fry |
| Burned exterior | Oil too hot initially | Maintain 350°F (180°C) precisely |
| Blah flavor | Short marinade time | Massage meat to accelerate absorption |
One thing people often overlook is the oil temperature drop. When you add cold chicken to hot oil, the temperature can plummet by 50 degrees. Work in small batches to keep that sizzle aggressive. If you crowd the pan, you’re basically boiling the chicken in oil, which is how you get that dreaded greasiness.
Common Mistakes Checklist ✓ Pat chicken skin dry with a paper towel before cutting to ensure the marinade sticks. ✓ Never crowd the pot; leave at least an inch of space between pieces. ✓ Use a thermometer for oil temp guessing is the path to failure.
✓ Sift the potato starch to remove any lumps that could create thick, doughy spots. ✓ Always do the second fry at a higher temperature than the first.
Scaling the Recipe for Any Crowd
When you're scaling down for one or two people, it's pretty straightforward. Cut the ingredients in half, but keep the oil volume high enough to submerge the chicken. Use a smaller pot to save on oil, but make sure it still has high sides to prevent splashing.
Cook times usually remain the same since the piece size hasn't changed.
Scaling up for a party (8 or 12 people) is where it gets tricky. Do not double the spices or salt linearly; salt and spices should be increased to about 1.5x for a double batch to avoid over seasoning. However, keep the liquid ratios (soy, sake) exact.
You will absolutely need to work in batches and keep the finished chicken in a 200°F (90°C) oven on a wire rack to stay warm while you finish the rest.
If you find yourself making a massive batch and want a variety of flavors, you can try something like my Spicy Chicken Wings Recipe alongside the karaage. The contrast between the Japanese ginger profile and a spicy wing sauce is always a hit at gatherings.
Debunking Fried Chicken Misconceptions
One myth I hear constantly is that "flour is better for crunch." In the world of Japanese frying, this is just wrong. Flour contains gluten, which develops a chewy, bread like texture when hydrated. Potato starch is pure starch; it creates a crystalline structure that shatters rather than chews.
Another common one is that you only need to fry once. While one fry will cook the chicken, the second fry is what targets the surface moisture. The first fry cooks the meat; the second fry creates the "glass" coating. Without that second dip, your karaage will lose its crispness within minutes of leaving the pan.
Trust the process.
Storage Solutions and Zero Waste Ideas
Leftover karaage is a gift. You can store it in the fridge for up to 3 days in an airtight container. To reheat, avoid the microwave at all costs it will turn your beautiful crust into a rubbery mess.
Instead, use an air fryer at 375°F (190°C) for 3-4 minutes or a toaster oven until the skin starts to sizzle again.
For long term storage, you can freeze the chicken after the first fry. Let them cool completely, freeze on a tray, then bag them. When you're ready to eat, do the "second fry" directly from frozen at 375°F (190°C) for about 3 minutes.
It’s the ultimate high efficiency meal prep move.
Don't toss out the leftover starch in the dredging bowl! If it's not too contaminated with raw chicken juice, you can mix it with a bit of water and the leftover marinade to create a thickener for a quick stir fry sauce.
If you have chicken scraps or skin trimmings, fry them up separately as a "cook's treat" they are incredibly crunchy and salty.
Beautiful Presentation Tips for Better Plates
The classic way to serve karaage is with a simple wedge of lemon and a dollop of Japanese mayo (like Kewpie). The acid from the lemon cuts through the richness of the fried skin, and the creamy mayo adds a velvety finish to the experience.
I like to serve mine on a bed of shredded cabbage, which stays crunchy and provides a fresh contrast to the hot chicken.
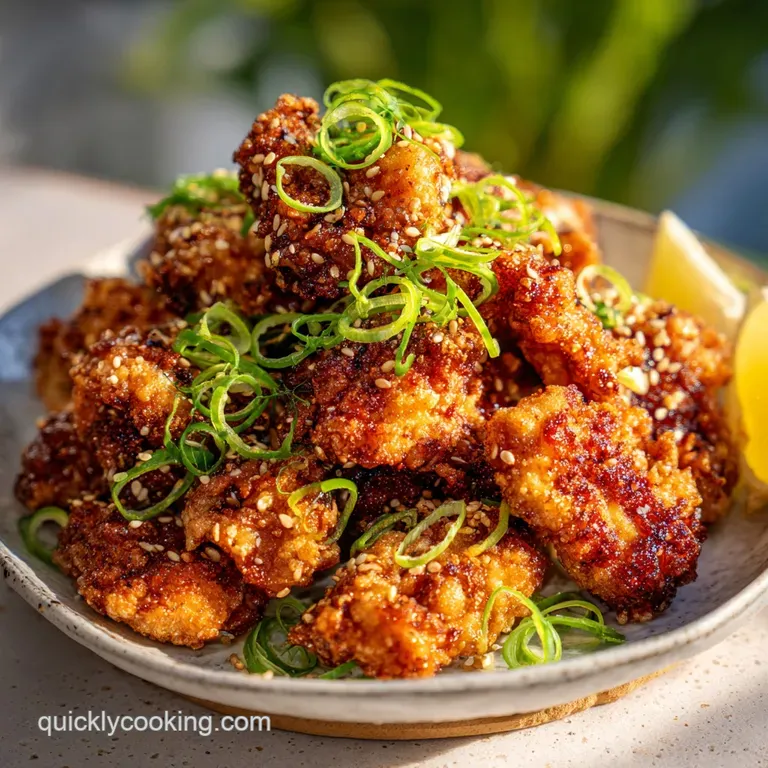
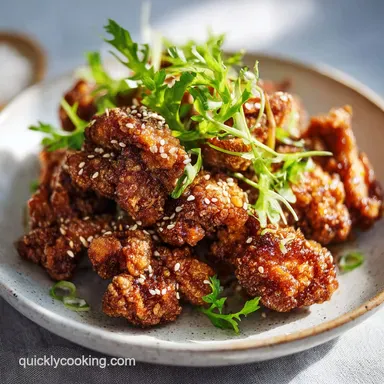
For a more modern look, sprinkle some toasted sesame seeds or finely sliced scallions over the top right before serving. The green against the golden brown chicken makes the dish pop.
If you're feeling fancy, a small dish of shichimi togarashi (Japanese seven spice) on the side allows guests to control their own heat level. It’s a simple touch that makes your home kitchen feel like a high end Izakaya.

High in Sodium ⚠️
895 mg mg of sodium per serving (39% % of daily value)
American Heart Association recommends limiting sodium intake to approximately 2,300mg per day.
Tips to Reduce Sodium in Your Fried Chicken
-
Low-Sodium Soy Sauce-20%
Replace regular soy sauce with a low-sodium or reduced sodium version. This simple swap can significantly reduce the sodium content without sacrificing flavor.
-
Reduce Added Salt-25%
Eliminate or drastically reduce the amount of sea salt added (currently 0.5 tsp). Taste the marinade before adding any salt and adjust accordingly.
-
Acidic Boost-10%
Enhance the flavor profile with ingredients like lemon juice or rice vinegar. The acidity can make up for the flavor lost when reducing sodium.
-
Flavorful Herbs & Spices
Experiment with fresh herbs and spices like white pepper, garlic powder (ensure it's salt free), onion powder, or dried herbs to add depth of flavor without sodium.
-
Consider Sake Alternative-10%
Ensure your sake is a low-sodium brand. If unsure, experiment with swapping sake with Shaoxing wine, using a smaller quantity and tasting as you go.
Recipe FAQs
What is the ideal oil temperature for the initial fry of the chicken?
Maintain 350°F (180°C) precisely. This moderate heat ensures the coating sets without burning, allowing the internal temperature to rise slowly toward the desired doneness.
Must I rest the chicken between the first and second frying stages?
Yes, resting for 3 minutes is crucial. This allows residual internal heat to finish cooking the center and redistributes moisture, preparing the crust for the high heat crisping.
How to achieve the shatter crisp coating without specialized equipment?
Use a heavy bottomed pot or Dutch oven and potato starch. The combination of high amylose starch and the aggressive heat shock from the second fry at 375°F creates the characteristic crunch.
Is it true that using only all-purpose flour yields a better crust for Karaage?
No, this is a common misconception. All-purpose flour develops gluten, resulting in a chewy texture; potato starch creates the necessary crystalline structure for a true, shattering crisp.
How long should the chicken marinate for maximum flavor penetration?
Marinate for a minimum of 45 minutes, up to 24 hours. The enzymes in the fresh ginger need this time to tenderize the meat fibers, similar to how acid works to tenderize in the [Authentic Jamaican Curry recipe].
How should I reheat leftovers to retain crispness?
Use an air fryer or toaster oven at 375°F (190°C) for 3-4 minutes. Avoid the microwave entirely, as it traps steam and rapidly degrades the crunchy exterior structure you worked hard to build.
What can I substitute for sake in the marinade if I need to avoid alcohol?
Use dry sherry as a direct substitute for similar flavor and acidity. If you are avoiding alcohol entirely, use a blend of water and rice vinegar to mimic the acidity, though the flavor profile shifts slightly.
Ultimate Crispy Chicken Karaage
Ingredients:
Instructions:
Nutrition Facts:
| Calories | 741 kcal |
|---|---|
| Protein | 33.8 g |
| Fat | 47.2 g |
| Carbs | 40.1 g |
| Fiber | 0.9 g |
| Sugar | 1.8 g |
| Sodium | 895 mg |
