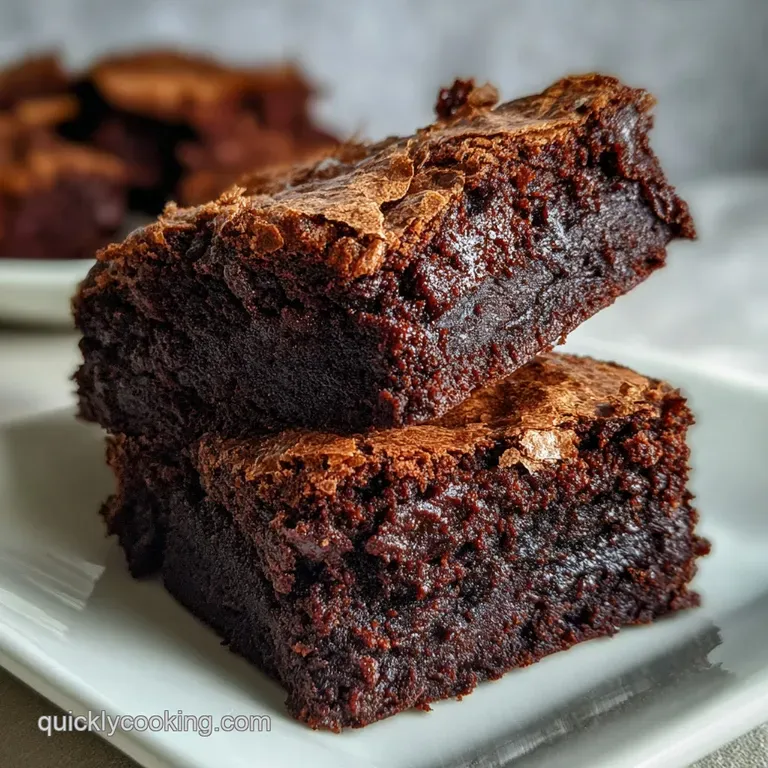
Fudgy Brownies: One Bowl Decadence
- Time: Active 10 minutes, Passive 25 minutes, Total 35 minutes
- Flavor/Texture Hook: Velvety center with a shatter thin top
- Perfect for: Late night cravings, busy weeknights, or beginner bakers
- Why These Fudgy Brownies Beat Every Box Mix Ever
- Essential Time and Temperature Specs for Success
- Selecting High Quality Components for Maximum Flavor
- Minimal Tools Required for This One Bowl Wonder
- Foolproof Steps for the Most Intense Chocolate Texture
- Avoiding Common Mistakes and Mastering the Bake
- Creative Twists to Personalize Your Chocolate Batch
- Debunking Brownie Myths
- Storage Strategies for Maintaining That Dense Texture
- Perfect Pairings for Your Finished Chocolate Treat
- Fudgy Brownie FAQs
- 📝 Recipe Card
Why These Fudgy Brownies Beat Every Box Mix Ever
I still remember the first time I truly nailed these. It was a Tuesday night, I was exhausted, and the craving for something chocolatey was hitting hard. I didn't want to deal with a stand mixer or a sink full of dishes. I just grabbed one heat proof bowl, melted the butter, and whisked like my life depended on it.
When I pulled the pan out 25 minutes later, the kitchen smelled like a high end chocolatier, and that first bite was a total game reverser.
The real magic happened when I realized that most people over complicate the process. You don't need fancy tempered chocolate or three types of flour. These fudgy brownies from scratch rely on a specific order of operations that ensures every square is dense, moist, and ridiculously rich.
It’s the kind of recipe that makes you look like a pro even if you're baking in your pajamas with a wooden spoon.
We’ve all had those cakey, dry brownies that feel more like a disappointing muffin. Forget those. We're going for a texture that's almost like a truffle but with enough structure to hold in your hand. This is about efficiency without sacrificing a single ounce of quality.
If you've been looking for a reliable, fast paced way to get your chocolate fix, you've found it. Right then, let’s get into what actually makes this tick.
The Physics of the Fudgy Crumb
Starch Suppression: Using a low flour to fat ratio prevents a cakey structure from forming, keeping the center dense and moist. This mechanical choice ensures the fats dominate the crumb for that velvety mouthfeel.
Sugar Dissolution: Whisking granulated sugar into hot butter creates a meringue like film on the surface during baking. This is what produces the iconic "shatter" top that distinguishes elite brownies from basic ones.
| Method | Prep Time | Texture Result | Cleanup Level |
|---|---|---|---|
| Fast Method (This One) | 10 minutes | Dense, Velvety, Glossy | One Bowl |
| Classic Method | 25 minutes | Chewy, Aerated | Multiple Bowls |
| Box Mix | 5 minutes | Spongy, Artificial | Minimal |
This comparison highlights why focusing on the one bowl approach works so well for us. We're cutting down the time by half compared to traditional "from scratch" methods while maintaining a superior texture to anything that comes out of a cardboard box.
Trust me, the extra five minutes over a box mix is worth the massive jump in flavor.
Essential Time and Temperature Specs for Success
Efficiency doesn't mean being sloppy with your numbers. In fact, when you're moving fast, precision becomes even more important. I've ruined more than one batch by guessing the oven temp or pulling them out too early.
For these fudgy brownies from scratch, we have three non negotiable checkpoints that guarantee success every single time you bake.
First, your butter needs to be genuinely hot when it hits the sugar. This isn't just about melting; it's about starting the sugar dissolving process immediately. Second, your eggs should be cold.
It sounds counterintuitive, but cold eggs help regulate the batter's temperature after the hot butter, preventing the flour from clumping. Finally, the bake time is a hard limit. If you overbake by even three minutes, you're heading into "dry territory," and nobody wants to live there.
The Component Analysis Deep Dive
| Ingredient | Science Role | Pro Secret |
|---|---|---|
| Unsalted Butter (115g) | Primary Fat Source | Use it hot to "bloom" the cocoa powder and dissolve sugar |
| Unsweetened Cocoa (60g) | Flavor Foundation | Sift it directly into the wet mix to avoid bitter lumps |
| Large Eggs (2) | Structural Binder | Cold eggs create a tighter, fudgier emulsion in the batter |
| White Sugar (200g) | Textural Catalyst | Rapid whisking with butter creates the crackly top layer |
Understanding these roles helps you move faster because you know exactly which steps require your full attention. For instance, you can be casual with the flour, but you must be aggressive when whisking the sugar and butter. That’s where the real texture is built.
Selecting high-quality Components for Maximum Flavor
To keep things efficient, we’re using staple pantry items, but there’s a strategy to how we pick them. I once tried using a "low-fat" butter substitute in a moment of madness honestly, don't even bother. The fat is what carries the chocolate flavor across your palate. Stick to the real stuff.
- 1/2 cup (115g) Unsalted butter: This must be melted and hot.
- 1 cup (200g) White granulated sugar: This provides the sweetness and the crunch.
- 1/4 cup (50g) Packed light brown sugar: Why this? Adds moisture and a subtle molasses undertone for depth.
- 2/3 cup (60g) Unsweetened cocoa powder: Use a standard Dutch processed or natural cocoa.
- 2 Large eggs: Keep these in the fridge until the very second you need them.
- 1 tsp (5ml) Pure vanilla extract: Why this? Acts as a flavor enhancer for the chocolate, making it taste "darker."
- 1/2 cup (65g) All purpose flour: Just enough to hold it all together.
- 1/4 tsp (1.5g) Fine sea salt: Crucial for balancing the heavy sugar content.
- 1/2 cup (90g) Semi sweet chocolate chips: These provide "pockets" of melted joy in the finished bake.
| Original Ingredient | Substitute | Why It Works |
|---|---|---|
| Unsalted Butter | Salted Butter | Works fine; just omit the 1/4 tsp of extra salt |
| Light Brown Sugar | Dark Brown Sugar | Adds more moisture; results in a slightly heavier, chewier crumb |
| All Purpose Flour | 1:1 gluten-free Blend | Rice based blends work well here since gluten isn't the goal |
| Chocolate Chips | Chopped Walnuts | Adds crunch note that the texture will be less "gooey" |
If you decide to swap the chips for nuts or even different chocolate types, keep the volume the same. The balance of this batter is delicate, and adding too much "stuff" can lead to a crumbly mess. If you're feeling adventurous later, you might even consider how this base compares to a Tiramisu Brownies Ready recipe for a more complex flavor profile.
Minimal Tools Required for This One Bowl Wonder
We're going for maximum speed and minimum cleanup. You don’t need a stand mixer or a food processor for this. In fact, a hand whisk is actually better because it prevents you from over incorporating air, which would make the brownies rise too much and lose that fudge factor.
Prepping Your Station
Start by grabbing an 8x8 inch square baking pan. I prefer metal pans because they conduct heat more evenly than glass, which can lead to overbaked edges and raw centers. Line it with parchment paper, leaving an overhang on two sides.
This is my favorite "lazy cook" trick it lets you lift the entire block out once it's cooled, making slicing a breeze.
The Tool Kit
You'll need one large microwave safe bowl (or a pot if using the stovetop), a sturdy whisk, and a silicone spatula. That’s it. If you have a kitchen scale, use it. Measuring by weight is significantly faster than using cups and it's much more accurate.
One mistake I once made was packing the flour too tightly in a measuring cup, which turned my "fudgy" dream into a "bready" nightmare.
Foolproof Steps for the Most Intense Chocolate Texture

- Heat the oven. Set it to 350°F (175°C) and ensure the rack is in the center position.
- Melt the butter. In your large bowl, melt the 115g of butter until it is bubbling and hot. Note: The heat is vital for the next step.
- Whisk the sugars. Add the 200g white sugar and 50g light brown sugar to the hot butter. Whisk vigorously for 1 minute until the mixture looks like grainy wet sand.
- Incorporate eggs and vanilla. Add the 2 cold eggs and 5ml vanilla extract. Whisk for 2 full minutes until the batter becomes pale, thick, and smooth.
- Bloom the cocoa. Sift in the 60g cocoa powder. Stir gently until the batter is dark and glossy.
- Fold in dry ingredients. Add the 65g flour and 1.5g salt. Use a spatula to fold until just a few streaks of flour remain. Note: Do not overmix here!
- Add the chips. Fold in the 90g chocolate chips quickly.
- Transfer and level. Pour the batter into your prepared 8x8 pan. Smooth the top with your spatula until it reaches all four corners.
- Bake the batch. Place in the oven for 25 minutes.
- Test for doneness. Insert a toothpick; it should come out with a few moist crumbs attached. Pull them out when the edges are set but the center still wobbles slightly.
Chef's Note: For the cleanest cuts, wait until the pan is completely cool. If you cut them while hot, the center will collapse and look messy. If you're in a rush, pop the pan in the fridge for 20 minutes to set the fats quickly.
If you find yourself loving this one bowl method, you might also enjoy the simplicity of my Gooey Brownies - recipe which uses a similar high fat technique for that perfect texture.
Avoiding Common Mistakes and Mastering the Bake
The biggest hurdle with brownies from scratch is knowing when to stop. Because the batter is so high in sugar and fat, it continues to cook even after you take it out of the oven. This is called carryover cooking. If the toothpick comes out clean, you've actually overbaked them. You want those sticky crumbs!
Why Your Brownies Turned Out Cakey
If your brownies feel more like chocolate bread, you likely overbeat the eggs or used too much flour. Overbeating eggs incorporates air, which acts as a leavening agent. We want a dense emulsion, not a foam. Also, check your flour measurement; even a tablespoon too much can ruin the fudge factor.
Preventing a Dull or Matte Top
A dull top usually means the sugar didn't dissolve properly. This happens if the butter wasn't hot enough or if you didn't whisk the sugar butter egg mixture long enough. That 2 minute whisking session isn't just for exercise; it’s creating the structural film that dries into that beautiful crackle.
| Problem | Root Cause | Solution |
|---|---|---|
| Greasy Bottom | Butter separated from the batter | Whisk eggs more thoroughly to emulsify the fats |
| Brittle/Crumbling | Overbaked or too much cocoa | Reduce bake time by 2-3 mins; ensure cocoa is measured by weight |
| Raw/Gooey Center | Oven temp too low or glass pan used | Increase temp by 15°F if using glass; bake 5 mins longer |
Common Mistakes Checklist
- ✓ Never skip sifting the cocoa powder - lumps will not bake out and leave bitter spots.
- ✓ Use a metal baking pan for the sharpest, most evenly cooked edges.
- ✓ Don't open the oven door constantly; the temperature drop ruins the rise/fall of the fudge.
- ✓ Always use large eggs; medium eggs don't provide enough moisture for this specific flour ratio.
- ✓ Let the brownies rest for at least 30 minutes before slicing to allow the structure to set.
Creative Twists to Personalize Your Chocolate Batch
Once you've mastered the base, you can start playing with the "add ins." The beauty of this recipe is its stability. You can swirl in a quarter cup of salted caramel or peanut butter right before baking for a marbled effect. Just don't over swirl, or it will just blend into the batter and disappear.
If you want a crunchier texture, toasted walnuts or pecans are the way to go. Toast them in a dry pan for 3 minutes before adding them to the batter; it makes a massive difference in the aroma.
For a more sophisticated vibe, a sprinkle of flaky sea salt on top right as they come out of the oven is brilliant. It cuts through the sweetness and makes the chocolate pop.
Scaling for Larger Crowds
If you need to feed a mob, you can easily double this recipe.
- Scaling UP (2x): Use a 9x13 inch pan. Increase the salt and vanilla to 1.5x only to avoid overpowering the chocolate. Bake for 30-35 minutes, but start checking at 28.
- Scaling DOWN (1/2): Use a loaf pan. Use 1 egg and 1 yolk (discard the extra white). Reduce bake time to 18-20 minutes.
| Serving Size | Pan Size | Cook Time | Yield |
|---|---|---|---|
| Small Batch | 9x5 Loaf Pan | 20 minutes | 8 brownies |
| Standard | 8x8 Square | 25 minutes | 16 brownies |
| Party Size | 9x13 Rectangular | 32 minutes | 32 brownies |
When doubling the recipe, keep the liquids slightly reduced (about 10% less) to ensure the center sets properly. Large pans have more surface area, but the depth can make the middle take longer to reach the right temperature.
If you find the edges getting too dark while the center is still liquid, lower your oven temp by 25°F for the final 10 minutes.
Debunking Brownie Myths
There’s a lot of noise online about what makes a "perfect" brownie. One big myth is that you need expensive bar chocolate to get a fudgy result. That’s simply not true.
Cocoa powder actually provides a more intense chocolate flavor because it's essentially pure chocolate solids without the extra cocoa butter and sugar found in bars. By controlling the butter yourself, you get a more consistent fudge.
Another misconception is that "more eggs equals more fudge." In reality, too many eggs will lead to a cakey, souffle like texture. It’s the balance of sugar and fat against a very small amount of flour that creates the fudge.
Don't fall for the "extra yolk" trap unless you specifically want a very dense, almost gummy brownie.
Storage Strategies for Maintaining That Dense Texture
Storing these is easy because the high fat content keeps them moist for days. Keep them in an airtight container at room temperature for up to 4 days. If you like them extra chewy, store them in the fridge. The cold hardens the butter and chocolate chips, creating a texture almost like a candy bar.
Freezing: These brownies freeze beautifully. Wrap individual squares in plastic wrap, then place them in a freezer bag. They’ll stay fresh for up to 3 months.
To eat, just let them thaw on the counter for 15 minutes, or hit them in the microwave for 10 seconds for that "fresh out of the oven" feel.
Zero Waste Tip: If you happen to have any edges that get a bit too crispy (though some people love those!), don't throw them away. Crumble them over vanilla ice cream or mix them into a milkshake. You can even pulse them in a blender to make a decadent "brownie dirt" for a chocolate parfait.
Perfect Pairings for Your Finished Chocolate Treat
While these are incredible on their own, a few simple additions can turn them into a full blown dessert. A cold glass of whole milk is the classic choice for a reason the fat in the milk cleanses the palate from the heavy sugar.
If you’re serving these for guests, a dollop of unsweetened whipped cream or a scoop of tart raspberry sorbet provides a great contrast to the richness.
For those who want to go all out, try making a quick espresso glaze or simply serving them alongside a strong cup of coffee. The bitterness of the coffee brings out the earthy notes in the cocoa powder. If you're looking for more cake like chocolate options for a different occasion, you might want to try a Small Chocolate Cake recipe or even a Chocolate Mousse Cake recipe for something lighter.
| Ingredient Shortcut | Impact | Benefit |
|---|---|---|
| Self Rising Flour | Slightly more lift | Use if you prefer a "cakier" edge |
| Espresso Powder | Deepens cocoa notes | Makes the chocolate taste "expensive" |
| Salted Butter | Adds savory edge | Saves you from measuring salt separately |
Whatever you choose, remember that the best fudgy brownies from scratch are the ones you actually have time to make. Don't stress the small stuff just melt that butter, whisk those eggs, and enjoy the aroma filling your kitchen. Let's crack on and get baking!

Fudgy Brownie FAQs
What is the secret to fudgy brownies?
Melt your butter and vigorously whisk the sugar into it. This step, combined with a low flour-to-fat ratio and precise baking time, is crucial. It helps dissolve the sugar, creating the signature crackly top and dense, moist interior.
What makes brownies chewy vs fudgy?
Fudgy brownies use a higher fat-to-flour ratio and less leavening. Chewy brownies often have more flour and a bit more leavening (like baking soda), plus sometimes an extra egg yolk for richness and chew.
What is the secret to nice chewy brownies?
Use a higher ratio of flour to fat and ensure you don't overbake. While this recipe focuses on fudge, for chewiness, you'd add a touch more flour and whisk the eggs into the sugar mixture until pale and thick, then bake until a toothpick comes out with moist crumbs, not clean.
What is the secret to making good brownies?
Mastering the fat-to-flour ratio and precise baking time. For fudgy brownies, melt the butter, whisk vigorously with sugar, use minimal flour, and slightly underbake so they set as they cool. If you master controlling the texture here, the same principles of fat content and temperature apply to achieving perfect results in our Maple Cake Recipe Ready in 1 Hour.
Can I use oil instead of butter for fudgy brownies?
No, stick with butter for the best fudgy texture. Butter provides a rich flavor and the specific fat structure needed for that desirable dense, moist crumb. Oil can make brownies taste greasy and change the texture to something less desirable.
How do I get a crackly top on my brownies?
Whisk hot butter and sugar vigorously until pale and thick, then bake. This process creates a meringue like film on the surface that dries into the signature crackly top as the brownies bake and cool.
What happens if I overbake my fudgy brownies?
They will become dry and cakey instead of fudgy. Overbaking allows too much moisture to evaporate, sacrificing the dense, moist interior that defines a fudgy brownie. Pull them out when the edges are set but the center still looks slightly underdone.
Fudgy Brownies From Scratch
Ingredients:
Instructions:
Nutrition Facts:
| Calories | 172 kcal |
|---|---|
| Protein | 2.2 g |
| Fat | 8.5 g |
| Carbs | 24.4 g |
| Fiber | 1.6 g |
| Sugar | 18.7 g |
| Sodium | 38 mg |
