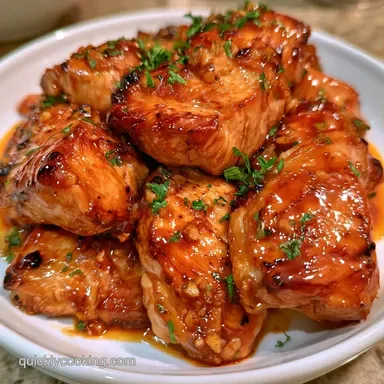
Crockpot Honey Garlic Chicken with Thighs
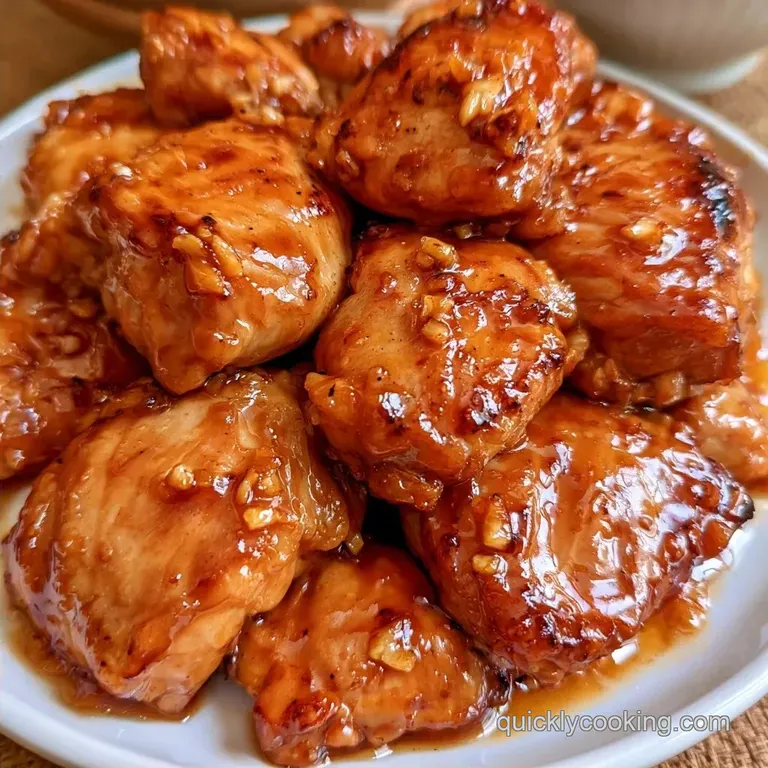
- Time: 10 min active + 6 hours cooking
- Flavor/Texture Hook: Sticky, mahogany glaze with tender, shreddable meat
- Perfect for: Busy weeknight dinner or meal prep
- Crockpot Honey Garlic Chicken Made Easy
- Why the Meat Stays Juicy
- Gear For This Meal
- What Goes Into the Pot
- The Recipe Specs
- Putting It All Together
- Troubleshooting Common Sauce Issues
- Changing the Portion Size
- Preservation and Waste Tips
- Tweaking the Recipe
- Serving Your Meal
- Critical Sodium Level
- Recipe FAQs
- 📝 Recipe Card
Crockpot Honey Garlic Chicken Made Easy
The aroma greets you immediately upon entering a rich, sweet, and savory scent that permeates the whole house. My first attempt involved chicken breasts, thinking leaner meat was the way to go. However, after six hours of cooking, the meat ended up dry and tough, even though it was drenched in sauce.
It was a complete disappointment.
Everything improved once I switched to thighs. The higher fat content keeps the meat tender, and the sauce coats the chicken perfectly rather than sliding away. This Crockpot Honey Garlic Chicken recipe is designed for simplicity.
Just combine a few basic pantry ingredients and let the slow cooker work its magic while you focus on other things.
The result is meat that shreds effortlessly with a fork and a sauce with the polished quality of a top-tier restaurant. It’s the perfect meal for making your home smell like a gourmet kitchen without requiring hours of active cooking at the stove.
Why the Meat Stays Juicy
Thighs over breasts: Thighs have more connective tissue that turns into gelatin over six hours, keeping the meat moist. Low and slow heat: Cooking at a lower temperature prevents the muscle fibers from tightening up and squeezing out their juices.
Gear For This Meal
I prefer using a 6 quart programmable slow cooker for this. It gives the chicken enough room to sit in a single layer, which means every piece gets coated in that sticky glaze. If you have a multi cooker like an Instant Pot, just use the "Slow Cook" setting on low.
You'll also need a medium mixing bowl to whisk the sauce and a small saucepan. While you could try to thicken the sauce inside the Crockpot, it takes forever. Moving the liquid to a saucepan allows you to boil it down and get that glossy finish in about five minutes.
What Goes Into the Pot
The honey is the real hero here. It provides the sweetness, but more importantly, it creates the viscosity needed for the sauce to stick to the chicken. Maple syrup is too thin and changes the flavor profile too much, and brown sugar can sometimes leave a grainy texture if not dissolved completely.
For the salt and umami, low sodium soy sauce is the way to go. Using the full sodium version often makes the dish taste like a salt lick after the sauce reduces on the stove. The ketchup might seem weird, but it adds a vinegary tang and a hint of tomato that balances the sugar.
The Ingredients List
- 2 lbs boneless, skinless chicken thighsWhy this? High fat content prevents drying during long cooks
- 1/2 cup honeyWhy this? Creates the thick, sticky glaze
- 1/3 cup low sodium soy sauceWhy this? Adds salty umami without overpowering
- 1/4 cup ketchupWhy this? Balances sweetness with acidity
- 4 cloves fresh garlic, mincedWhy this? Provides a sharp, aromatic bite
- 1 tbsp olive oilWhy this? Helps emulsify the sauce base
- 1/2 tsp ground gingerWhy this? Adds a subtle, warm zing
- 2 tbsp cornstarchWhy this? Essential for thickening the final glaze
- 2 tbsp cold waterWhy this? Slurry base to prevent cornstarch clumps
Substitution Guide
| Original Ingredient | Substitute | Why It Works |
|---|---|---|
| Honey (1/2 cup) | Brown Sugar (1/2 cup) | Similar sweetness. Note: Less glossy finish |
| Soy Sauce (1/3 cup) | Coconut Aminos (1/3 cup) | Salty and sweet. Note: Lower sodium, slightly sweeter |
| Garlic Cloves (4) | Garlic Powder (1 tsp) | Same base flavor. Note: Lacks the punch of fresh garlic |
The Recipe Specs
The timing here is fixed to ensure the chicken is safe to eat and the texture is right. According to USDA data, poultry is safe to eat once it hits 165°F.
- Prep time:10 minutes
- Cook time:6 hours (Low) or 3 hours (High)
- Total time:6 hours 10 minutes
- Yield: 6 servings
Putting It All Together

- Whisk together the honey, soy sauce, ketchup, minced garlic, olive oil, and ground ginger in a medium bowl. Note: Whisk until the honey is fully blended and no longer clumpy.
- Arrange the chicken thighs in the bottom of the slow cooker in a single layer.
- Pour the sauce over the chicken. Note: Use a spoon to make sure every inch of meat is covered.
- Cover and cook on Low for 6 hours until the meat yields easily to a fork.
- Remove the chicken from the pot and place it on a platter.
- Pour the liquid from the pot into a small saucepan.
- Heat the saucepan over medium high heat until it begins to bubble.
- Mix 2 tbsp cornstarch with 2 tbsp cold water in a small cup, then whisk this slurry into the bubbling sauce.
- Simmer for 3-5 minutes until the sauce reduces into a thick, glossy glaze.
- Pour the thickened glaze back over the chicken and serve immediately.
Troubleshooting Common Sauce Issues
Fixing a Watery Sauce
If the glaze remains too thin after simmering, there may be excess moisture from the chicken. Let it simmer for an additional 3 minutes or stir in one more teaspoon of cornstarch slurry. Remember, the sauce will continue to thicken as it cools slightly on the plate.
Avoiding Scorched Garlic
Garlic burns easily if sautéed over too high a heat before going into the pot. To avoid this, this recipe incorporates the garlic raw into the sauce. If you prefer a milder taste, you can gently sauté the garlic in olive oil for 30 seconds before adding the remaining sauce components.
Addressing Bland Meat
If the chicken lacks flavor despite the sauce, you likely have too much liquid in the pan. Always utilize a cornstarch slurry to reduce the sauce. This intensifies the taste and ensures the glaze coats the meat instead of collecting at the bottom of the bowl.
Changing the Portion Size
When you need to make a bigger or smaller batch of this Slow Cooker Honey Garlic Chicken, keep the ratios in mind.
Scaling Down (Half Batch) Use 1 lb of chicken and halve all sauce ingredients. Use a smaller slow cooker if possible, otherwise, the sauce may evaporate too quickly, leaving the meat dry. Reduce the cook time by about 20%.
Scaling Up (Double Batch) If you're feeding a crowd, double the chicken but only increase the salt and soy sauce by 1.5x. Liquids can pool more in larger batches, so you might need an extra tablespoon of cornstarch slurry to get the sauce thick.
Work in batches if your pot is too small to keep the chicken in a single layer.
Quick Decision Guide
- For a spicier kick: Add 1 tsp red pepper flakes to the sauce.
- For a thicker glaze: Simmer the saucepan reduction for 2 minutes extra.
- For a leaner meal: Skim the fat off the top of the liquid before moving it to the saucepan.
Preservation and Waste Tips
Place leftovers in a sealed container and keep chilled for 4 days. Because the sauce thickens as it cools, stir in a bit of water or chicken broth during reheating to loosen it.
For freezer storage, allow the chicken and sauce to cool completely first. These will keep for 3 months. When ready, thaw overnight in the fridge and warm through in a pan over medium heat, which maintains the texture better than a microwave.
To reduce waste, use any extra glaze as a marinade for grilled shrimp or tofu. If you're tired of the honey taste but have chicken remaining, shred the meat and add it to Creamy Chicken Enchiladas for a fresh take.
Tweaking the Recipe
Customize this meal by adjusting the sides or incorporating a few extra ingredients. To create a "Crockpot Honey Garlic Chicken and Potatoes" variation, add 1 inch gold potato chunks around the chicken; they will absorb the sauce and cook perfectly alongside the meat.
For a lighter take, try a Healthy Crockpot Honey Garlic Chicken version by replacing the honey with a small amount of maple syrup and substituting low sodium coconut amino. You can also stir in frozen snap peas or broccoli during the final 30 minutes of cooking.
If you prefer a different protein, this sauce pairs well with pork tenderloin, though be sure to monitor the temperature sooner to prevent overcooking. If you fancy a total change of pace, check out these Crispy Air Fryer Chicken Nuggets for a quick snack.
Fresh vs Shortcut Comparison
| Component | Fresh Option | Shortcut Option | Difference |
|---|---|---|---|
| Garlic | Fresh Cloves | Garlic Powder | Fresh has a punchier, sharper bite |
| Ginger | Fresh Root | Ground Ginger | Ground is warmer and more subtle |
| Honey | Raw Honey | Clover Honey | Raw honey is thicker and floral |
Serving Your Meal
Because this meal is quite sweet and salty, it pairs best with a neutral side. Steamed jasmine or brown rice is a timeless choice, as the grains soak up the extra glaze.
For those seeking a low-carb alternative, try serving the chicken on a bed of steamed bok choy or cauliflower rice. I particularly enjoy adding a side of Sourdough Discard Garlic Knots to capture every last bit of that mahogany sauce.
To complete the dish, garnish with sliced green onions and toasted sesame seeds. The onions provide a fresh contrast to the rich honey, while the seeds add a light crunch that elevates the presentation.
Critical Sodium Level
1580 mg 1,580 mg of sodium per serving (69% 69% of daily value)
The American Heart Association recommends a daily sodium limit of no more than 2,300 mg, with an ideal limit of 1,500 mg for most adults.
Tips to Reduce Sodium
-
Swap for Coconut Aminos-30%
Replace the low-sodium soy sauce with coconut aminos, which provides a similar savory flavor with significantly less sodium.
-
Use No-Salt Added Ketchup-20%
Substitute standard ketchup with a no-salt added version or a mixture of unsalted tomato paste and a splash of apple cider vinegar.
-
Dilute the Soy Sauce-15%
Replace half of the soy sauce with water or unsalted chicken broth to reduce the salt concentration while maintaining volume.
-
Enhance Natural Aromatics
Double the amount of fresh garlic and ground ginger to add more complexity and punch without adding any sodium.
Recipe FAQs
Can I use chicken thighs for this honey garlic recipe?
Thighs are the ideal choice for this dish.
Tip: They stay juicy during the 6-hour low heat cycle compared to breasts.
Why does slow cooker chicken often result in watery sauces?
Condensation and meat juices collect in the pot during the long cooking process.
Tip: Simmer the liquid in a saucepan with a cornstarch slurry for 3-5 minutes to create a thick, glossy glaze.
Is it true that slow cooker meals are always expensive to prepare?
Surprisingly, no.
Tip: This recipe relies on affordable pantry staples like honey and soy sauce to keep costs low.
How to make this honey garlic chicken healthier?
Use low-sodium soy sauce and slightly reduce the amount of honey.
Tip: Serve the chicken over steamed broccoli or cauliflower rice instead of white rice.
What is the best way to serve this chicken?
This dish pairs exceptionally well with steamed rice or a crisp side salad.
Tip: If you enjoyed balancing these bold flavors, see how the same sweet salty logic applies to our potsticker sauce.
Crockpot Honey Garlic Chicken