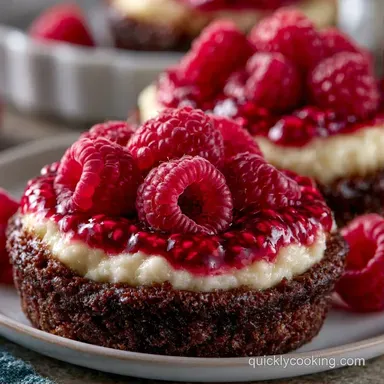
Mini Raspberry Cheesecake Bites with Oreo Crust
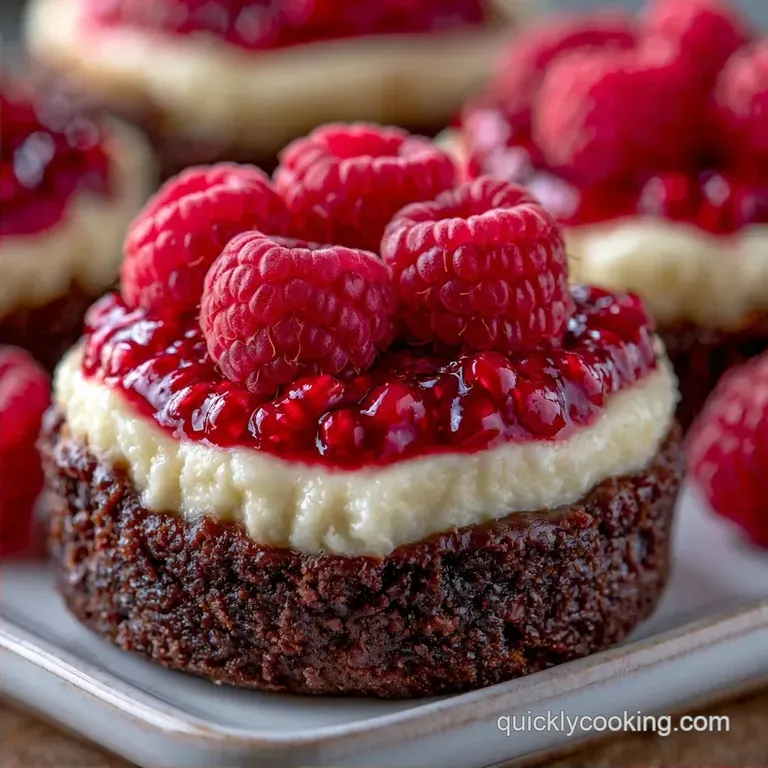
- Time: 20 min active + 4 hours 25 mins chilling
- Flavor/Texture Hook: Tangy raspberry swirl with a crunchy chocolate base
- Perfect for: Budget-friendly party platters or quick dessert cravings
Mini Cheesecake in a Standard Muffin Pan with Raspberry
Whenever I catch a scent of toasted chocolate cookies, I'm reminded of a party where my cheesecakes had the consistency of rubber erasers. I had over mixed the batter and cranked the oven to 350°F, thinking a faster bake was better. The result was a cracked, tough mess that no one wanted.
It was a tough lesson in how delicate cream cheese can be.
Here is a foolproof recipe for Mini Raspberry Cheesecakes made in a muffin tin. I've removed the need for fussy water baths and pricey equipment. By using a basic muffin pan and a few easy shortcuts, you can get a dense, rich result without any stress.
You can expect these to be tangy and bite sized. They don't require a professional kitchen, just some patience while they chill. Believe me, that time spent in the fridge is what perfects the texture.
Why These Bites Actually Work
- Room Temp Cheese: Softened cream cheese blends without lumps, so you don't have to over mix and trap air.
- Low Heat: Baking at 300°F prevents the batter from puffing up and cracking, similar to the logic used in a classic cheesecake recipe.
- The "Jiggle": Pulling them out while the center still wobbles ensures they stay creamy rather than turning into a sponge cake.
According to guides on Serious Eats, avoiding over aeration is the most important part of a cheesecake's structure. If you beat in too much air, the cake rises and then sinks, leaving a crater in the middle.
| Ingredient/Step | Fresh/Traditional Way | Shortcut Way | Impact |
|---|---|---|---|
| Raspberry Element | Fresh berry reduction | Seedless jam + lemon | Saves 30 mins; consistent sweetness |
| Crust | Homemade graham crumbs | Crushed Oreo cookies | Deeper chocolate flavor; faster prep |
| Baking Method | Water bath (Bain marie) | Low oven temp | No risk of leaking water; easier cleanup |
The Quick Specs
These treats are designed for speed and low cost. You get 12 servings that look fancy but use a very short ingredient list.
- Prep time: 20 minutes
- Cook time: 25 minutes
- Total time: 4 hours 45 mins (includes cooling and chilling)
- Yield: 12 mini cheesecakes
What You'll Need
I recommend using a reliable brand like Philadelphia for the cream cheese, as the consistent fat content ensures the texture remains stable.
- 1 cup (110g) Oreo cookie crumbs Why this? Provides a deep, chocolaty crunch to contrast the tart fruit.
- 2 tbsp (28g) unsalted butter, melted Why this? Holds the crumbs together for a firm base.
- 8 oz (225g) Philadelphia cream cheese, softened Why this? Ensures the filling has a smooth, creamy consistency.
- 1/4 cup (50g) granulated sugar Why this? Adds sweetness without changing the overall structure.
- 1 large egg (50g), room temperature Why this? Helps the filling set properly.
- 1/2 tsp (2.5ml) pure vanilla extract Why this? Softens the sharpness of the cheese.
- 1/4 cup (60ml) seedless raspberry jam or puree Why this? An efficient way to get a concentrated berry taste.
- 1 tsp (5ml) fresh lemon juice Why this? Balances the sweetness of the jam.
Substitution Options: Oreo crumbs → Graham cracker crumbs (A more classic, lighter profile) Raspberry jam → Apricot preserves (A softer, honey like flavor) Philadelphia cream cheese → Store brand full fat cream cheese (Works well, as long as you avoid "light" options)
Essential Kitchen Tools
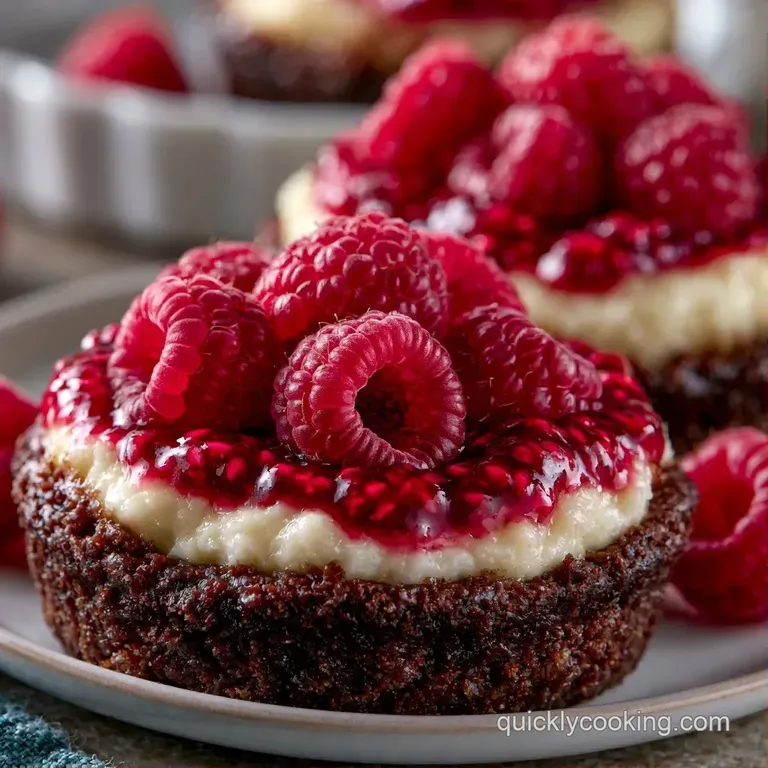
This recipe only requires a few simple tools.
- Standard 12-cup muffin pan
- Paper liners (to ensure easy removal)
- Hand mixer or stand mixer (like a KitchenAid)
- Small mixing bowls
- Toothpick (for creating the swirl)
- Measuring cups and spoons
Step-by-step Baking Guide
Let's get started. Be sure to be patient during the cooling stages.
Constructing the Base
- Set your oven to 300°F (150°C).
- Mix the Oreo crumbs and melted butter together in a small bowl.
- Firmly press about 1 tablespoon of the mixture into the bottom of each lined muffin cup.
- Bake the crusts for 5 minutes until they smell toasted, then remove them to cool while you prepare the filling.
Whipping the Filling
- Using medium low speed, beat the softened cream cheese and sugar together.
- Stir in the egg and vanilla extract. Mix only until just combined. Note: Stop the mixer as soon as egg streaks disappear to avoid incorporating too much air.
- Distribute the batter evenly among the 12 muffin cups.
Creating the Raspberry Swirl
- Mix the lemon juice into the raspberry jam.
- Spoon approximately ½ teaspoon of the raspberry mixture onto the center of each cheesecake.
- Use a toothpick to create a figure eight swirl with the jam.
Baking to Perfection
- Bake for 20–25 minutes. The edges should be set, but the centers must still have a slight, jelly like jiggle.
- Remove from the oven and allow to cool in the pan for 30 minutes.
- Chill in the fridge for at least 4 hours.
Chef's Tip: To speed things up, you may place the pan in the freezer for 20 minutes after the initial 30 minute cool, though the 4 hour fridge rest is what really develops the flavor.
Fixing Common Baking Issues
If your cheesecakes aren't looking right, it's usually a temperature or mixing issue.
Eliminating Lumps
Lumps usually happen because the cream cheese was still too cold when you started. If the batter looks curdled, don't keep beating it, or you'll add too much air. Instead, set the bowl over a pot of simmering water for 30 seconds and whisk gently by hand.
Stopping the Sinking Center
A sunken center often means the cake was over mixed or underbaked. If they sink slightly, don't panic. Once they chill for 4 hours, the structure firms up and the dip becomes less noticeable.
Preventing Over Browning
If the tops are getting too dark but the center is still liquid, your oven might run hot. Tent the pan loosely with foil for the last 5 minutes of baking.
| Problem | Root Cause | Solution |
|---|---|---|
| Cracked Tops | Over beating or oven too hot | Mix until just combined; use 300°F |
| Rubbery Texture | Overbaked | Remove when the center still jiggles |
| Soggy Crust | Not pre baked | Bake crusts for 5 mins before filling |
| Lumpy Filling | Cold cream cheese | Soften cheese to room temp first |
Swaps and Flavor Twists
You can easily change the vibe of these treats without buying new equipment. If you like other fruits, this base works with almost anything. For a different fruit experience, you could try mini cherry pies for a similar bite sized format.
Decision Shortcuts: Extra tang? → fold in 1 tsp lemon zest to the batter. Nutty base? → replace 2 tbsp Oreo crumbs with almond flour. White chocolate twist? → press a white chocolate chip into the center before swirling.
For a gluten-free version, just swap the Oreo cookies for a gluten-free chocolate wafer. The butter and cream cheese stay exactly the same. If you want a less sweet version, use a sugar-free raspberry preserve, though the texture might be slightly thinner.
Storage and Waste Tips
These stay fresh remarkably well, and they often taste even better on day two once the flavors have had time to meld.
Storage Tips:Fridge: Keep in a sealed container for up to 5 days. Freezer: Freeze for up to 2 months. Place parchment paper between layers to prevent sticking. Thaw in the refrigerator overnight.
Zero Waste Hacks: Instead of discarding the remaining raspberry jam, stir in a little extra lemon juice to create a pancake glaze or mix it into Greek yogurt for breakfast. If you have extra Oreo crumbs, blend them into a milkshake or use them to garnish the rim of a chocolate martini glass.
Serving Your Treats
Their small size makes them perfect for gatherings, though you can easily elevate the presentation with a few simple additions.
I love topping each piece with a single fresh raspberry and a tiny mint leaf. This adds a splash of color that gives them a polished, professional look. For a more decadent option, drizzle some melted chocolate over the top and let it set in the refrigerator.
Pair these with a robust black coffee or a tart hibiscus tea. The coffee's sharp notes balance the richness of the Philadelphia cream cheese and complement the chocolate crust. Because they are bite sized, they're also ideal for "dessert flights" where you serve three different flavors on a single plate.
Recipe FAQs
Can I make mini cheesecakes in a muffin pan?
Yes, they are ideal for portion control and faster baking. Using a standard pan eliminates the need for a large springform base.
Should I use cupcake liners for mini cheesecakes?
Yes, liners ensure the cakes pop out cleanly without sticking. They make cleanup easier and provide a professional look for serving.
How to make a quick mini cheesecake?
Preheat your oven to 300°F. Combine Oreo crumbs with melted butter for the base, fill with a cream cheese mixture, and bake for 20-25 minutes.
Is it true I must use a springform pan for cheesecake?
Actually, no. A standard muffin pan allows you to create individual servings without any specialized equipment.
How to make mini cheesecakes in muffin pans?
Press a buttered Oreo crumb mixture into the bottom of lined cups. Bake the crusts for 5 minutes, add the cream cheese filling, and swirl in raspberry jam.
How to get a cheesecake out of a muffin tin without liners?
Run a thin knife around the edge of each cake after they have chilled. This breaks the seal between the cheesecake and the pan walls for a clean release.
How to fill muffin pans?
Divide the cream cheese batter evenly among 12 cups. If you enjoyed mastering the swirl technique here, see how it works in our homemade cinnamon rolls.
Is it true the center should be completely firm when baking?
Surprisingly, no. The centers must maintain a slight, jelly like jiggle to ensure a creamy texture and prevent cracking.
Mini Raspberry Cheesecake Bites