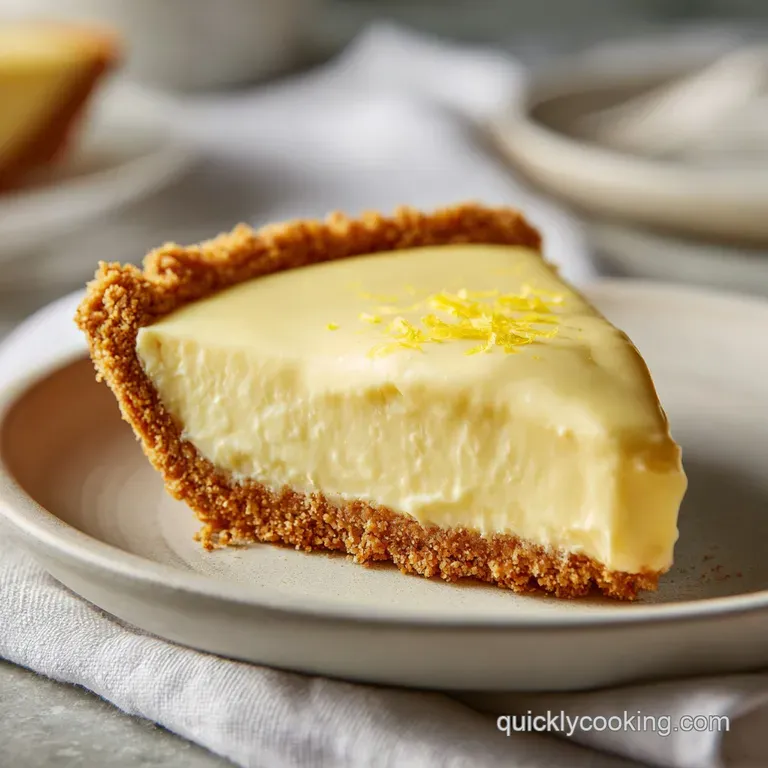
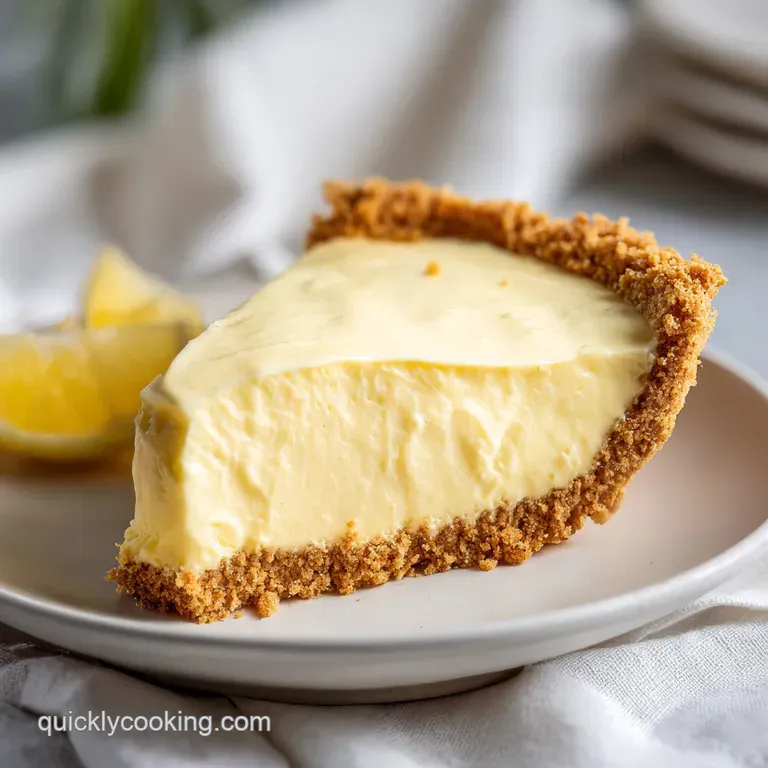
6-Ingredient Blender Lemon Pie with Graham Cracker Crust
- Time: 20 min active + 3 hours chilling = Total 3 hours 30 mins
- Flavor/Texture Hook: Tangy, velvety filling with a shatter crisp crust
- Perfect for: Summer potlucks, budget-friendly parties, or beginner bakers
- 6 Ingredient Blender Lemon Pie with Graham Cracker Crust
- Secrets of the Silky Texture
- The Essential Ingredient List
- Tools for the Job
- Step by Step Process
- Pro Tips and Pitfalls
- Creative Flavor Variations
- Fixing Common Issues
- Troubleshooting Common Issues
- Adjusting the Recipe Size
- Busted Dessert Myths
- Storage and Leftover Guide
- Best Pairing Ideas
- Recipe FAQs
- 📝 Recipe Card
6 Ingredient Blender Lemon Pie with Graham Cracker Crust
That smell of toasted graham crackers hitting the air is honestly my favorite part of this whole process. It's that warm, honeyed scent that tells you the base is ready for something bright and zingy.
For a long time, I thought you had to spend an hour whisking lemon curd over a double boiler, praying it wouldn't curdle or stay runny. I once made a traditional lemon pie for a family dinner and it turned into "lemon soup" right on the table, which was a total nightmare.
But here is the secret: you don't need a stove or a thermometer to get a professional style set. This easy 6 Ingredient Blender Lemon Pie with Graham Cracker Crust is the perfect refreshing treat because it uses a blender to do all the heavy lifting.
We are swapping the stressful cooking process for a high speed whirl and a long nap in the fridge.
Expect a dessert that is velvety, sharply tangy, and incredibly stable. It's a budget friendly win that looks like it came from a bakery but actually costs very little to put together. Right then, let's crack on with the details.
Secrets of the Silky Texture
Forget the idea that "no bake" means "mushy." The magic here happens because we are combining high fat components with a strong acid. When the lemon juice hits the condensed milk and cream cheese, it creates a natural thickening effect without any heat. It's similar to how a Classic Cheesecake recipe relies on the density of cream cheese to hold its shape.
- Acid Reaction
- Lemon juice reacts with the proteins in the condensed milk to thicken the mixture instantly.
- Fat Stability
- The cream cheese provides a structural backbone that keeps the pie from sagging.
- Air Incorporation
- Using a blender instead of a whisk whips tiny air bubbles into the filling, making it feel lighter on the tongue.
- Cold Set
- Chilling allows the fats to solidify, turning a glossy liquid into a sliceable treat.
| Method | Time | Texture | Best For |
|---|---|---|---|
| Baked Crust | 10 mins | Shatter crisp | Maximum stability |
| No Bake Crust | 0 mins | Soft and chewy | Maximum speed |
| Freezer Crust | 15 mins | Sandy and firm | Very hot weather |
The Essential Ingredient List
I've kept this list tight. We are using standard grocery store finds that don't break the bank. The key is getting the cream cheese to room temperature, or you'll end up with tiny lumps in your filling.
- 150g graham cracker crumbs Why this? Provides the classic honey wheat flavor base
- 75g unsalted butter, melted Why this? Binds crumbs and adds a rich, toasted finish
- 225g cream cheese, softened Why this? Adds velvetiness and structural support
- 397g sweetened condensed milk Why this? Acts as the primary sweetener and thickener
- 120ml fresh lemon juice Why this? Provides the essential tartness and sets the filling
- 240ml heavy whipping cream, chilled Why this? Creates the light, fluffy topping
| Ingredient | Science Role | Pro Secret |
|---|---|---|
| Cream Cheese | Structural Base | Soften fully to avoid "beads" in filling |
| Condensed Milk | Stabilizer/Sweetener | Use a full fat can for the glossiest finish |
| Lemon Juice | Setting Agent | Freshly squeezed is mandatory for the "zing" |
Tools for the Job
You don't need a kitchen full of gadgets for this. A basic blender and a pie dish are the heavy hitters here.
- High speed blender (like a Ninja or Vitamix)
- 9 inch pie dish
- Small mixing bowl
- Electric hand mixer or whisk (for the cream)
- Spatula for smoothing
Step by step Process
Let's get this moving. Trust me on the chilling time, it's the only part that requires real patience.
Phase 1: Building the Base
- Combine 150g graham cracker crumbs and 75g melted butter in a bowl. Stir until the mixture looks like wet sand.
- Press the mixture firmly into the bottom and sides of your pie dish.
- Bake at 175°C for 8-10 minutes until it smells toasted and looks golden.
- Let the crust cool completely on the counter. Note: Pouring filling into a hot crust makes it soggy
Phase 2: The Blender Blitz
- Place 225g softened cream cheese into the blender and pulse until smooth and creamy.
- Add 397g sweetened condensed milk and 120ml lemon juice.
- Blend on medium high for 45-60 seconds until the mix is glossy and pale yellow.
- Pour the filling into the cooled crust and smooth the top with a spatula.
Phase 3: The Set and Serve
- Refrigerate for at least 3 hours until the filling is firm to the touch.
- Whip 240ml chilled heavy cream to stiff peaks and dollop onto slices just before serving.
Pro Tips and Pitfalls
If you want a truly professional finish, pay attention to the temperature of your cream. Cold cream whips faster and holds its shape longer. I've found that chilling the mixing bowl in the freezer for 5 minutes makes a huge difference.
Another trick is to avoid over blending. If you run the blender for too long, you can actually incorporate too much air, which might cause the pie to lose its density. You want it glossy, not foamy. As Nikki is the creative force behind Tikkido.com .
She's been featured on Food Network's Holiday Gingerbread Showdown and often emphasizes the importance of precise ingredient temperatures in desserts.
Chef's Note: If you find the filling is too sweet, add a pinch of salt or a teaspoon of lemon zest. It cuts through the sugar of the condensed milk perfectly.
Creative Flavor Variations
This 6 Ingredient Blender Lemon Pie with Graham Cracker Crust is a great canvas for other flavors. If you're looking for something different, you can easily pivot.
- The Lime Twist: Swap the lemon juice for fresh lime juice. It turns it into a Key Lime style pie that is incredibly zesty.
- The Berry Layer: Add a layer of fresh raspberries or blueberries on top of the filling before adding the cream. The tart berries balance the richness.
- The Nutty Base: Replace 50g of the graham crumbs with crushed almonds for a more sophisticated, earthy crust.
- Alternative Treats: If you love budget friendly bakes, you might also like my Homemade Banana Bread for a cozy afternoon snack.
| Original Ingredient | Substitute | Why It Works |
|---|---|---|
| Graham Crackers | Digestive Biscuits | Similar texture. Note: Slightly saltier, more buttery taste |
| Heavy Cream | Coconut Cream | Similar fat. Note: Adds a tropical flavor profile |
| Lemon Juice | Lime Juice | Similar acidity. Note: Result is a more aromatic "Key Lime" vibe |
Fixing Common Issues
Most mistakes with this recipe happen during the "setting" phase or with the crust. Don't panic if it doesn't look like a brick immediately after pouring.
Troubleshooting Common Issues
| Issue | Solution |
|---|---|
| Why Your Filling Is Runny | If the filling hasn't set, it's usually because the cream cheese wasn't cold enough during the set or the lemon juice wasn't fresh. Bottled lemon juice sometimes lacks the acidity needed to "tighten" |
| Why Your Crust Crumbles | This usually happens if the butter wasn't fully melted or the crumbs weren't pressed firmly enough into the dish. Use the bottom of a measuring cup to pack it down hard. |
| Why Your Cream Collapses | Over whipping turns cream into butter very quickly. Stop the moment you see stiff peaks that hold their shape when you lift the whisk. |
Common Mistakes Checklist
- ✓ Did you soften the cream cheese to room temperature?
- ✓ Did you use fresh lemon juice instead of bottled?
- ✓ Did you let the crust cool completely?
- ✓ Did you avoid over blending the filling?
- ✓ Did you chill the pie for a full 3 hours?
Adjusting the Recipe Size
Scaling a no bake pie is pretty straightforward, but you have to be careful with the blender volume.
Scaling Down (1/2 Batch): Use a smaller 6 inch pan. Reduce the baking time for the crust by about 2 minutes. To get half an egg or small measurements, use a kitchen scale for the cream cheese and condensed milk.
Scaling Up (2x Batch): Work in batches if you have a standard sized blender. Do not double the lemon juice exactly if you want a milder taste, but for the set, keep the ratio the same. Since you'll likely be making two pies, you can bake both crusts at once, but leave space between them for airflow.
Busted Dessert Myths
There's a lot of misinformation about lemon pies. Let's clear a few things up.
Myth: You must cook lemon curd for it to set. Truth: The acid in fresh lemon juice reacts with the proteins in condensed milk to create a thick, stable structure without any heat.
Myth: No bake pies are always less flavorful. Truth: Heat can actually dull some of the bright, volatile notes of fresh lemon. The blender method preserves that "fresh squeezed" punch.
Storage and Leftover Guide
This pie keeps remarkably well because of the fat content in the cream cheese.
Fridge Storage: Keep the pie in the fridge, covered with plastic wrap or a lid. It stays fresh for up to 5 days. I recommend adding the whipped cream just before serving, as the cream can deflate after 24 hours.
Freezer Storage: You can freeze the un topped pie for up to 2 months. Thaw it in the fridge overnight before adding the fresh whipped cream.
Zero Waste Tips: - Lemon Zest: Don't throw away the peels! Zest your lemons before juicing. Freeze the zest in a small container to add to cakes or pastas later.
- Leftover Crumbs: If you have extra graham cracker crumbs, mix them with a bit of cinnamon and sugar to make a topping for yogurt or oatmeal.
Best Pairing Ideas
Since this pie is quite rich and tangy, you want sides that cleanse the palate.
- Fresh Berries: A handful of raspberries or sliced strawberries adds a beautiful color contrast and a different kind of sweetness.
- Hot Tea: A cup of Earl Grey or Chamomile balances the acidity of the lemon perfectly.
- Mint Leaves: A simple garnish of fresh mint makes the plate look professional and adds a cool aroma.
Recipe FAQs
How long does the pie stay fresh in the refrigerator?
Up to 5 days. Keep the pie covered with plastic wrap or a lid. Add the whipped cream just before serving, as it can deflate after 24 hours.
Why is my lemon filling runny?
The cream cheese may not have been cold enough during the set. Ensure you refrigerate for at least 3 hours and use fresh lemon juice, as bottled versions lack the acidity needed to tighten the filling.
Is bottled lemon juice a suitable replacement for fresh?
No, this is a common misconception. Fresh juice is required because the specific acidity levels are what allow the filling to set without baking.
How to stop the graham cracker crust from crumbling?
Press the mixture firmly into the dish using the bottom of a measuring cup. Also, ensure the butter is fully melted before stirring it into the crumbs to create a cohesive "wet sand" texture.
Can I prepare this pie overnight?
Yes, this is actually recommended. An overnight chill ensures the filling is completely set, which results in much cleaner slices when serving.
How to achieve a glossy, uniform filling?
Blend on medium high for 45-60 seconds. Start by pulsing the softened cream cheese alone until smooth before adding the sweetened condensed milk and lemon juice.
Can I freeze this pie for later?
Yes, but only the untopped pie. Freeze for up to 2 months and thaw in the fridge overnight before adding fresh whipped cream. For other celebratory desserts, you might also enjoy our funfetti cake.
Blender Lemon Pie

