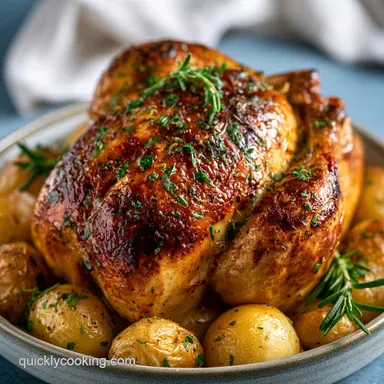
Dutch Oven Chicken: Mahogany Skin and Potatoes
- Time:15 minutes active + 90 minutes roasting = Total 1 hour 45 mins
- Flavor/Texture Hook: Shatter crisp mahogany skin with velvety root vegetables
- Perfect for: Sunday family dinners or high impact meal prep
Sizzle. That's the sound of cold butter hitting a hot cast iron pot, and for me, it's the sound of home. My grandfather had this massive, blackened pot that looked like it had survived a war, but it produced the most tender birds I've ever eaten.
In many cultures, the heavy pot is the heart of the kitchen, whether it's a French cocotte or a Southern campfire pot, because it holds heat in a way a thin pan never could.
I remember trying to mimic his style for years, often ending up with soggy skin or dry breasts. The trick wasn't in the heat, but in the "bed." He didn't just throw the chicken in; he built a foundation of roots and aromatics that acted as a natural roasting rack.
This Dutch Oven Chicken is the result of stripping away the fluff and focusing on that one high efficiency technique. You'll get a bird that's juicy inside and crackling outside, all while the vegetables soak up every drop of rendered fat.
Trust me on this, once you do it this way, you'll never go back to a standard roasting pan.
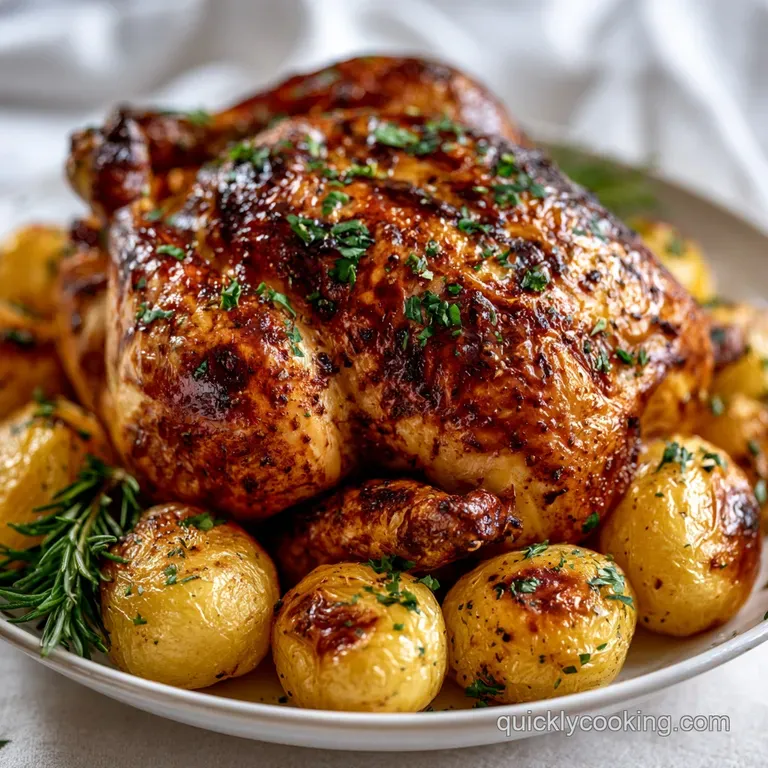
Dutch Oven Chicken
The secret here is the heavy duty heat. When you sear the chicken breast side down first, you're essentially frying the skin in its own fat and butter. This creates that deep mahogany color and a texture that actually shatters when you bite into it.
But what about the inside? By flipping the bird onto a bed of carrots and potatoes, the meat doesn't touch the bottom of the pot during the roast. This prevents the bottom from getting mushy and allows the heat to circulate evenly around the chicken. It's basically a built in convection oven.
If you're looking for other fast paced poultry options, you might enjoy an easy homemade butter chicken for a different flavor profile, but for a classic roast, this is the gold standard.
The Heat Distribution Logic
Thermal Mass: The thick walls of the pot keep the temperature stable, preventing the meat from shocking and tightening up.
Vegetable Insulation: The root veg bed lifts the chicken, allowing hot air to reach the bottom of the bird instead of steaming it.
Fat Rendering: Searing first melts the subcutaneous fat, which then bastes the vegetables throughout the roasting process.
Moisture Control: Roasting uncovered allows steam to escape, which is the only way to get that crisp skin.
| Method | Time | Texture | Best For |
|---|---|---|---|
| Fresh Roast | 1 hour 45 mins | Shatter crisp skin | Sunday Dinner |
| Shortcut/Pre seared | 1 hour 10 mins | Slightly softer skin | Weeknight |
| Slow Cooker | 6-8 hours | Fall apart/shredded | Pot Roast style |
Component Analysis
| Ingredient | Science Role | Pro Secret |
|---|---|---|
| Unsalted Butter | Fat Carrier | Rub under the skin for internal moisture |
| Smoked Paprika | Color/Depth | Adds a "grilled" note without a grill |
| Baby Potatoes | Starch Base | Halving them increases surface area for browning |
| Kosher Salt | Moisture Draw | Pat chicken dry first to ensure salt penetrates |
The Ingredient List
Gather everything before you start. I've found that hunting for the paprika while the butter is melting is a great way to burn your dinner.
For the bird and rub:
- 4 lb whole chicken, patted dryWhy this? Standard size fits most 5-6 quart pots
- 3 tbsp unsalted butter, softenedWhy this? Creates a velvety barrier for seasoning
- 1 tbsp olive oilWhy this? High smoke point for the initial sear
- 1 tbsp kosher saltWhy this? Coarser grains are easier to distribute
- 1 tsp cracked black pepper
- 1 tsp garlic powder
- 1 tsp smoked paprika
For the root vegetable bed:
- 1 lb baby potatoes, halvedWhy this? They roast at the same rate as the chicken
- 3 large carrots, cut into chunks
- 1 large yellow onion, wedged
- 1 head garlic, halved crosswiseWhy this? Roasted garlic becomes a spreadable paste
- 3 sprigs fresh rosemary
- 3 sprigs fresh thyme
If you don't have fresh herbs, you can use dried, but the flavor is more muted. For a more complex sauce, some people add a splash of white wine to the veg, though it's not strictly necessary for this Dutch Oven Chicken.
Necessary Equipment
You don't need a professional kitchen, but a few specific tools make this a lot faster.
- Enameled Cast Iron Dutch Oven: I prefer a 5.5 or 6 quart size. Enameled is easier to clean, but raw cast iron gives a slightly better sear.
- Meat Thermometer: This is non negotiable. According to USDA FoodData, poultry must reach 165°F (74°C) to be safe. Guessing based on "clear juices" is a rookie mistake.
- Heavy Duty Paper Towels: You need to get that skin bone dry. Any moisture on the surface will turn to steam, and steam is the enemy of a crisp crust.
- Tongs: Use metal tongs to flip the bird without tearing the skin.
Chef Note: If your pot is too small and the chicken is cramped, the skin will steam instead of roast. If it's a tight fit, consider using a larger pot or cutting the chicken into parts.
Execution Steps
Right then, let's crack on with the actual cooking. Follow these steps in order to keep the flow efficient.
- Dry the chicken. Use paper towels to remove all surface moisture from the chicken. Note: Wet skin equals soggy skin.
- Create the rub. Mix the softened butter with salt, pepper, garlic powder, and paprika. Rub this mixture under the skin of the breast and all over the exterior of the chicken.
- Prep the bed. Toss baby potatoes, carrots, and onions in the Dutch oven with a drizzle of olive oil and a pinch of salt. Scatter the garlic halves and herb sprigs across the top to create a vegetable bed.
- The initial sear. Heat the Dutch oven over medium high heat. Place the chicken breast side down and sear for 5–7 minutes until the skin is mahogany colored and releases easily from the pan.
- The flip. Flip the chicken so it rests directly on top of the vegetable bed.
- The roast. Transfer the pot to a preheated oven at 425°F (218°C). Roast uncovered for 60–75 minutes.
- The temperature check. Remove from the oven when a meat thermometer reaches 165°F (74°C) in the thickest part of the thigh.
- The rest. Let the chicken rest in the pot for 15 minutes before carving. Note: This allows juices to redistribute so they don't leak out on the board.
Precision Checkpoints
- Sear Temp: Skin should be deep brown, not black, after 7 mins.
- Oven Temp: Steady 425°F (218°C).
- Final Temp: 165°F (74°C) in the thigh.
Troubleshooting Guide
Even with a plan, things happen. Maybe the skin didn't shatter, or the potatoes are still a bit firm. Here is how to handle it.
| Issue | Solution |
|---|---|
| Why Your Skin Is Soft | If the skin isn't crispy, it's usually because of moisture. Either the chicken wasn't dried enough, or the pot was too crowded, creating a steam chamber. Next time, leave more space between the bird a |
| Why Your Meat Is Dry | This usually happens if the oven is too hot or if you overcook the breast. Remember that the breast cooks faster than the thigh. If you're worried, you can shield the breast with a small piece of foil |
| Why Your Potatoes Are Hard | Different potato varieties have different starch levels. If they're still hard, they were likely tucked too far under the chicken where the heat couldn't reach them. Stir the veg bed occasionally if y |
Common Mistakes Checklist
- ✓ Forgot to pat the skin dry (Result: steamed skin)
- ✓ Didn't let the meat rest (Result: dry meat)
- ✓ Used a lid during the roast (Result: no crispiness)
- ✓ Overcrowded the pot (Result: uneven cooking)
- ✓ Ignored the thermometer (Result: overcooked breast)
Taste Variations
Once you've nailed the basic Dutch Oven Chicken, you can start playing with the flavors. The beauty of this method is that the vegetable bed acts like a sponge for whatever spices you use.
The Mediterranean Twist: Swap the smoked paprika for dried oregano and add kalamata olives and lemon wedges to the vegetable bed. The lemon juice deglazes the pan naturally as it roasts.
The Spicy Kick: Add 1 tbsp of cayenne pepper to the butter rub and toss in some sliced jalapeños with the carrots. It gives the whole dish a warm, buzzing heat.
The Low Carb Option: Replace the potatoes and carrots with cauliflower florets and radishes. Radishes, when roasted, lose their bite and taste surprisingly like small potatoes.
The French Style: Add a tablespoon of Dijon mustard to the butter rub and use shallots instead of yellow onions. This gives the Dutch Oven Chicken a more refined, velvety flavor profile.
For those who want a more creamy, sauce heavy experience, you might prefer my creamy chicken gnocchi soup, but for a dry roast, keep it simple with the butter and paprika.
Scaling Logic
Adjusting this recipe depends entirely on your pot size. You can't just double the ingredients if you don't have a bigger vessel.
Scaling Down (Half Bird): If you're cooking for two, use a 3 quart pot and a half chicken (breast and leg). Reduce the roasting time by about 20% (around 50-60 minutes). Be careful with the salt, as a smaller bird can easily become over seasoned.
Scaling Up (Two Birds): Don't try to cram two chickens into one 6 quart pot. Use two separate pots. If you must use one giant pot (like an 11 quart), keep the salt and spices at 1.5x rather than 2x.
Liquids from the extra meat can build up, so you might need to extend the roasting time by 10-15 minutes to ensure the skin stays crisp.
Baking Adjustments: If you're using a convection oven (fan forced), lower the temperature to 400°F (200°C). The fan moves heat more efficiently, so the skin will brown faster, but the inside might stay raw if you don't adjust.
Storage Guidelines
Don't let the leftovers go to waste. This dish actually tastes great the next day, provided you reheat it correctly.
Fridge Storage: Store the chicken and vegetables in an airtight container for up to 4 days. The vegetables will stay velvety, but the skin will lose its shatter.
Freezer Storage: You can freeze cooked chicken and veg for up to 3 months. However, I don't recommend freezing the skin on breast if you care about the texture. Shred the meat and freeze it in the pan juices for the best flavor.
Reheating: Avoid the microwave if possible. The best way to revive this is in a 350°F (175°C) oven for 10-15 minutes. This helps bring back some of the crispness to the skin.
Zero Waste Tips: Save the carcass! After you've eaten the meat, toss the bones, the remaining onion skins, and the carrot ends into a pot with water and a bay leaf. Simmer for 4 hours to create a rich, homemade bone broth.
This is the highest efficiency way to use every part of the bird.
Pairing Options
Since the Dutch Oven Chicken is a heavy, savory dish, you need sides that cut through the richness.
The Bread Pairing: You absolutely need something to soak up the pan juices. I highly recommend serving this with Sourdough Discard Garlic Knots. The tang of the sourdough balances the buttery fat of the chicken perfectly.
The Green Pairing: A simple arugula salad with a lemon vinaigrette or some steamed asparagus provides a fresh, acidic contrast to the roasted root vegetables.
The Starch Pairing: While the recipe comes with potatoes, if you want something extra, a side of wild rice or a creamy polenta works wonders.
The Drink Pairing: A crisp Chardonnay or a light Pinot Noir complements the smoked paprika and rosemary without overpowering the natural flavor of the poultry.
Quick Decision Shortcut
- Want a feast? Add a side of garlic knots and a green salad.
- Want it healthy? Swap potatoes for cauliflower and skip the butter rub.
- Want it fancy? Use the French style Dijon rub and serve with a glass of wine.
Common Cooking Myths
Myth: Searing seals in the juices. This is a common misconception. Searing doesn't create a waterproof barrier. Moisture loss happens throughout the cooking process. The sear is entirely about flavor and texture, creating a complex crust through the browning of proteins.
Myth: You need a lid to keep the meat moist. For a roast, a lid actually traps steam, which makes the skin rubbery. As long as you have a bed of vegetables and a proper rub, the chicken will stay juicy without the lid.
Myth: All Dutch ovens are the same. Enameled pots are great for acidity (like wine or tomatoes), but raw cast iron is the king of the sear. If you're making this Dutch Oven Chicken frequently, having both options in your kitchen is a win.
Critical Sodium Level
1150 mg 1,150 mg of sodium per serving (50% 50% of daily value)
The American Heart Association recommends a daily limit of 2,300 mg of sodium, with an ideal limit of 1,500 mg for most adults to reduce the risk of cardiovascular disease.
Tips to Reduce Sodium
-
Slash the Added Salt-25%
Reduce the kosher salt by half or replace it entirely with a salt free herb blend to significantly lower the sodium content.
-
Add Acidic Brightness-10%
Squeeze fresh lemon juice over the chicken and vegetables before roasting; the acidity mimics the flavor profile of salt.
-
Boost Savory Aromatics-5%
Increase the amount of fresh garlic and onion to enhance the natural umami flavor without relying on sodium.
-
Maximize Fresh Herbs
Double the amount of fresh rosemary and thyme to build a robust, complex flavor profile that compensates for less salt.
Recipe FAQs
How long does it take to cook chicken in a Dutch oven?
90 minutes. This includes searing the skin for 5 7 minutes and roasting for 60 75 minutes. Total time from prep to table is 105 minutes.
Can a diabetic eat baked chicken?
Yes. This recipe focuses on whole proteins and fresh vegetables without added sugars. It is a naturally low-glycemic dinner option.
How to cook chicken if you have gallstones?
Reduce or omit the butter and olive oil. Skip the searing phase to avoid high fat triggers. Roast the chicken and vegetables using only the provided seasonings.
Is it better to bake chicken at 350 or 400 in the oven?
Neither; use 425°F for this recipe. A higher temperature is essential to achieve mahogany colored, crispy skin. Lower temperatures often result in soft, steamed skin.
What is your favorite camping Dutch oven recipe?
This whole roasted chicken with root vegetables. It provides a complete meal with minimal cleanup. If you have a portable air fryer, crispy chicken nuggets are another great camping alternative.
What's the best dinner to make for 10 people while camping?
Multiple Dutch oven chickens. Prepare two or three birds with their own beds of potatoes and carrots. This allows you to feed a crowd while keeping the meat moist.
How to cook a delicious campfire meal without any fuss?
Sear the chicken then roast it uncovered in the pot. Use halved potatoes and carrots as a natural rack for the bird. This one-pot method ensures everything finishes cooking simultaneously.
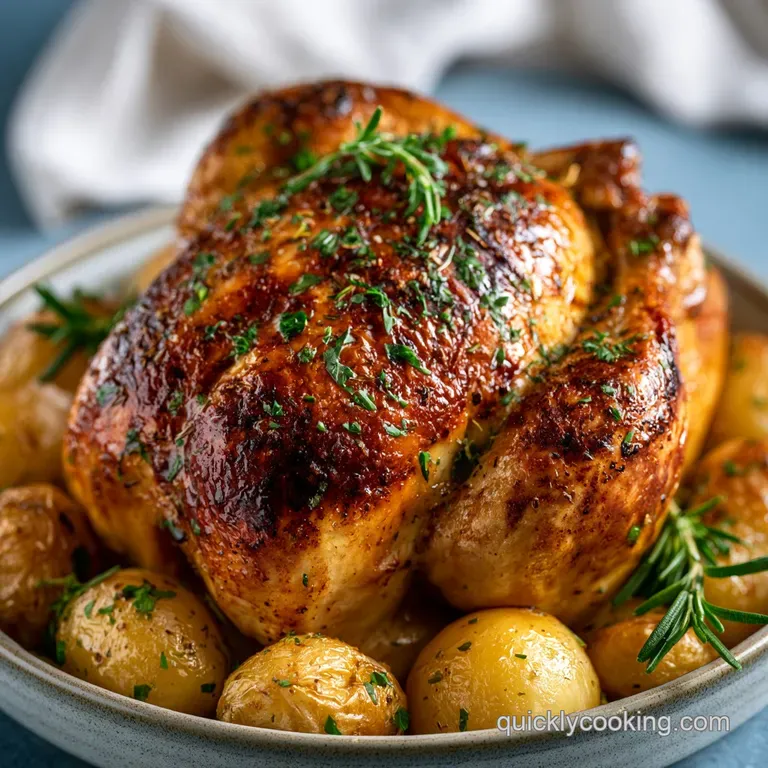
Dutch Oven Chicken