Simple Dutch Oven Peach Cobbler: Golden Crust
- Time: 10 min active + 45 min cook = 55 min total
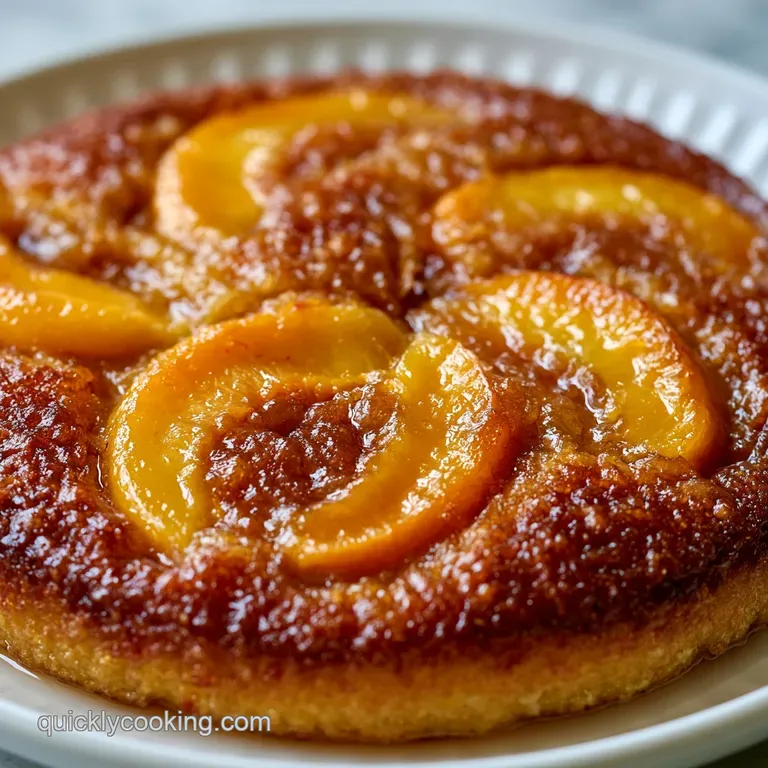
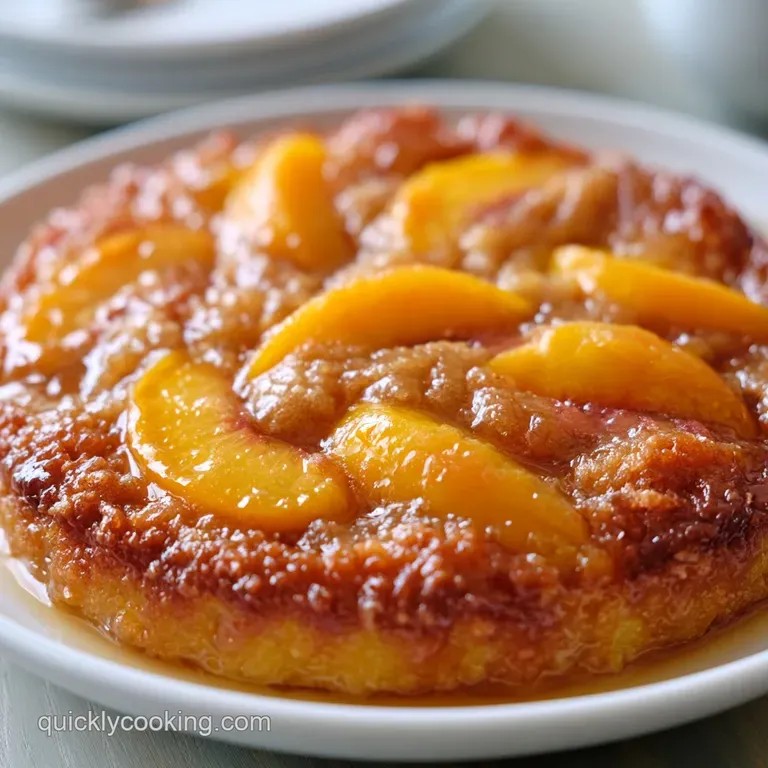
- Flavor/Texture Hook: Velvet soft peaches under a golden, cakey shatter
- Perfect for: Backyard bonfires, camping trips, or lazy Sunday desserts
- Making a Classic Dutch Oven Cobbler
- The Essential Recipe Specs
- Ingredients and Smart Swaps
- Gear for the Job
- The Cooking Process
- Fixing Common Glitches
- Troubleshooting Common Issues
- Twists and Alternative Ingredients
- Adjusting the Batch Size
- Cobbler Misconceptions
- Storage and Waste Tips
- Best Ways to Serve
- Recipe FAQs
- 📝 Recipe Card
The scent of bubbling peaches and toasted brown sugar hits you way before you even lift the lid. It's that specific, heavy aroma that makes everyone in the campsite stop talking and start looking for a spoon.
I remember the first time I tried this, I was convinced a "shortcut" recipe would taste like a cafeteria dessert, but the result was surprisingly sophisticated.
The magic happens because you aren't actually "baking" in the traditional sense, you're creating a heat sealed environment. This Dutch Oven Cobbler turns a few pantry staples into something that feels like it took hours of effort, when in reality, you spent about ten minutes prepping.
You can expect a dessert where the fruit creates its own thick syrup and the topping rises into a fluffy, golden cloud. It's a high efficiency win that doesn't compromise on the cozy, home cooked feel.
Making a Classic Dutch Oven Cobbler
The goal here is a sharp contrast between the jammy fruit and the spongy crust. Since we're using a cast iron pot, the heat wraps around the dish, meaning the edges get a bit of a chew while the center stays soft and velvety.
If you're planning a full outdoor menu, this treat is the ideal closer. If you've already whipped up a batch of my Sourdough Discard Garlic Knots as a savory appetizer, your guests will be primed for this sweet finish. It's all about that balance of salt and sugar.
Why the Texture Works
Most people think you need to cream butter and sugar to get a good rise, but we're cheating with chemistry.
- Carbonation Lift: The CO2 bubbles in the soda act as a physical leavening agent, pushing the cake mix upward as it heats.
- Steam Trapping: The heavy lid keeps moisture inside, steaming the peaches so they don't dry out while the top browns.
- Fat Distribution: Dotting the butter on top instead of mixing it in creates small pockets of richness that fry the top of the batter.
- Conductive Heat: Cast iron distributes heat more evenly than thin pans, preventing the bottom from scorching while the top cooks.
The way the soda interacts with the dry mix is similar to how baking powder works, but it's much faster and requires zero bowls. You can read more about how different leaveners work over at King Arthur Baking, but for this recipe, the bubbles do the heavy lifting.
| Method | Time | Texture | Best For |
|---|---|---|---|
| Cake Mix | 55 min | Spongy, Cakey | Camping / Fast |
| From Scratch | 120 min | Biscuit like | Sunday Brunch |
Component Analysis
Understanding what each ingredient does helps you tweak the recipe without ruining the batch.
| Ingredient | Science Role | Pro Secret |
|---|---|---|
| Lemon Lime Soda | Leavening & Sweetener | Use room temp to speed up the rise |
| Yellow Cake Mix | Structural Base | Don't sift; the lumps add texture |
| Unsalted Butter | Maillard Catalyst | Keep it ice cold for better "dots" |
| Lemon Juice | Acid Balance | Cuts through the syrup's heaviness |
The Essential Recipe Specs
Before we get the fire going, let's look at the numbers. This is a high efficiency build designed to feed a group without requiring a kitchen full of measuring cups.
The cook time is a steady 45 minutes, but the prep is a breeze. We're looking at 10 minutes of active work. Total time from start to finish is 55 minutes.
This recipe yields enough for 8 people, assuming everyone wants a generous scoop. It's a dense dessert, so a little goes a long way, especially if you serve it with a cold dollop of cream.
Ingredients and Smart Swaps
Stick to these measurements for the best result. I've used metric for precision, as that's what actually works in my kitchen.
- 2 cans (425g each) sliced peaches in syrup, drained Why this? Consistent sweetness and texture every time
- 100g brown sugar, packed Why this? Adds a molasses depth that white sugar lacks
- 2g ground cinnamon Why this? Essential warmth to contrast the tart lemon
- 15ml lemon juice Why this? Brightens the fruit and prevents cloying sweetness
- 432g yellow cake mix Why this? Reliable rise and a classic buttery flavor
- 240ml lemon lime soda Why this? The bubbles provide the necessary lift
- 113g unsalted butter, cubed into small pats Why this? Creates the signature golden crust
If you need to change things up, use this guide.
| Original Ingredient | Substitute | Why It Works |
|---|---|---|
| Sliced Peaches | Canned Apples | Similar texture. Note: Increase cinnamon by 1g |
| Lemon Lime Soda | Sparkling Water + 2tbsp Sugar | Same bubbles, less sugar. Note: Less intense flavor |
| Yellow Cake Mix | White Cake Mix | Similar structure. Note: Lighter, less buttery taste |
| Brown Sugar | Coconut Sugar | Similar caramel notes. Note: Slightly grainier texture |
Gear for the Job
You don't need a mountain of equipment, which is why I love this recipe. The minimal tool approach means less cleanup and more eating.
First, you need a 12 inch cast iron Dutch oven. Make sure it has a flanged lid, as this is where your charcoal briquettes will sit. A flat lid won't hold the coals and will lead to a raw top.
You'll also need a few basic tools: a small mixing bowl for the sugar, a sturdy spoon, and some tongs for handling the hot coals. If you're doing this indoors, just use your standard oven, but the charcoal method is where the real magic happens.
The Cooking Process
Right then, let's get into it. Follow these steps exactly, and don't be tempted to stir the pot.
- Spread the drained peaches evenly across the bottom of your 12 inch Dutch oven. Note: Ensure they're in a single layer for even cooking.
- In a small bowl, mix the 100g brown sugar and 2g cinnamon.
- Sprinkle that sugar mixture evenly over the peaches.
- Drizzle 15ml lemon juice over the top of the fruit.
- Sprinkle the 432g yellow cake mix evenly over the fruit base. Note: Do not stir the layers; the cake mix should sit on top like a blanket.
- Carefully pour the 240ml lemon lime soda over the cake mix. Ensure most of the surface is covered, but don't drown it.
- Dot the cold 113g butter pats across the top of the soda moistened mix.
- Place the flanged lid on the pot. Arrange your charcoal briquettes: 17 on the lid and 8 on the bottom.
- Bake for 40-45 minutes. Every 15 minutes, rotate the pot 1/3 turn and the lid 1/3 turn in the opposite direction. Note: This prevents hot spots from burning one side.
- Remove from heat when the topping is mahogany colored and the fruit juices are bubbling up the sides.
Chef's Tip: If you want an extra crispy edge, let the pot sit on the coals for an extra 5 minutes after the top is done, but keep the lid slightly ajar to let some steam escape.
Fixing Common Glitches
The most common issue people face is an uneven bake. Because charcoal heat is visceral and erratic, the rotation step is non negotiable.
Troubleshooting Common Issues
| Issue | Solution |
|---|---|
| Why Your Topping is Raw | This usually happens when you don't have enough heat on the lid. If the top looks pale after 30 minutes, you need more coals on top or a more concentrated pile in the center. |
| Why Your Bottom is Scorched | Too many coals underneath will burn the peaches before the cake rises. If you smell burning fruit, remove two coals from the bottom immediately. |
| Why the Crust is Soggy | Usually, this is caused by pouring the soda too aggressively or stirring the layers. The soda should moisten the mix, not turn it into a soup. |
Common Mistakes Checklist
- ✓ Stirring the layers (Never do this!)
- ✓ Forgetting to rotate the pot every 15 mins
- ✓ Using warm butter (Cold pats create better pockets)
- ✓ Using a non flanged lid
- ✓ Over pouring the soda
Twists and Alternative Ingredients
Once you've nailed the basic Dutch Oven Cobbler, you can start playing with the fruit. For a Simple Dutch Oven Apple Cobbler, just swap the peaches for canned apple slices and add a pinch of nutmeg.
If you're feeling adventurous, try a mixed berry twist using frozen blueberries and raspberries. Since frozen berries release more water, I recommend adding an extra tablespoon of brown sugar to help thicken the syrup.
For those who want a nuttier crunch, sprinkle 50g of chopped pecans over the cake mix before adding the soda. It adds a woody, toasted flavor that pairs brilliantly with the peaches.
If you're making a full meal, this sweet treat is a great contrast to something spicy. I often suggest a bowl of my Homemade Chili before this dessert to balance out the sugar.
Decision Shortcut
- Want it fruitier? Use 3 cans of peaches and reduce cake mix to 300g.
- Want a crunchier top? Add 1/2 cup of chopped pecans.
- Indoor oven? Bake at 180°C (350°F) for 45 minutes.
Adjusting the Batch Size
Scaling a Dutch Oven Cobbler is a bit tricky because the pot size is fixed. If you're using a smaller 8 inch pot, you'll need to halve everything.
When scaling down, reduce the baking time by about 20%. Since you're using a smaller volume of cake mix, the heat penetrates the center much faster. If you're using a half egg (for scratch versions), beat one egg and use half of the liquid.
For scaling up to a massive 14 inch pot, don't just double the spices. Increase salt and cinnamon to only 1.5x, as these can become overpowering in large quantities. You'll likely need to extend the bake time by 10-15 minutes to ensure the center is set.
Cobbler Misconceptions
You'll often hear that using a cake mix is "cheating." Honestly, it's not. The cake mix provides a consistent ratio of flour, sugar, and leavening that is hard to replicate in a campfire setting without a scale.
Another myth is that you need to preheat the Dutch oven. While some people swear by it, it's unnecessary here. The fruit needs to heat up gradually to create that syrup, and the top needs the slow rise provided by the coals.
Finally, some believe that "sealing" the peaches with sugar prevents them from getting mushy. In reality, the sugar draws moisture out, which is exactly what we want to create the sauce.
Storage and Waste Tips
If you have leftovers, store them in an airtight container in the fridge for up to 4 days. The topping will soften slightly, but it's still great.
To reheat, avoid the microwave if you can, as it makes the cake mix rubbery. Instead, pop a slice in a toaster oven or a skillet with a tiny bit of butter until the edges shatter again.
This dish freezes surprisingly well. Wrap individual squares in foil and freeze for up to 2 months. Thaw in the fridge overnight before reheating.
To avoid waste, if you have leftover peach syrup in the can, don't toss it. Mix it into your morning oatmeal or use it as a glaze for grilled ham. Even the leftover cake mix powder can be stored in a jar for your next camping trip.
Best Ways to Serve
This Dutch Oven Cobbler is best served warm, right out of the pot. The contrast of the hot fruit and a cold topping is what makes it a winner.
I highly recommend a scoop of high-quality vanilla bean ice cream. The ice cream melts into the mahogany crust and creates a creamy sauce that complements the tart lemon juice.
For a more refined touch, add a sprig of fresh mint or a few fresh raspberries on top. It adds a pop of color and a fresh note that cuts through the richness of the butter and sugar. Just scoop it deep to get a bit of everything in every bite.
Recipe FAQs
What dessert can I make in my Dutch oven?
This peach cobbler is an ideal option. It combines canned peaches and cake mix for a fuss free campfire treat.
What are common cobbler mistakes?
Under heating the lid or over heating the bottom. A pale top requires more coals on the lid, while a burnt smell means you should remove coals from the bottom.
What should I avoid doing when preparing this cobbler?
Do not stir the layers. Keep the fruit, sugar, and cake mix separate to ensure the topping rises correctly.
What temperature do you cook Dutch oven cobbler?
Arrange 17 charcoal briquettes on the lid and 8 on the bottom. This distribution creates the necessary heat for a mahogany colored crust.
How do I store leftover cobbler?
Keep it in an airtight container in the refrigerator. It will remain good for up to 4 days.
How do I reheat cobbler to keep the crust crisp?
Warm a slice in a toaster oven or skillet with butter. This prevents the cake from becoming rubbery, which often happens in a microwave.
Is it true that I should stir the cake mix into the fruit?
No, this is a common misconception. The dry mix must stay on top of the soda; if you enjoyed mastering this layer separation, see how we use a similar technique for texture in our chocolate poke cake.
Dutch Oven Cobbler

