Homemade Cinnamon Toast Crunch: Golden and Crispy

- Time:30 minutes prep + 15 minutes cook = Total 45 minutes
- Flavor/Texture Hook: Warm cinnamon aroma with a crisp, sugary snap
- Perfect for: Nostalgic breakfasts or a budget-friendly homemade snack
Making Homemade Cinnamon Toast Crunch
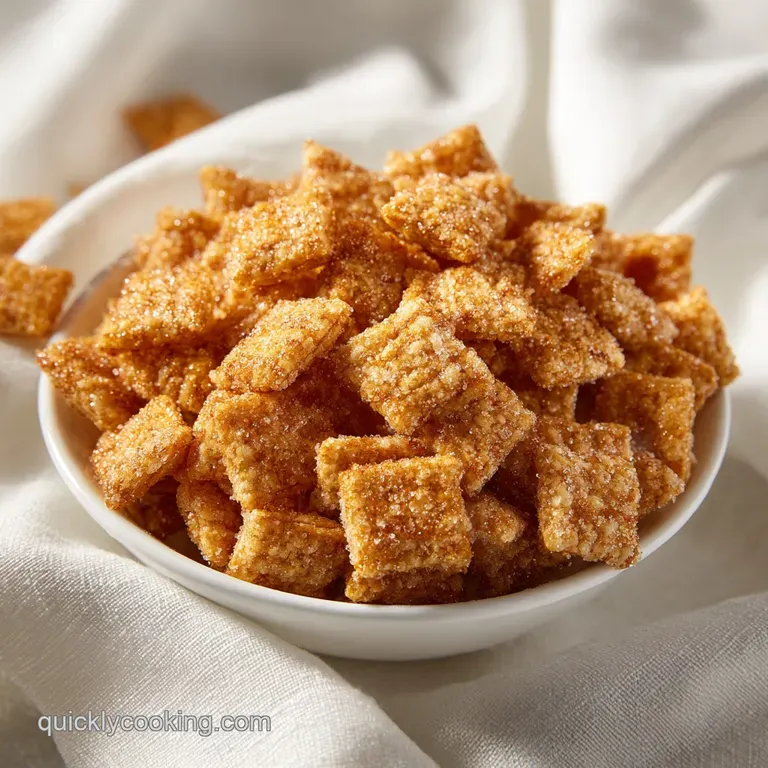
The first thing that hits you isn't even the taste, it's that smell. You know that warm, sugary cinnamon cloud that fills the room when you're baking? It's exactly like that, but focused into these tiny, crisp squares. I remember the first time I tried to copy this.
I thought I could just toast regular bread and coat it, but it turned into a soggy mess the second the milk touched it. I needed something that could actually hold its own.
That's where this dough comes in. It's essentially a sweet pastry, but we bake it until it's firm enough to shatter when you bite into it. Honestly, it's one of those recipes that makes you realize you don't need a fancy store-bought box when you've got flour and butter.
It's a bit of a process to cut the squares, but trust me, the reward is a bowl of cereal that actually tastes like real cinnamon and butter.
Let's crack on with the details. You're going to want a big bowl and some patience for the chopping part. But once those squares hit the oven and start to turn that pale golden brown, you'll know you've got it right. It's the kind of breakfast that makes a rainy Tuesday feel like a weekend treat.
Quick Recipe Specs
Right then, before we dive into the dough, let's talk about the flow. This isn't a "throw it in a bowl and stir" kind of meal. You've got a clear prep phase where we handle the cold butter, a precision bake, and then a final glazing step.
If you're planning this for a crowd, just remember that the cooling time is non negotiable. If you glaze them while they're too hot, it's great, but if you store them before they're cold, they'll lose that snap.
To keep things moving, I suggest a simple timeline: 20 minutes for the dough and cutting, 15 minutes in the oven, and then about 10 minutes for the glazing and final set. It's a fast process overall, but don't rush the "set" phase.
That's where the magic happens and the sugars harden into that glassy shell we're after.
Since we're focusing on a budget friendly approach, this is a winner. You're using basic ingredients that are probably already in your cupboard. No expensive specialty flours or weird additives, just the good stuff.
The Secret To The Crunch
I spent a lot of time wondering why my early batches felt more like cookies than cereal. It turns out it's all about how the fat is distributed. We aren't looking for a smooth, homogenous dough; we want tiny pockets of butter that steam during the bake, leaving behind those microscopic air gaps that create the crunch.
Cold Butter Pockets: Using chilled butter prevents it from melting into the flour, creating a flaky, crisp structure rather than a dense cookie.
The Sugar Shell: Tossing the hot squares in melted butter and brown sugar creates a thin, caramelized layer that seals the cereal.
Thickness Control: Rolling the dough to exactly 3mm ensures the squares bake through completely without becoming hard as rocks.
Moisture Removal: The low oven temperature allows the water in the milk to evaporate slowly, leaving a dry, snap able base.
| Method | Time | Texture | Best For |
|---|---|---|---|
| Oven Bake | 15 min | Consistent snap | Big batches |
| Air Fryer | 8 min | Extra crispy edges | Quick single serving |
| Stovetop | 12 min | More buttery/dense | No oven households |
This is a great way to get that classic taste without the additives. If you love this kind of cinnamon flavor, you might also like my Homemade Cinnamon Rolls, though those are definitely more of a treat than a daily breakfast.
The Pantry List
Before you start, gather everything. Using the right butter is key here. Don't even bother with low-fat or margarine; you need the actual fat from unsalted butter to get that velvety mouthfeel and the correct browning.
For the Cereal Base
- 2 cups (250g) all purpose flourWhy this? Provides the necessary structure and gluten for a snap
- ½ cup (115g) unsalted butter, chilled and cubedWhy this? Creates the air pockets for crispiness
- 2 tbsp (25g) granulated sugarWhy this? Adds a base sweetness and helps with browning
- ¼ cup (60ml) whole milkWhy this? Binds the dough without making it too soft
- ½ tsp (3g) fine sea saltWhy this? Balances the sugar and enhances the cinnamon
For the Cinnamon Coating
- 4 tbsp (55g) unsalted butter, meltedWhy this? Acts as the glue for the sugar coating
- ½ cup (100g) light brown sugar, packedWhy this? Adds a molasses depth that white sugar lacks
- 2 tbsp (15g) ground cinnamonWhy this? The star flavor; use a fresh jar for the best aroma
- ¼ tsp (1.5g) saltWhy this? Cuts through the sweetness of the glaze
| Original Ingredient | Substitute | Why It Works |
|---|---|---|
| All purpose Flour | Almond Flour | Low carb option. Note: Much softer texture, won't "shatter" |
| Whole Milk | Oat Milk | dairy-free. Note: Very similar results, slightly nuttier |
| Brown Sugar | Coconut Sugar | Lower glycemic. Note: Less "caramel" flavor than brown sugar |
| Unsalted Butter | Coconut Oil | Vegan option. Note: Adds a coconut hint, use chilled for base |
Right then, let's look at what's actually happening inside the dough. It's not just mixing; it's a bit of a balancing act.
| Ingredient | Science Role | Pro Secret |
|---|---|---|
| Chilled Butter | Leavening agent | Keep it in the fridge until the very second you need it |
| Brown Sugar | Humectant/Color | Pack it tight to ensure a mahogany glaze |
| Cinnamon | Aromatic compound | Toast the cinnamon in a dry pan for 30 seconds first |
Kitchen Tools Needed
You don't need a professional bakery to pull this off. Most of this is basic gear, but there are two things that make it way easier. First, parchment paper is a lifesaver. Trying to roll this dough directly on a counter can be a sticky nightmare. Second, a pizza cutter.
If you try to use a knife, you'll end up squishing the squares instead of slicing them.
For the mixing, a large bowl and your own hands are the best tools. I know some people love a pastry cutter, and those are great, but feeling the butter integrate into the flour is the only way to know when you've hit that "coarse crumbs" stage.
Finally, a large mixing bowl for the glazing phase. You need plenty of room to toss the cereal without breaking the squares. If the bowl is too small, you'll end up with a clump of cinnamon sugar in one spot and bare dough in another.
The Cooking Process
Now we get to the fun part. Follow these steps exactly to ensure you get that perfect snap.
- Combine flour, granulated sugar, and salt in a bowl. Work the chilled butter into the flour using your fingers or a pastry cutter until it resembles coarse crumbs. Note: Don't overwork it; you want tiny pieces of butter remaining.
- Gradually stir in the milk until a stiff dough forms. Note: Stop adding milk as soon as the dough holds together.
- Roll the dough out on parchment paper to a thickness of ⅛ inch (approx 3mm) and use a pizza cutter to slice the dough into tiny squares (about ¼ inch).
- Preheat oven to 325°F (160°C). Slide the parchment paper with the squares onto a baking sheet and bake for 12–15 minutes until edges are pale golden brown and dough feels firm.
- Transfer hot cereal squares into a large mixing bowl and drizzle with melted butter, tossing gently to coat.
- Sprinkle the mixture of brown sugar, cinnamon, and salt over the squares and toss until encapsulated in a mahogany colored coating.
- Let the cereal cool completely on the pan to set the crunch. Note: This is the most important step for the final texture.
Precision Checkpoints:
- Thickness: Exactly 3mm. Any thicker and they'll be chewy; any thinner and they'll burn.
- Temperature: 325°F (160°C). Too hot and the sugar in the dough burns before the center dries.
- Bake Time: 12–15 minutes. Check at 12; they should feel firm to the touch.
Fixing Cereal Problems
Even for experienced cooks, things can go sideways. Usually, it comes down to moisture or temperature. If your cereal feels more like a cookie, you probably rolled the dough too thick or didn't bake it long enough.
The Sogginess Issue
If your cereal goes soft too quickly in milk, it's usually because the "sugar shell" didn't set properly. This happens if you store them while they're still warm or if you didn't use enough cinnamon sugar. The coating needs to be a complete seal to keep the milk out for as long as possible.
The Burning Problem
Burnt edges happen when the oven is too hot or the squares are too small. Since we're using a relatively low temperature, the main culprit is usually "hot spots" in the oven. Rotating your pan halfway through the bake can fix this.
| Problem | Root Cause | Solution |
|---|---|---|
| Cereal is chewy | Dough too thick | Use a ruler or guide for 3mm thickness |
| Coating is clumpy | Butter not melted | Ensure butter is fully liquid before drizzling |
| Tastes bland | Old cinnamon | Use fresh cinnamon or add a pinch more salt |
To make sure your next batch is spot on, keep this checklist handy.
- ✓ Pat the baking sheet dry before adding parchment to prevent slipping.
- ✓ Use a pizza cutter for clean, sharp edges on the squares.
- ✓ Don't overcrowd the pan; leave a bit of space for air to circulate.
- ✓ Allow the cereal to cool for at least 20 minutes before sealing in a jar.
- ✓ Use chilled butter for the base and melted butter for the glaze.
Flavor Twists
Once you've nailed the basic version, you can start playing around. I've found that a little bit of variation goes a long way. If you want something a bit more indulgent, try adding a pinch of nutmeg to the cinnamon mixture. It adds a warm, woody note that makes it taste more like a professional bakery.
For a maple version, replace the brown sugar with maple sugar or add a tablespoon of maple syrup to the melted butter before tossing. It gives it a distinct autumn vibe that's incredible with cold milk.
If you're looking for something a bit healthier, you can use whole grain flour, though it will be a bit denser and less "shatter y".
If you find yourself craving something softer and more cake like, you might prefer my Cinnamon Roll Cake, which uses similar flavors but in a totally different format. For those wanting a gluten-free version, you can use a 1:1 gluten-free flour blend, but be aware that the snap will be slightly different.
Decision Shortcut:
- Want a deeper flavor? → Use dark brown sugar.
- Want more spice? → Add a pinch of ginger or cloves.
- Want a lighter taste? → Use honey instead of brown sugar.
Preservation Secrets
Since this is a homemade cereal, it doesn't have the preservatives that the boxed stuff does. To keep that crunch alive, you need to be smart about how you store it. An airtight glass jar is your best friend here.
I usually put a small piece of parchment paper at the bottom of the jar to prevent the squares from sticking together.
In the fridge, these will stay crisp for about 5 days, but I recommend keeping them in a cool, dry pantry. They'll last about 2 weeks there if the seal is tight. If you're really prepared, you can actually freeze the unglazed baked squares for up to 2 months.
Just thaw them and then do the butter sugar coating right before you're ready to eat.
As for zero waste, don't throw away the leftover cinnamon sugar mixture in your bowl. I always scrape it up and use it to coat a piece of regular toast the next morning. You can also use any "broken" bits of cereal as a topping for yogurt or vanilla ice cream.
Best Serving Ideas
The most obvious way to eat this is in a bowl of cold milk, but don't stop there. Because these are essentially tiny sweet biscuits, they work in a lot of other ways. I love using them as a crunchy topping for a bowl of Greek yogurt with fresh berries.
The tartness of the yogurt balances the sweetness of the mahogany glaze perfectly.
Another great trick is to use them as a garnish for a cinnamon apple crisp. Just sprinkle a handful of the squares on top of the warm dessert for an extra layer of texture. If you're feeling fancy, try serving them with a side of warm maple syrup for dipping, almost like a miniature version of cinnamon toast.
For the milk, I've found that whole milk provides the best contrast to the crunch, but almond milk is a fantastic alternative if you want a nuttier flavor. Just remember to pour the milk over the cereal right before you eat it this homemade version is all about that initial shatter, so don't let it soak for too long!
Recipe FAQs
What ingredients are needed for homemade Cinnamon Toast Crunch?
Flour, butter, milk, sugar, cinnamon, and salt. These basic pantry staples create both the crisp pastry base and the mahogany colored glaze.
What goes into the cinnamon seasoning for this cereal?
Light brown sugar, ground cinnamon, and a pinch of salt. This mixture is tossed with the butter coated squares after baking to create the characteristic sweet, spicy crust.
Does this recipe use real cinnamon?
Yes, it uses ground cinnamon. This provides the authentic warm aroma and deep flavor that mimics the nostalgic boxed version.
What gives these homemade squares their signature crunch and flavor?
The shortcrust method and the brown sugar glaze. Baking the tiny squares at 325°F (160°C) ensures a shatteringly crisp texture that doesn't turn soggy immediately in milk.
How to store homemade cinnamon cereal to keep it crisp?
Place the completely cooled cereal in an airtight jar. This prevents humidity from softening the sugar coating and preserves the snap for several days.
Can I use this cinnamon sugar blend for other desserts?
Yes, this flavor profile is incredibly versatile. If you enjoyed balancing these warm spices here, see how the same flavor logic works in our pumpkin cupcakes.
Is it true that I must use a rolling pin to get the dough to 1/8 inch thickness?
No, this is a common misconception. You can use a smooth glass or a wine bottle to roll the dough to the required 3mm thickness if you don't own a rolling pin.
Homemade Cinnamon Toast Crunch

