Dutch Oven Chili: Award Winning Make-Ahead
- Time:15 minutes active + 90 minutes cooking + 12 hours resting = Total 13 hours 45 mins
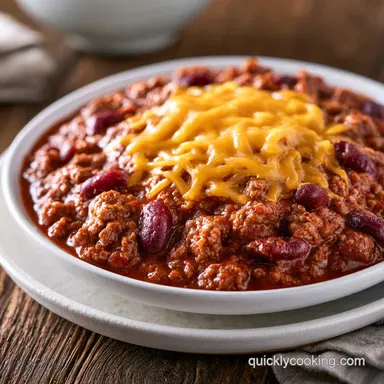
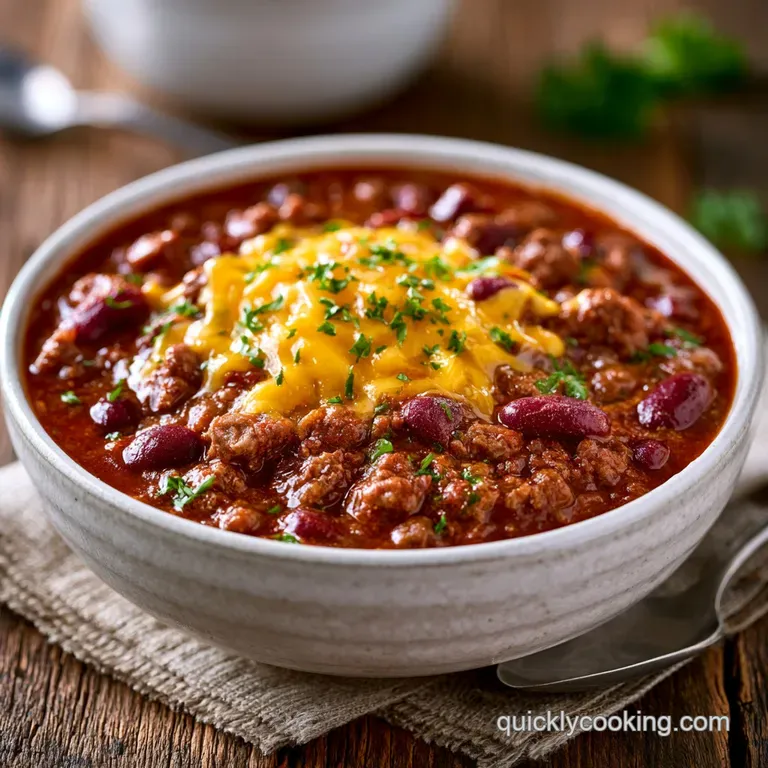
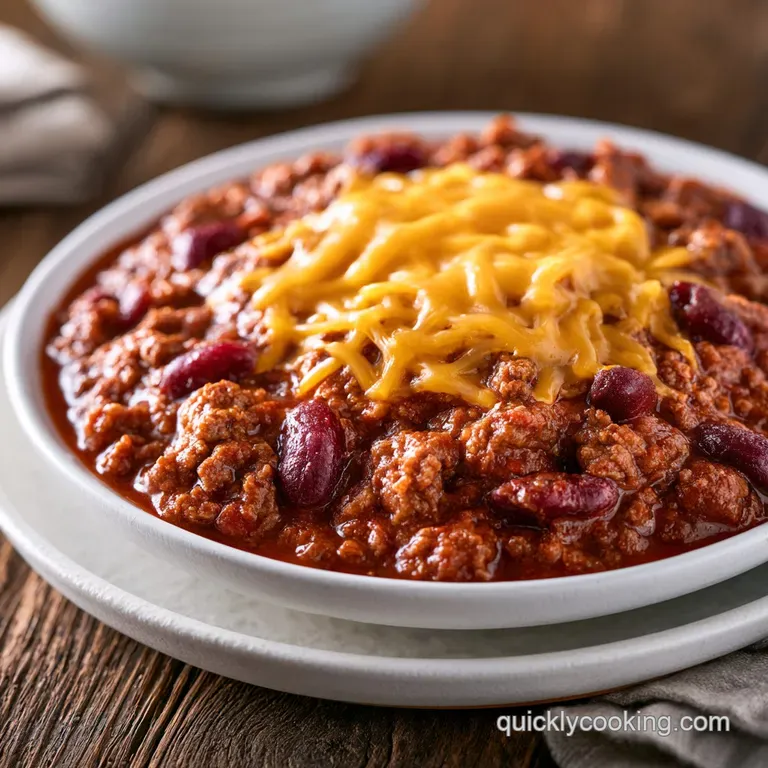
- Flavor/Texture Hook: Velvety texture with a mahogany crusted beef finish
- Perfect for: Busy weeknight prep, winter gatherings, or beginner friendly meal prepping
- The Best Dutch Oven Chili Recipe
- The Logic Behind the Flavor
- The Essential Ingredient List
- The Required Kitchen Gear
- The Cooking Process
- Fixing Common Chili Problems
- Troubleshooting Common Issues
- Creative Flavor Tweaks
- Adjusting the Batch Size
- Debunking Kitchen Myths
- Storage and Leftover Hacks
- The Best Side Pairings
- Recipe FAQs
- 📝 Recipe Card
The Best Dutch Oven Chili Recipe
The first thing you notice is that heavy, rhythmic sizzle of beef hitting hot oil. It's that specific sound that tells you the crust is forming, and soon, your entire kitchen will smell like smoked paprika and toasted cumin. I remember a freezing Tuesday a few years back when I was completely exhausted.
I didn't want a complex project, but I needed something that felt like a warm blanket. I pulled out my heavy cast iron pot, and the result was a meal so thick and hearty it felt like it had been simmering for days, even though the active work was minimal.
This isn't a thin soup or a watery stew. We're going for something with a velvety consistency and layers of flavor that actually build on each other. By using a heavy pot, we keep the heat steady, which is exactly what you need for a rich Dutch Oven Chili.
You can expect a dish that's savory, slightly smoky, and perfectly balanced. The secret isn't a weird ingredient, but rather a bit of patience and the right technique for browning the meat. Trust me, if you skip the sear, you're leaving half the flavor on the table.
The Logic Behind the Flavor
Since we're focusing on efficiency, it's helpful to know why we do things a certain way. This Dutch Oven Chili works because we're manipulating the ingredients to maximize depth without spending ten hours at the stove.
- The Deep Sear: Browning the beef creates a concentrated crust that adds a savory, toasted depth to the entire pot.
- Spice Blooming: Heating the spices in oil before adding liquids wakes up the fat soluble flavors, making the chili taste more "cooked in" and less like raw powder.
- Cold Infusion Resting: Letting the pot sit in the fridge overnight allows the proteins and spices to bond, smoothing out the sharp edges of the acidity from the tomatoes.
- Sugar Balance: A tiny bit of brown sugar doesn't make it sweet; it just cuts through the bitterness of the chili powder and the acidity of the crushed tomatoes.
| Fresh Approach | Shortcut Method | Impact | Best For |
|---|---|---|---|
| 80/20 Chuck | Lean Beef | Less richness, thinner sauce | Health conscious |
| 12hr Cold Rest | Serve Immediately | Sharper, more acidic taste | Last minute guests |
| Fresh Garlic | Garlic Powder | Less aromatic, flatter profile | Extreme speed |
The Essential Ingredient List
When you're making this Dutch Oven Chili, the quality of your beef matters. I always go for an 80/20 lean to fat ratio because that fat carries the flavor of the spices. According to USDA FoodData, the fat content in ground beef chuck provides the necessary lipids to create a satisfying mouthfeel.
Component Analysis
| Ingredient | Science Role | Pro Secret |
|---|---|---|
| Ground Beef Chuck | Flavor Base | Don't crowd the pan or it will steam instead of sear |
| Tomato Paste | Thickener/Umami | Fry it until it turns a dark brick red |
| Smoked Paprika | Aroma/Color | Use a Spanish Pimentón for a deeper smokiness |
| Brown Sugar | Acid Balance | Just a pinch balances the tomato tang |
What to Buy
- 2 lbs ground beef chuck (80/20 lean to fat ratio) Why this? Higher fat equals a better sear and richer taste
- 2 tbsp olive oil Why this? High smoke point for browning
- 1 medium yellow onion, diced Why this? Balanced sweetness and sharp notes
- 4 cloves garlic, minced Why this? Fresh aromatics are non negotiable
- 1 tbsp smoked paprika Why this? Adds a wood fired quality
- 3 tbsp chili powder Why this? The primary flavor driver
- 1 tbsp ground cumin Why this? Earthy, warm undertones
- 1 tsp cayenne pepper Why this? Adds a clean, sharp heat
- 2 tbsp tomato paste Why this? Concentrates the tomato flavor and thickens
- 1 tsp kosher salt Why this? Coarser grains for easier control
- 1/2 tsp black pepper Why this? Basic bite
- 1 can (28 oz) crushed tomatoes Why this? Provides a velvety, consistent texture
- 1 can (15 oz) kidney beans, drained and rinsed Why this? Hearty structure
- 1 can (15 oz) black beans, drained and rinsed Why this? Adds a creamy contrast
- 2 cups beef broth Why this? Deeper flavor than water
- 1 tbsp brown sugar Why this? Rounds out the acidity
Substitution Options
| Original Ingredient | Substitute | Why It Works |
|---|---|---|
| Ground Beef Chuck | Ground Turkey | Leaner alternative. Note: Needs more oil and tastes milder |
| Kidney Beans | Chickpeas | Similar texture. Note: Nuttier flavor, less traditional |
| Beef Broth | Vegetable Broth | Good for flexibility. Note: Lacks the beefy depth |
| Crushed Tomatoes | Tomato Puree | Very similar. Note: Ensure it's not "sauce" with added sugar |
Right then, before we get to the heat, make sure your ingredients are prepped. I hate stopping mid sear to dice an onion. Get everything in bowls, and you'll glide through this process.
The Required Kitchen Gear
You don't need a fancy kitchen, but the pot is where the magic happens. A heavy bottomed vessel is critical because it distributes heat evenly, preventing those annoying burnt spots at the bottom.
I highly recommend a cast iron Dutch oven, either enameled or raw. Enameled is easier to clean, but raw cast iron gives you a bit more versatility if you want to pop it over a campfire. For the stirring, a sturdy wooden spoon or a silicone spatula is your best friend.
You'll be scraping the bottom of the pot (called deglazing) to get all those browned beef bits back into the sauce.
If you don't have a Dutch oven, a heavy stockpot will work, but you might find the beef steams more than it sears. The goal is that mahogany crust. Trust me, the equipment is a small part of the cost but a huge part of the result.
The Cooking Process
Let's crack on. This is where we turn these raw ingredients into an award winning Dutch Oven Chili. Follow these steps exactly for the best result.
- Heat the olive oil in the Dutch oven over medium high heat until shimmering. Add the ground beef and cook, breaking it apart with a spoon, until it develops a deep, mahogany colored crust. Drain excess fat, leaving about 2 tablespoons for flavor. Note: Don't stir too often; let the meat sit to brown.
- Stir in the diced onion and cook for 4–5 minutes until translucent and soft.
- Add the minced garlic and smoked paprika, stirring for 60 seconds until the fragrance is released and the garlic is golden.
- Stir in the tomato paste, chili powder, cumin, salt, pepper, and cayenne. Toast the spices with the meat for 2 minutes until the oil looks red and smells aromatic. Note: This "blooms" the spices for a deeper taste.
- Pour in the crushed tomatoes, beef broth, and brown sugar. Bring the mixture to a simmer.
- Allow the chili to cool and refrigerate overnight. This is the cold infusion resting phase where the flavors marry. Reheat on the stove before serving.
Chef's Tip: For an even deeper color, try adding a teaspoon of instant espresso powder during step 4. It doesn't taste like coffee, but it makes the beef flavor feel more intense.
Fixing Common Chili Problems
Even with a great plan, things happen. Maybe the heat got away from you, or the consistency isn't what you expected. Don't panic; most chili issues are easy to fix.
Troubleshooting Common Issues
| Issue | Solution |
|---|---|
| Why Your Chili Is Too Watery | This usually happens if the beef wasn't browned enough or if the simmer wasn't long enough to reduce the liquids. You can fix this by simmering without a lid for another 20 minutes. If it's still too |
| Why Your Chili Is Too Spicy | If the cayenne pepper hit too hard, you need to balance the heat. Add a dollop of sour cream or a squeeze of lime juice to each bowl. The fat in the cream and the acid in the lime neutralize the capsa |
| Why Your Chili Tastes Bitter | This is almost always caused by burning the garlic or the tomato paste. If you notice black specks in your garlic, you've gone too far. You can counteract bitterness by adding another pinch of brown s |
Common Mistakes Checklist
- ✓ Did you drain the beef but leave some fat for flavor?
- ✓ Did you toast the spices before adding the tomatoes?
- ✓ Did you let it rest overnight instead of eating it immediately?
- ✓ Did you use crushed tomatoes instead of diced for a smoother texture?
- ✓ Did you simmer on low rather than a rolling boil?
Creative Flavor Tweaks
One of the best things about this Dutch Oven Chili is how adaptable it is. Once you've nailed the base, you can start playing with the profile. If you want a more "Texas style" feel, you can omit the beans entirely and use larger chunks of beef chuck.
For those who want a smoky twist, try adding a chopped chipotle pepper in adobo sauce. It adds a creamy, smoky heat that pairs perfectly with the smoked paprika. If you're looking for something different for your next cozy night in, you might enjoy my Chicken Gnocchi Soup, which offers a completely different but equally comforting vibe.
If you're trying to reduce the carb count, simply swap the beans for extra diced bell peppers or zucchini. You'll lose some of the thickness, but the flavor remains. For an easy make ahead Dutch oven chili with beans, I suggest using a mix of pinto and kidney beans for a varied texture.
Adjusting the Batch Size
Scaling a stew is different than scaling a cake. You can't just double everything and expect the same result, especially with salt and thickeners.
Scaling Down (Half Batch) If you're only cooking for two or three, use a smaller pot. Reduce the cooking time by about 20% since the liquid will evaporate faster. I recommend beating one egg if a recipe calls for a fraction, but since we're using beef, just weigh out 1 lb.
Scaling Up (Double or Triple Batch) When making a massive pot of this ahead Dutch oven chili, don't double the salt and cayenne immediately. Start at 1.5x the amount, then taste and adjust. Liquids can be reduced by about 10% because a larger volume of food traps more steam, meaning less evaporation.
Work in batches when browning the beef; if you put 4 lbs of meat in one pot, it will boil in its own juices rather than sear.
| Goal | Adjustment | Why |
|---|---|---|
| More Heat | +1/2 tsp Cayenne | Direct increase in spice |
| Thicker Sauce | -1/2 cup Broth | Less liquid to reduce |
| Richer Beef | +1 tbsp Tomato Paste | Increases umami concentration |
Debunking Kitchen Myths
There are a few things people tell you about chili that just aren't true. Let's clear those up so you can cook with confidence.
Myth: Searing the meat "seals in" the juices. This is a classic mistake. Searing doesn't seal anything; in fact, the meat loses more moisture during the sear. However, we do it anyway because of the flavor. The brown crust adds a depth that you simply cannot get from boiling or stewing.
Myth: Beans aren't "authentic" chili. Depending on who you ask in Texas, beans are a crime. In other places, they're mandatory. The truth is, it's your pot. Whether you make an easy make ahead Dutch oven chili with ground beef and beans or a meat only version, the technique of browning and resting is what actually makes it taste professional.
Myth: You must use a slow cooker for the best flavor. Slow cookers are convenient, but they don't allow for the over high heat searing and reduction that a Dutch oven does. You get a more "homogenized" taste in a slow cooker, whereas this recipe creates distinct layers of flavor.
Storage and Leftover Hacks
This is where this recipe really shines. This is the best make ahead Dutch oven chili because it actually improves over time.
Fridge and Freezer Keep your chili in an airtight container in the fridge for up to 4 days. If you're looking to stock up your freezer, this stuff lasts for 3 months. Just make sure it's completely cooled before freezing to avoid ice crystals.
When reheating, add a splash of beef broth or water to loosen the sauce, as it will thicken even more in the fridge.
Zero Waste Tips Don't toss those onion skins or the ends of your garlic. If you're making a larger batch, save those scraps in a freezer bag to make a quick vegetable stock later. If you have leftover beans in the can, mash them into a dip or toss them into a salad.
Even the leftover beef fat from the initial browning can be stored in a jar and used to sauté vegetables for other meals.
The Best Side Pairings
You can't just serve a bowl of chili and call it a day. You need contrast. Since the chili is heavy, savory, and spicy, you want sides that are either fresh, acidic, or buttery.
The absolute gold standard is a side of warm, buttery cornbread. The sweetness of the corn cuts right through the heat of the cayenne. For something a bit more unique, I love serving this with my Sourdough Discard Garlic Knots. The chewy bread and garlic butter are perfect for mopping up the last bits of sauce from the bowl.
For toppings, don't hold back. A dollop of full fat sour cream, a sprinkle of sharp cheddar cheese, and some thinly sliced green onions add a fresh, cool contrast to the slow cooked Dutch oven chili. A squeeze of fresh lime right before eating wakes up all the heavy flavors and makes the dish feel lighter.
Right then, you've got the plan. From the initial sizzle to the overnight rest, this Dutch Oven Chili is all about the process. It's a high efficiency approach to a slow food classic. Get your pot hot, brown that beef until it's mahogany, and get ready for the best bowl of comfort food you've ever had. Let's crack on!
Recipe FAQs
How early in advance can you make chili?
Prepare it up to 4 days before serving. The flavors improve significantly after refrigerating overnight. For long term storage, it lasts up to 3 months in the freezer.
Is chili better in a crockpot or Dutch oven?
A Dutch oven is superior. It allows you to sear the beef to a mahogany colored crust, creating a depth of flavor that a slow cooker cannot replicate.
Is chili okay for diabetics?
Consult your doctor, but monitor the sugar content. This specific recipe contains brown sugar and beans, both of which can impact blood glucose levels.
Are Dutch ovens good for chili?
Yes, they are ideal. The heavy walls distribute heat evenly, which prevents the bottom from scorching during the 90-minute simmer.
What is your favorite camping Dutch oven recipe?
This Dutch oven chili is the top choice. It is a hearty, one-pot meal that is easy to transport and actually tastes better after resting.
What's the best dinner to make for 10 people while camping?
Make a large batch of this chili. It is the most efficient way to feed a crowd using one pot and pairs perfectly with crusty bread.
How to cook a delicious campfire meal without any fuss?
Brown your meat and aromatics over hot coals first. Then, simmer the remaining liquid ingredients slowly, stirring occasionally to maintain a consistent temperature.
make ahead Dutch Oven Chili